.svg)

.svg)
.jpg)

TL;DR
In this breakdown of a real 2.5-year DIY transformation, you’ll learn how to layer crown molding, build a library wall, and style a dark-academia palette without overspending. Expect budget decorating ideas, sourcing tips, and step-by-step guidance for a library-dining hybrid. Use these easy DIY home decor projects for small spaces to give a modern home prewar character.
How to Turn a Basic Room into a Prewar-Inspired Library on a Budget
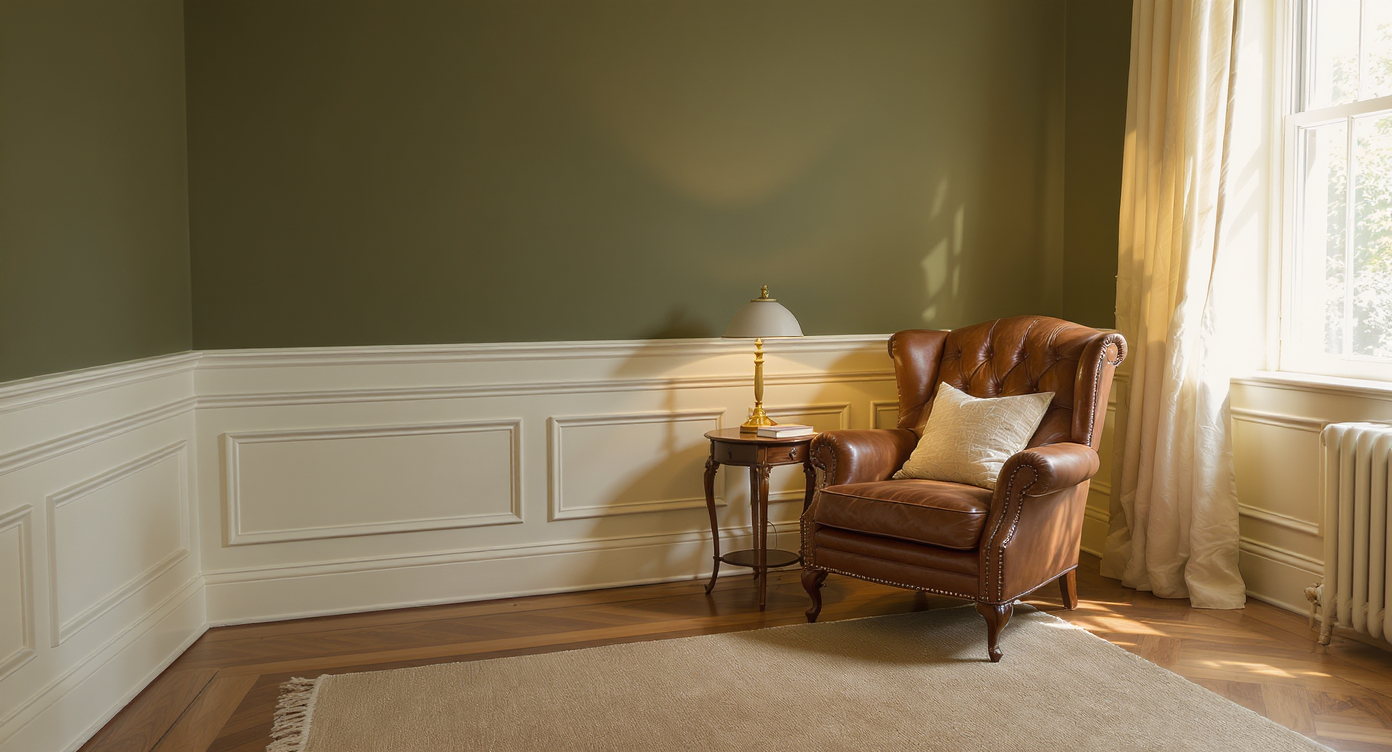
Layered moldings and thrifted textures create a warm, inviting prewar-inspired reading corner.
A 140-character promise: Turn a basic room into a prewar-inspired, bookish haven with budget DIYs, layered moldings, and smart secondhand finds. Here’s the thing: DIY home decor isn’t just a weekend fling anymore. With budgets tight and sustainability top-of-mind, more homeowners are choosing to learn, source secondhand, and build slowly. The result isn’t showroom perfect; it’s personal. I recently followed a first-time homeowner who spent 2.5 years transforming a plain room into a prewar-style library-dining hybrid. He started with more determination than tool skills, taught himself to cut trim, built a library wall, and hunted Facebook Marketplace, Goodwill, garage sales, and estate sales for furniture. The space feels rich, but the approach was relentlessly practical — and repeatable. If you’ve been craving dark-academia warmth, classic millwork, and old-world charm in a newer home, this playbook will help you get there, one project at a time.
The 2.5-Year Mindset: Design as Practice
Designers often advise tackling permanent architecture first — floors, trim, built-ins — then layering color and furnishings. Think of the next 2.5 years as your studio. The best budget decorating ideas follow a simple philosophy: build bones, then add soul. Start with crown molding and door casings, add a built-in bookcase or library wall, and paint with intention. Small-space hacks matter here: visual weight belongs on the lower two-thirds of a room, lighting should be layered, and every piece should earn its place. Short-tail anchors like DIY home decor, crown molding, and built-in bookcase aren’t just buzzwords. They’re your roadmap to 2025 design trends that favor sustainability, personalization, and tactile warmth.
Anecdote
A first-time homeowner told me he wrapped the top of a cased opening with the same trim used on the sides after noticing it in historic references; that small decision made the room feel “finished.” Another pair of new owners swore they’d never tackle carpentry, then built a library wall together over several weekends using off-the-shelf cases and a patient caulk gun. And yes, a single personal artifact — in their case, a beloved fantasy sword — became the detail guests remember most.
DIY Hacks & Tricks That Deliver High Impact
Experts say choose projects with 80/20 returns — high visual payoff, low materials waste, and skills you can compound.
01. Build a Library Wall on a Budget (built-in bookcase)
For most 8–9 foot ceilings, a 10–12 inch bookcase depth and a 3–4 inch face-frame read “custom” without crowding the room.
What it is: A wall of shelves, trimmed to the ceiling and sides, that turns a plain room into a bookish focal point and adds storage.
How it works: Create a level base, anchor ready-made bookcases or custom carcasses to studs every 16 inches, then bridge gaps with scribed filler strips. Cap with crown molding and add a continuous toe-kick to unify sections. If you’re new to carpentry, an IKEA hack (think Billys with 15–20 inches of added height boxes) delivers a convincing built-in look. Rule of thumb: leave 2–3 inches of clearance above cases for crown plus a reveal; paint shelves and trim the same sheen and color for a seamless read.
- Tip 1: Pre-prime wood and caulk seams; spray doors/shelves for a factory finish.
- Tip 2: Use 1/4 inch beadboard or MDF as a back; paint it a darker tone for depth.
- Tip 3: Add a shallow ladder rail or library light for instant “prewar” cues.
Alt text suggestion: built-in bookcase library wall with crown molding in a dark-academia color. Caption idea: DIY library wall with thrifted decor and vintage books.
02. Layered Molding to Fake Prewar Bones (crown molding)
For 8–9 foot ceilings, experts recommend 4.25–6 inch crown; at 9 feet, 5–5.5 inches feels proportional.
What it is: Combining crown, chair rail, and picture-frame molding to add depth and classic architecture to a plain room.
How it works: Start with door and cased opening trim; wrap the top of openings with the same profile to “complete” the frame. Next, install chair rail at roughly one-third of wall height (32–36 inches is a common range) and build picture-frame boxes with 3–4 inch molding, maintaining a consistent 3–4 inch margin from baseboard and rail. Top it off with crown — a decorative profile or a simple build-up using base cap plus crown. Keep a 1/8 inch reveal where trim meets casing for crisp lines. One homeowner I interviewed used an acanthus-leaf crown at 5.25 inches for a bold, old-world read.
- Tip 1: Prime and sand between coats; a satin or semi-gloss on trim highlights profiles.
- Tip 2: Use a coping saw on inside corners for tight seams.
- Tip 3: Align panel boxes with furniture sightlines for symmetry.
Alt text suggestion: classic picture-frame molding and crown on 9-foot ceilings. Caption idea: Layered millwork adds prewar character to a modern room.
03. The Dark-Academia Color Plan (paint color)
A good rule: use a 60/40 split — darker on built-ins and lower walls, lighter above — to lift ceilings visually.
What it is: A moody palette of inky greens, browns, charcoals, and oxbloods balanced with warm neutrals and brass for scholarly comfort.
How it works: Paint shelves and lower wall sections in a low-LRV shade (below 15) for depth; keep upper walls and ceiling one or two steps lighter to avoid a cave effect. Matte on walls softens shadows; satin on trim adds crisp definition. Warm the scheme with vintage rugs, oil portraits, linen shades, and patinated metals. One homeowner told me the bookshelves went dark first, then the rest of the room “caught up,” proving you can stage color over months. If ceilings are 8–9 feet, limiting the darkest color to two-thirds of the wall height elongates the room.
- Tip 1: Sample at least three tones and check them morning and night.
- Tip 2: Use rubbed-brass hardware and picture lights to warm cool paints.
- Tip 3: Add a plaster ceiling medallion to punctuate the palette overhead.
Alt text suggestion: dark-academia bookcases with brass picture lights. Caption idea: Deep paint on built-ins anchors a prewar-inspired room.
04. Source Secondhand Like a Pro (budget decorating ideas)
Set saved searches on Facebook Marketplace and estate-sale sites with niche terms like barley twist, pedestal table, or brass picture light.
What it is: Strategically hunting Marketplace, Goodwill, garage sales, and estate sales to furnish and style without blowing the budget.
How it works: Identify two or three anchor pieces — a pedestal dining table, a set of wood chairs, a vintage rug — and let them dictate scale and tone. Check dimensions before pickup; chairs should sit 10–12 inches under the table apron for comfort. Mix eras for depth: a traditional table with modern art, a classic bookcase with an unexpected artifact. A homeowner I met displayed a beloved sword above the shelves; it became the room’s wink and a conversation starter. Rule of thumb: 70 percent timeless, 30 percent personal quirk keeps it chic.
- Tip 1: Search by measurements, not just photos; bring tape and felt pads.
- Tip 2: Refinish tops and reupholster seats; let patina live on bases.
- Tip 3: Group smalls in odd numbers for cleaner styling.
Alt text suggestion: thrifted pedestal table with vintage chairs and rug. Caption idea: Secondhand anchors add warmth and history on a budget.
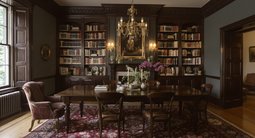
05. Light It Right Without Blocking the View (ceiling medallion, chandelier)
Fixture sizing formula: add room length and width in feet to get diameter in inches; choose semi-flush if a tall bookcase is the focal point.
What it is: A lighting plan that frames a library wall instead of fighting it, using dimmers, picture lights, and a proportionate central fixture.
How it works: If a chandelier would obscure a bookcase, go semi-flush or a slim pendant with a large ceiling medallion for presence. Add 2700K bulbs on dimmers for evening warmth and aim for three layers: ambient (ceiling), task (table), and accent (picture or sconce lights). In dining zones, hang pendants 30–34 inches above the table surface; in walk-through rooms, keep fixtures high enough to protect sightlines. Designers often advise placing picture lights 6–8 inches above art for even wash.
- Tip 1: Use a bigger medallion to compensate for a smaller fixture.
- Tip 2: Add toe-kick or shelf LEDs to make millwork glow.
- Tip 3: Keep bulb finish consistent (frosted or clear) to avoid mixed glare.
Alt text suggestion: semi-flush light with plaster medallion centering a dining table. Caption idea: Layered lighting highlights built-ins without blocking them.
What Ties These Ideas Together
What ties these ideas together isn’t thrift alone — it’s intention. Each project turns resourcefulness into architecture, and every imperfection becomes part of the charm. One homeowner laughed that he had “more determination than skill” when he started the bookcase; another swore the doorway looked wider only because the after photo was shot from farther back. Both reactions reveal the same truth: design is iterative, and perception is part of the magic.
Visualize Before You DIY
Before you pick up a saw or paintbrush, test-drive your plan. Platforms like ReimagineHome let you upload a photo of your room, apply crown molding, try dark-academia paint, and preview a library wall in seconds. Designers often advise visualizing multiple schemes before buying materials; a quick render can save you a costly repaint or trim re-cut. Use it to compare fixture sizes, medallion diameters, and panel layouts until your space sings.
Visualization Scenario
Upload a photo of your dining room to ReimagineHome, drop in 5.25-inch crown, sketch chair rail at 34 inches, and paint the built-ins a deep green. Toggle between a semi-flush light and a chandelier with a 22-inch diameter, then test medallions from 18 to 26 inches to see which frames the table best. Save two or three options and compare them side by side before you buy a single gallon of paint.
FAQ
Experts recommend answering common questions with clear rules of thumb and measurements for faster decision-making.
How do I build a library wall with IKEA bookcases?
Anchor cases to studs, add height boxes, scribe side fillers, and cap with crown; paint everything the same color for a seamless built-in look.
What’s the best crown molding size for 8–9 foot ceilings?
Designers often recommend 4.25–6 inches; at 9 feet, 5–5.5 inches usually looks proportional without overwhelming the room.
How can I make a modern home look prewar on a small budget?
Prioritize layered molding, a single statement built-in bookcase, dimmable warm lighting, and curated secondhand furniture for instant character.
How high should I install a chair rail in a dining room?
Chair rail typically sits at one-third of wall height, about 32–36 inches from the floor in standard 8–9 foot rooms.
What paint sheen and color work best for dark-academia style?
Use matte on walls and satin on trim; choose low-LRV darks for built-ins and keep upper walls lighter to avoid a cave effect.
What’s the right chandelier size for my dining room?
Add the room’s length and width in feet to get the diameter in inches; hang pendants 30–34 inches above the tabletop.
Live Inside Your Story
A slow-build room holds your story in its layers: the books you kept, the table you rescued, the molding you measured twice and cut once. Over 2.5 years, that patience adds up to a space that feels both historic and wholly yours. The prewar look is less about pedigree and more about proportion, paint, and personal artifacts that make you smile when you walk in the door. If you’re ready to start, begin with one element — a chair rail, a thrifted rug, a single bookcase bay — and let momentum do the rest. And if you want confidence before you commit, visualize your ideas with ReimagineHome and see your room transform on screen before it does in real life.


.png)