
TL;DR
Yes, DIY flooring is worth it for many homeowners, especially with luxury vinyl plank in pet-friendly homes. The key is meticulous subfloor prep, planning doorways, and buying mid-tier or better materials. For most 1,100 sq ft homes, expect 40–60 hours of work and to save 3–6 dollars per square foot in labor by installing LVP yourself. If you’re asking “is it worth it to DIY flooring,” start with one room, refine your technique, then expand.
DIY flooring with pets: Should you do it yourself or hire a pro?
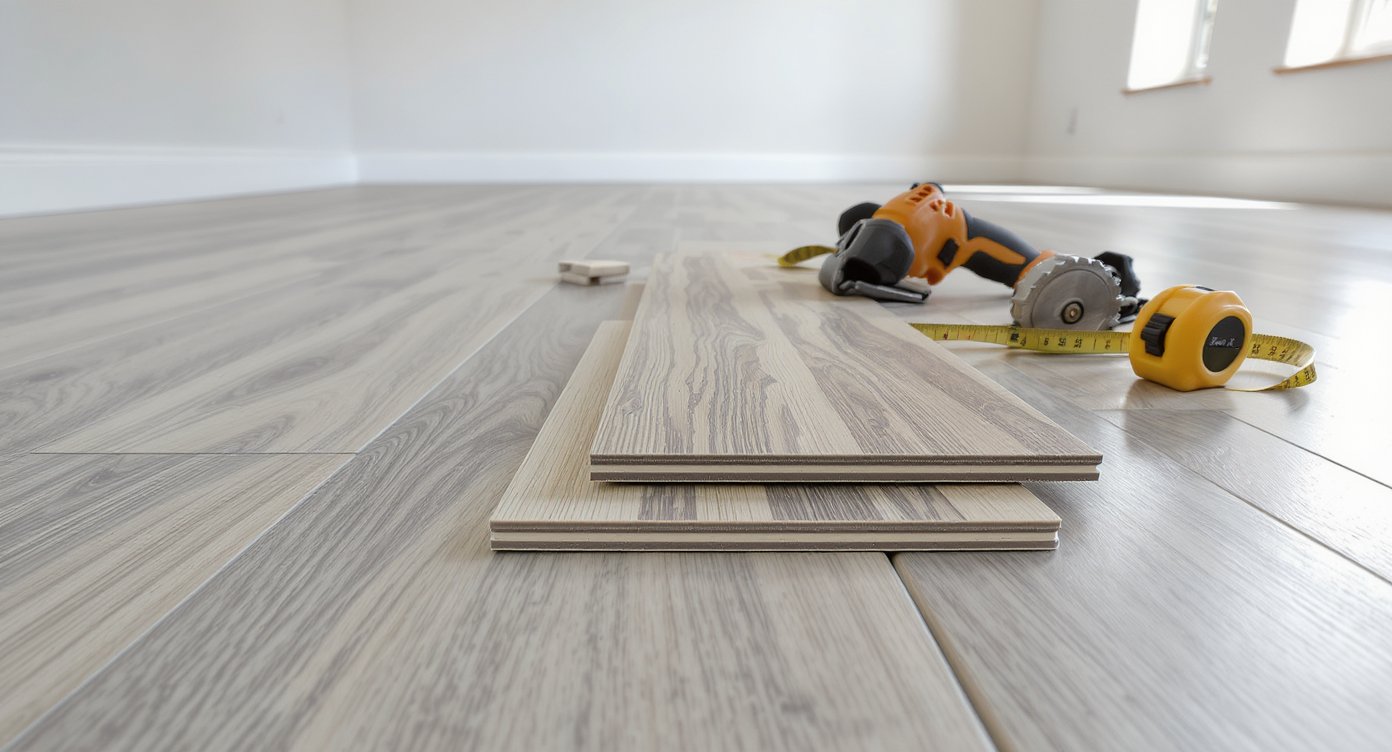
Preparing the subfloor with tools and waterproof laminate planks sets the foundation for successful DIY pet-friendly flooring.
Thinking about DIY flooring in a pet-friendly home? Learn when to choose LVP vs laminate, prep your subfloor, and what tools you’ll need.
DIY flooring, luxury vinyl plank, and laminate flooring are often framed as weekend projects. Here’s the thing: it is absolutely doable for a novice with basic power tool skills, especially in a single-story 1,100 sq ft house. The deciding factors are not bravery or brawn. They’re surface flatness, layout, and whether you can live with a learning curve across those first few rooms.
If you have dogs, the search intent is clear: you want floors that resist scratches, are truly water tolerant, and clean up fast. That usually points to LVP or high-quality waterproof laminate, with LVP edging ahead on durability and moisture resistance. I’ve seen first-timers nail it by starting in a small bedroom, then tackling high-visibility spaces once the layout clicks. The reward is big: lower cost, better control, and the pride of walking on a floor you installed yourself.
Should you DIY flooring or hire a pro? The real math for LVP and laminate
For most 1,100 sq ft homes with pets, DIY LVP is feasible if your subfloor is flat within 3/16 inch over 10 feet and you budget 40–60 hours of hands-and-knees work.
Short-tail keywords like DIY flooring and luxury vinyl plank aside, the real decision is cost vs effort. Contractors often charge 3–6 dollars per sq ft to install LVP. Mid-tier materials run 2–5 dollars per sq ft for 20 mil wear layer LVP at 5–8 mm thick. DIY often cuts total project cost by a third to half, provided you own or borrow tools.
With dogs, experts recommend LVP over traditional laminate for moisture resistance and scratch tolerance. If you love wood, prefinished hardwood can still work with pets when finished with a high-wear product and maintained, but it demands more skill and tools or a finisher for sanding.
Plan your layout before the first cut. Designers often advise running planks parallel to the longest wall or primary sightline for visual calm and an elongated feel. Leave a 1/4 inch expansion gap at all walls and vertical obstructions. Acclimate LVP per manufacturer guidance, usually 24–48 hours in the space. Use transitions at doorways if the geometry gets hairy, or flow planks through for a seamless look if you’re confident.
Doorways and closets are the true time thieves. A novice can lay 90 percent quickly; the last 10 percent around jambs, stairs, and vents separates a tidy job from a great one. A simple strategy is to start with the easiest room, get your rhythm, then move to the kitchen or hall where precision counts.
Suggested image alt text: DIY LVP installation in small bedroom with tapping block and spacers visible along a 1/4 inch expansion gap.
Anecdote
A young couple swapped 40-year-old carpet for LVP in their nursery first. The closet taught them how to notch and stagger ends. By the time they reached the hallway, doorways were a breeze and they flowed planks through without thresholds. Takeaway: start small, learn fast, then scale. A single homeowner tackled 325 sq ft of LVP after work and on weekends. The field went quickly; door jambs took hours. They used a multi-tool to undercut, and the finish looked professional. Takeaway: doorways are where patience pays. A wood purist installed prefinished oak and finished it with a high-wear satin topcoat. Two dogs later, the floors still looked great after routine maintenance. Takeaway: hardwood works with pets when finished and cared for properly. One DIYer loved their laminate’s look but regretted skimping on quality. Corners chipped and a minor leak telegraphed through. Their second project used thicker-core LVP with a 20 mil wear layer and survived daily life easily. Takeaway: buy better once, especially with pets and kitchens.
Common DIY flooring mistakes to avoid
Most DIY flooring failures come from poor subfloor prep, tight perimeters, and sloppy doorways that cause joints to open or click-lock seams to fail.
- Skipping subfloor flatness. Manufacturers typically require no more than 3/16 inch variation over 10 feet. Use a long straightedge to find highs and lows, then grind, sand, or fill with patch or self-leveler.
- Forgetting expansion gaps. Floating floors expand and contract with temperature and humidity. Leave a 1/4 inch gap at walls, cabinetry islands, and columns to prevent buckling.
- Cheaping out on material. Ultra-thin planks and weak click systems chip easily and are harder to lock. Aim for at least a 20 mil wear layer and thicker core for easier installation.
- Rushing doorways and jambs. Without undercutting jambs, cuts show and edges catch. Use an oscillating multi-tool to undercut trim so planks slide beneath for a clean, pro finish.
- Ignoring layout math. If your last row will be a sliver, rip the first row narrower to balance. Stagger end joints at least 6 inches and avoid H-joints that concentrate stress.
Pro tips for installing LVP like a pro
Experts recommend tackling one full room first, then scaling up; the first 150–300 sq ft will teach you layout, cuts, and pacing for the rest.
- Start straight. Snap a chalk line 16–24 inches off your starting wall as a reference. Check parallel every few rows to keep lock-up easy and seams tight.
- Invest in the right cutter. A laminate/LVP guillotine makes dust-free crosscuts. Pair it with a jigsaw or circular saw for rips and notches. A tapping block and pull bar are non-negotiable.
- Undercut early. Undercut door jambs before you reach them. It speeds installation and hides edges for that no-threshold look.
- Mind moisture. On concrete, use a vapor barrier if the product calls for it. On wood subfloors, tighten squeaks with deck screws before you start.
- Work clean. Vacuum grit as you go. Debris in the click-lock joint is a top cause of gaps that show up weeks later.
Reflection: The first time I watched a homeowner move their chop saw indoors mid-project, their pace doubled and the finish quality improved. Set yourself up to reduce trips and protect your back.
Tools, planning, and resources for DIY flooring
Plan your toolkit and workflow up front to keep momentum and quality high.
- Essential tools: knee pads, tape measure, long straightedge, chalk line, rubber mallet, tapping block, pull bar, oscillating multi-tool, jigsaw, chop/miter saw or guillotine cutter, shop vac.
- Materials checklist: mid-tier or better LVP with 20 mil wear layer, matching transitions, color-matched t-molds or reducers, baseboards or quarter-round, shims/spacers, vapor barrier if required.
- Skill builders: watch two to three detailed videos on LVP layout, doorways, and subfloor prep. Compare approaches and follow the written manufacturer installation guide.
- Inspiration and planning: use a visualizer to test plank direction and color across rooms. Try ReimagineHome to preview layouts and finishes before you commit.
Suggested image alt text: Flatness check with 6-foot level and chalk line across a hallway before LVP installation.
Visualization Scenario
Picture this: You clear the smallest bedroom and snap a chalk line down the longest wall. Planks click tight, seams disappear, and a soft satin grain runs to the window. You undercut the door trim so the floor glides under, then reinstall a crisp baseboard that hides your expansion gap. Later that night, the dog pads in from the yard and you wipe a muddy paw print with a damp cloth. The floor looks exactly like it did an hour ago. Tomorrow, you’ll roll that same direction into the hallway, confident the layout will carry through the rest of the house.
DIY flooring FAQ
- Is it worth it to DIY flooring in a 1,100 sq ft house?
Yes. DIY LVP can save 3–6 dollars per sq ft in labor if your subfloor is flat and you plan 40–60 hours for installation and trim. - What’s the best flooring for homes with dogs, LVP or laminate?
Luxury vinyl plank is usually better for pets due to waterproof cores and tough wear layers; choose at least a 20 mil wear layer. - How flat should a subfloor be for vinyl plank?
Most manufacturers require flat within 3/16 inch over 10 feet or 1/8 inch over 6 feet; fix highs and lows before installing. - Do I need to remove baseboards to install LVP?
Removing baseboards yields the cleanest result and hides the 1/4 inch expansion gap; quarter-round is a workable alternative. - What tools do I need to install LVP as a beginner?
A tapping block, pull bar, rubber mallet, spacers, guillotine cutter or miter saw, jigsaw, oscillating multi-tool, straightedge, and knee pads.
The bottom line on DIY flooring
DIY flooring is “easy” in the way cooking a great meal is easy: the recipe is simple, the finesse is in prep and timing. If you choose LVP for a home with dogs, buy solid mid-tier planks, obsess over flatness, and plan doorways before you get there. Expect your first room to feel slow, and the next rooms to fly.
Here’s my rule of thumb: if your subfloor meets spec, your floor plan is reasonably simple, and you can spare a few weekends, DIY is worth it. If your slab is wavy, you have complex hallways, or you’re on a deadline, hire the install and keep the demo and baseboards as DIY to split the difference. Either way, you’ll step into cleaner, tougher floors that change how your home feels every day.
Ready to visualize plank direction and color in your rooms before you buy? Test ideas with ReimagineHome and walk in confident.