.svg)

.svg)

TL;DR
Renter-friendly home DIY projects for winter focus on low-commitment upgrades like peel-and-stick wallpaper, thrift flips, and temporary wall texture. Plan with a mood board, measure twice, and prioritize changes that move with you. Most projects can be finished in a weekend for under $200, with minimal tools and zero paint fumes.
Getting started with renter-friendly winter projects
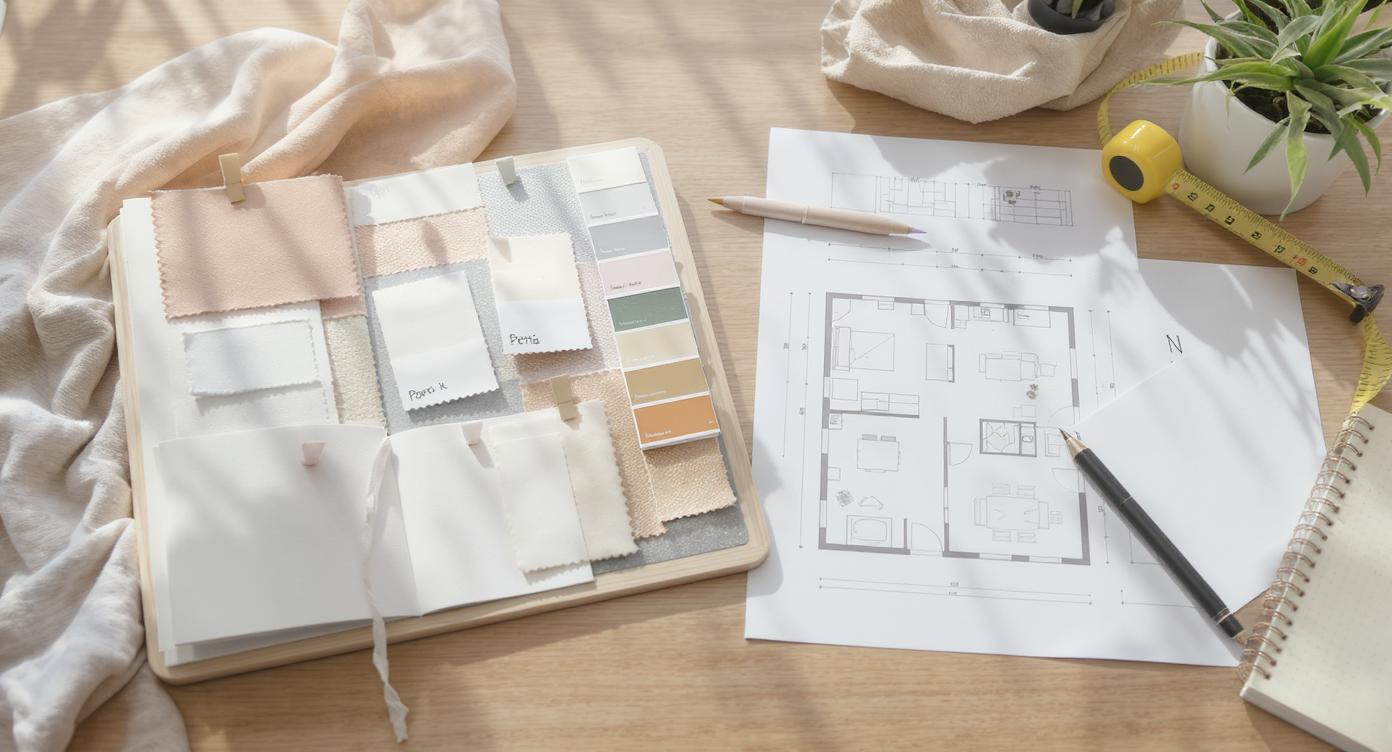
Planning your renter-friendly DIY projects with mood boards and floor plans ensures stylish, deposit-friendly results.
Renter-friendly DIY projects to refresh your home before spring. Low-cost, low-commitment upgrades with peel-and-stick, thrift flips, and texture.
Here’s the thing: winter is prime time for renter-friendly DIY. Short days, long nights, and a craving for comfort drive smart, small changes. In the first 100 words, let’s name them clearly — renter-friendly DIY, peel-and-stick wallpaper, thrifted furniture makeovers, and how to add texture to walls in a rental. These winter home projects brighten rooms fast and protect your deposit.
Start with a plan. Gather inspiration, build a mood board, and drop real products into a simple floor planner so you can test scale before you buy. Experts recommend measuring twice and modeling big purchases like sofas and rugs. As a rule of thumb, most living rooms look balanced with an 8×10 rug if the sofa is at least 72 inches long, while bedrooms often take a 6×9 under a full or queen bed.
Your renter-friendly DIY game plan for winter weekends
Renter-friendly home DIY projects that avoid permanent changes can refresh a space in a weekend for under $200.
Think of this as a 4-part blueprint: plan, stick, thrift, and texture.
1) Plan with a mood board and a floor plan
Good planning saves money and returns. Build a simple mood board with 5 to 8 images and 3 to 5 color swatches, then list the exact products you’ll use. Use a floor planner to check scale — designers often advise leaving 18 inches of walkway space around major furniture and hanging art with centers at roughly 57 inches from the floor.
User insight: one renter realized their narrow living room needed a 30-by-72 inch console, not a deep cabinet, after seeing the traffic flow in a digital layout. The purchase fit, the returns vanished.
2) Upgrade with peel-and-stick products
Peel-and-stick wallpaper, backsplash tile, and countertop films are renter-safe and require no paint or ventilation. Clean surfaces with 70 percent isopropyl alcohol, snap a vertical plumb line with a laser level, and smooth from center to edges. Many pros leave a 1/16 inch overlap on wallpaper seams and trim with a sharp snap-off blade for crisp edges. Allow adhesive films 24 hours to fully bond before heavy use.
3) Transform thrifted furniture
Thrift flips stretch style on a budget. Sand lightly, clean well, then use a bonding primer so water-based enamel adheres to old finishes. Swap hardware for an instant custom look — standard pulls are 3 inches center-to-center, but you can use backplates to cover old holes. For stained pieces, test on the underside and finish with a water-based polyurethane to reduce odor indoors.
4) Add texture without commitment
Texture warms winter rooms. Create temporary wainscoting with lightweight beadboard panels or pre-primed lattice strips. Install panels with 1.25 inch 18-gauge brad nails into studs where possible, cap with simple trim, and use painter’s caulk sparingly at the top edge for a finished line. Keep chair-rail height between 32 and 36 inches in most rooms so proportions feel classic. When it’s time to move, pry gently, roll off any adhesive strips, and spackle nail holes.
Finish strong with plug-in lighting. Plug-in sconces or picture lights mounted with wall-safe anchors add layered light and zero electrician fees.
Anecdote
A renter in a north-facing studio used peel-and-stick grasscloth on one wall and a plug-in picture light above a thrifted landscape. The room went from cold to cozy in a weekend, and all of it came down clean when they moved.
Common mistakes renters make and how to avoid them
Most rental DIY mistakes come from skipping measurements, ignoring surface prep, and choosing the wrong adhesives.
- Skipping the plan: Buying rugs and art without a mood board leads to mismatched scales. Avoid it by confirming dimensions in a floor planner and keeping the rug 8 to 12 inches from walls in small rooms.
- Placing wallpaper without leveling: Starting at a door casing instead of a plumb line drifts patterns off by panel three. Use a laser level to draw a true vertical and start there every time.
- Using harsh adhesives: Permanent construction adhesive can damage drywall. Choose removable mounting strips rated for the item’s weight and use 2 to 4 times the rated number for safety.
- Forgetting landlord rules: Even renter-friendly upgrades can violate a lease. Snap a quick email with product links and get written approval if you plan to add nail holes or panels.
- Thrift flips without primer: Old varnish rejects paint. A bonding primer saves you from peeling and repaints.
Pro tips to make temporary look tailored
Small, repeatable techniques make temporary upgrades look custom and last longer.
- Use a test board: Apply peel-and-stick offcuts to scrap drywall for 48 hours. If edges curl, clean better or warm the adhesive with a hair dryer during install.
- Map patterns: Measure wallpaper repeat and pre-cut panels with a 1 inch surplus at top and bottom. This speeds installs and keeps motifs aligned over doors and outlets.
- Fake built-ins: Line bookcases with peel-and-stick grasscloth and add a 1x2 painted to match the wall across the top for a built-in look. Experts recommend painting both the wall and trim in the same color for a cohesive, rental-safe effect.
- Plug-in sconce trick: Hide cords with paintable cord covers. Mount at 60 to 66 inches from the floor for reading light beside a chair.
- Hardware harmony: Match metal tones across lamps, frames, and pulls, or intentionally mix two finishes 70/30 for balance.
Anecdotes & real stories
One couple kept their sectional pressed against a wall for years. Floating it 10 inches from the wall and adding an 8×10 rug made the room feel twice as open — and they finally hosted game nights again.
A grad student refreshed a sad galley kitchen with peel-and-stick subway tile in a single afternoon. A $120 backsplash and a plug-in over-sink light changed the mood more than new dishes ever could.
A first-time renter turned a dated dresser into a statement with matte paint, wood filler to close old knob holes, and modern pulls spaced 5 inches apart. The piece moved with them and still anchors the new bedroom.
A designer friend starts every rental makeover with the view. She says if your sofa faces away from the window, no amount of styling beats turning it toward the light.
Tools, apps, and inspiration
Simple tools and apps speed results and minimize errors.
- Laser level and snap-off knife for straight, safe wallpaper seams.
- 1.25 inch brad nails, stud finder, and painter’s caulk for crisp, removable beadboard.
- Bonding primer, foam rollers, and water-based enamel for thrift flips with a durable finish.
- Room planners and visualization tools like ReimagineHome to test layouts, palettes, and wall treatments before you buy.
Suggested image alt text and captions: “Peel-and-stick wallpaper in a rental entryway, straight seam detail” and “Temporary beadboard wainscot capped with simple trim, 34 inches high.”
Visualization Scenario
It’s Saturday morning. You’ve mocked up your living room in a planner and chosen a soft green peel-and-stick for the entry. By noon, the first two panels are up, dead straight thanks to the laser line. After lunch, you float the sofa 10 inches off the wall, roll out an 8×10 rug, and hang a plug-in sconce at 64 inches. Sunday is for the thrifted dresser: primer, two coats of enamel, new pulls. By Sunday night, the space feels brighter and more personal — spring-ready without a single permanent change.
FAQ
How should I plan renter-friendly home DIY projects for winter?
Build a mood board, measure your space, and use a floor planner to test scale. Prioritize renter-friendly home DIY projects for winter that can be finished in a weekend and move with you.
What’s the best way to use peel-and-stick wallpaper in a rental?
Start on a plumb line, clean the wall with alcohol, and smooth from center to edges. Allow 24 hours for adhesive to set and trim seams with a sharp blade.
How do you add texture to walls in a rental without damage?
Install lightweight beadboard or lattice wainscoting with brad nails into studs and finish with removable caulk. Keep chair-rail height around 32–36 inches for balanced proportions.
Can I transform thrifted furniture on a budget?
Yes. Use a bonding primer, water-based enamel, and new hardware to create a durable finish for less than $100 on most small pieces.
What’s the best way to make a mood board for a small apartment?
Limit the palette to 3–4 colors, include specific products, and test an 8×10 rug or 6×9 under a queen bed in a layout so scale feels right in a small space.
Bring it together before spring
Renter-friendly DIY does not mean dull. Plan with a mood board, lean on peel-and-stick upgrades, give thrifted furniture a second life, and add removable texture for warmth. Keep measurements tight, adhesives gentle, and lighting layered. Do that, and by the time daffodils show, your space will feel fresh, personal, and deposit-safe.
Ready to visualize options? Mock up your room and materials with ReimagineHome before you lift a finger.


.png)