
TL;DR
You can DIY a 5-inch concrete slab removal by renting a jackhammer and a roll-off bin, cutting any rebar with a concrete saw, and hauling debris as you go from the farthest point toward the bin while wearing full PPE. For a stable paver patio in clay and freeze–thaw, excavate for 6–8 inches of compacted granular base plus 1 inch of bedding, maintain a 2% slope away from the house, lock edges with restraints, and finish with polymeric sand for a backyard makeover that lasts.
5 inches of concrete with rebar call for a plan: Introduction

Visualizing backyard makeovers instantly with ReimagineHome.ai brings clarity before you build.
Planning a backyard makeover that replaces cracked slabs with a stone patio and fire pit is classic hardscaping design—and entirely DIY‑possible with the right prep. Here’s the landscaping idea that matters most: Winnipeg’s clay and deep freeze–thaw cycles punish shallow bases and poor drainage, so build your paver patio like a permanent outdoor room, not a temporary path.
Try your own exterior layout instantly on ReimagineHome.ai: launch the visualizer.
- At a Glance: 2% slope away from the house; 36–48 inch primary path width; 6–8 inch compacted base (in 2–3 inch lifts); 1 inch bedding; edge restraints; polymeric sand jointing.
- Tools: jackhammer, concrete saw for rebar, wheelbarrow, plate compactor, level/screed, PPE (mask, ear pro, face shield, gloves).
- Materials: non‑woven geotextile, 3/4 inch minus aggregate (dense‑graded) or open‑graded chip + clear stone system, bedding sand or HPB, pavers, restraint, polymeric sand.
50–70% of low‑maintenance yard budgets go to hardscaping: Why landscaping & hardscaping are changing
Hardscaping dominates low-maintenance yard budgets with lasting patios and paths that redefine outdoor spaces.
Hardscape elements—patios, walkways, steps—often drive the biggest share of low‑maintenance yard budgets because they reduce mowing and watering while boosting curb appeal. In older neighborhoods, sunken or separated concrete along foundations is common; replacing it with pavers lets you regrade correctly and improve drainage.
2% slope keeps water off your foundation: Drainage comes first
Set your finished patio to fall 1/4 inch per foot away from the house for at least the first 5–6 feet. This single move protects basements and ensures your outdoor living area sheds water, not collects it.
36–48 inches is comfortable path width: Design for daily life
Primary walkways feel generous at 36–48 inches; secondary garden design paths can be 24–30 inches. If you’re tight on space, modern landscaping ideas for small front yards rely on straight runs and clean edges to feel bigger.
2700–3000 K is ideal for outdoor lighting design: Warm, not orange
When you add landscape lighting, choose warm white 2700–3000 K for steps, seating, and planting. It flatters stone and foliage and helps your hardscaping design read well after dark.
Anecdote
A Winnipeg homeowner swapped a failing side slab for a 42-inch paver walk in one weekend: break in sections, cut rebar, compact as you go, and the space suddenly works for daily life.
6–8 inches of compacted base is standard in cold climates: Key trends for paver patios and walkways
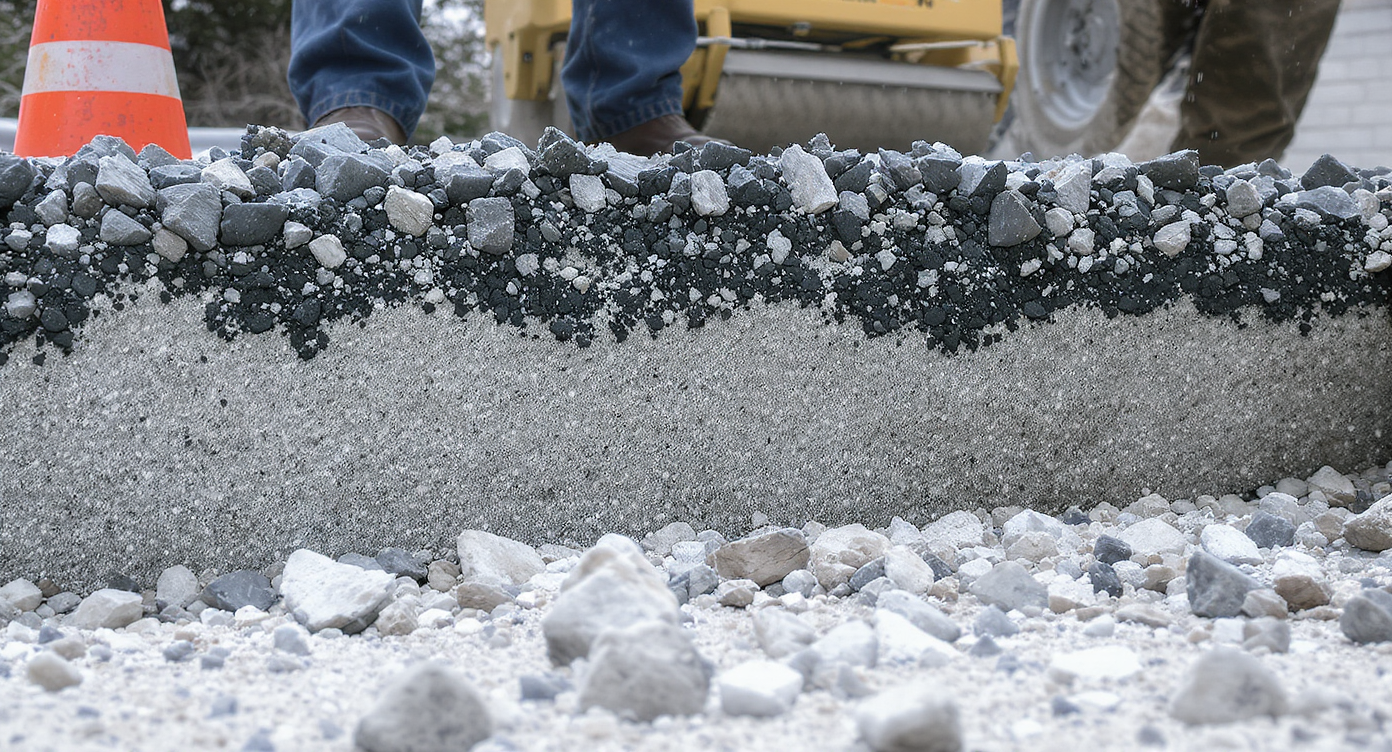
Cold-climate patios rely on thick, compacted bases for lasting durability beneath attractive pavers.
Cold‑climate patios perform when the base is king. Think of the visible stone patio as the finish on a well‑built roadbed: most stability lives beneath the pavers.
3–4 passes per lift achieve compaction: Build in layers
Excavate to allow your base plus bedding and paver thickness. Lay a non‑woven geotextile over subsoil (especially in clay) to separate fines. Place 2–3 inch lifts of 3/4 inch minus and compact with a plate compactor 3–4 passes per lift until it “rings.” Aim for 6–8 inches total base for patios, 4–6 inches for walkways.
1 inch is the bedding standard: Set pavers on sand or chip
Use 1 inch of concrete sand screeded dead flat. In wet or heave‑prone spots, many pros choose high‑performance bedding (HPB) or 1/4 inch chip for better drainage; pair open‑graded bedding with open‑graded base and strong edge restraints.
10 feet clearance is a typical fire‑pit rule: Stay safe and code‑aware
Keep wood fire pits at least 10 feet from structures and overhead obstructions; check local bylaws. Use fire‑rated block and a gravel center; don’t set a wood fire pan directly on pavers without a heat shield.
2–3 cubic yards is a common bin for concrete: Plan disposal
Concrete is heavy. Rent a roll‑off specifically rated for clean concrete; fees are often lower when the bin contains concrete only. Break from the farthest point toward the bin, and cut exposed rebar with a concrete saw for safer handling.
5 inch slabs break with the right tool: Rent, don’t buy
A rental jackhammer makes short work of 5 inch concrete. Score sections with a saw if needed, then lift and wheel debris over solid ground to avoid ruts. Wear a respirator, ear protection, gloves, boots, and a face shield—concrete dust and chips are real hazards.
3 steps to test layouts before you demo: How to use ReimagineHome.ai

Preview and perfect your patio design in three steps with ReimagineHome.ai before you start demolition.
Before you pour sweat, design clarity saves hours. ReimagineHome.ai lets you test multiple hardscaping ideas, materials, and layouts against your actual house.
- Step 1: Upload a front yard or backyard photo and mark ground surfaces. Swap lawn for a stone patio, add walkway ideas, and try privacy planting without moving a shovel.
- Step 2: Compare textures and tones—charcoal pavers with buff coping, granite vs. concrete, herringbone vs. running bond. See how curb appeal shifts in real time.
- Step 3: Place elements at true scale—36–48 inch paths, 10 foot fire‑pit clearance rings, terrace levels for a sloped yard—then export your favorite scheme to build from.
Explore more on designing low‑maintenance hardscaping in our guide: how to design low‑maintenance hardscaping. For slope and structure, see cold‑climate paver base depth. Planning a front yard makeover? Try modern walkway ideas that boost curb appeal.
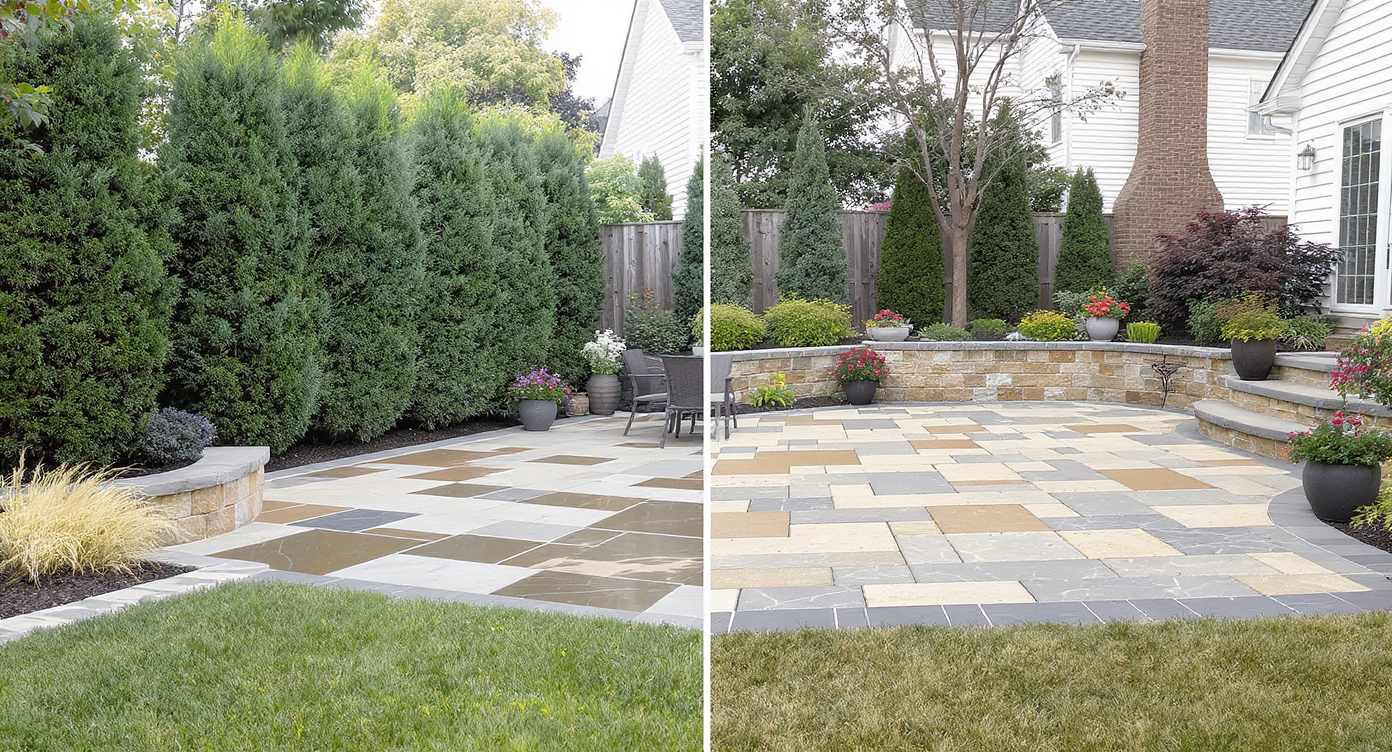
Alt: “Overhead view of a Winnipeg backyard rendered with a 14 x 20 foot stone patio, 2% slope arrows, and a 36 inch path to the gate.”
Caption: “ReimagineHome.ai helps you test patio sizes, slopes, and path widths before you break ground.”
2 DIY case studies prove it’s doable: Real‑world stories from the prairies
DIY prairie pathways prove hardscaping is doable, turning cracked yards into inviting outdoor spaces.
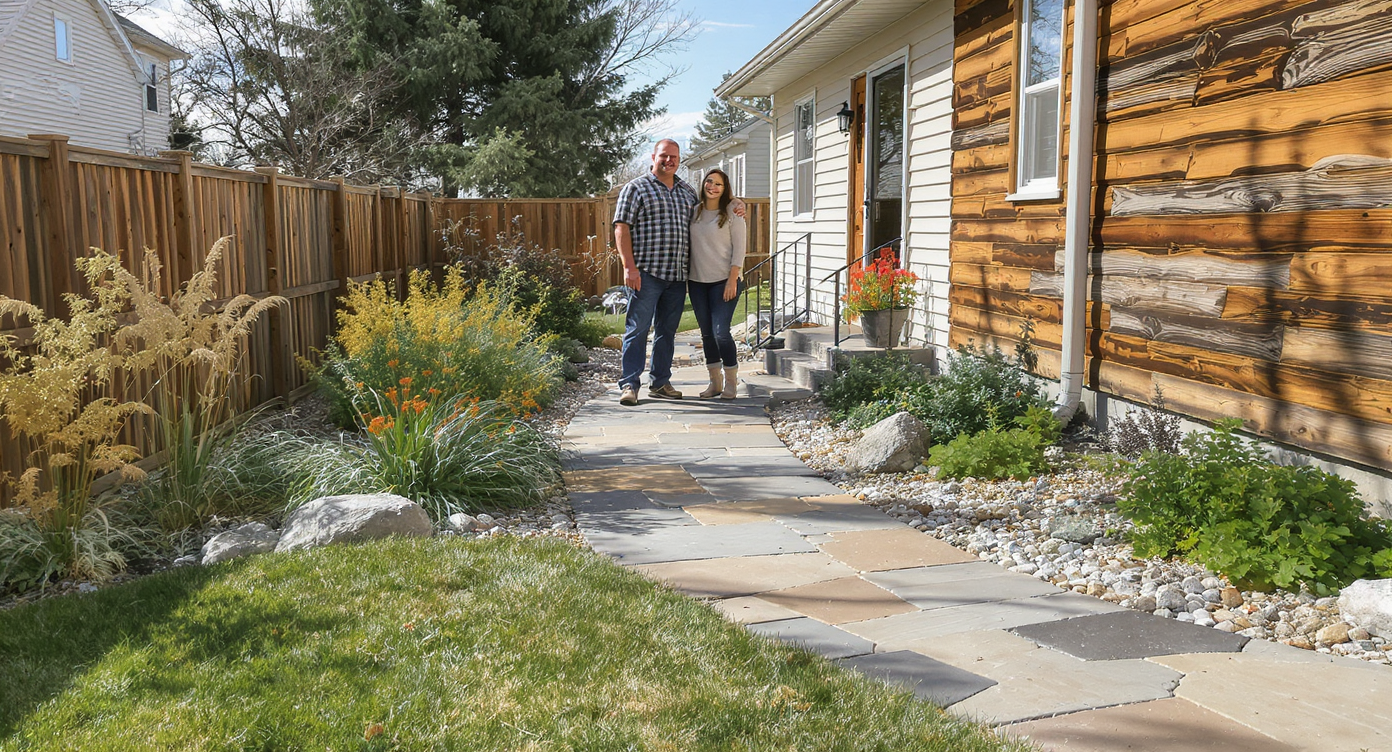
A homeowner on the prairies turned a cracked side yard into a cinematic, stone‑lined walkway. They started demolition at the back gate and worked toward a concrete‑only bin, cutting a few stubborn rebar pins with a rented saw. The new path—42 inches wide with a gentle 2% fall away from the foundation—instantly changed the daily rhythm of hauling bikes and bins.
Another weekend, two friends tackled a backyard slab up to five inches thick. A jackhammer, wheelbarrow, and a steady cadence of compact‑as‑you‑go turned the space into a proper outdoor living zone: 8 inches of base under a 16 x 18 foot patio, a low seating wall, and a simple steel fire ring set 12 feet from the fence. By choosing discontinued pavers, they kept the project in the “affordable landscaping ideas” category without sacrificing style.
Alt: “Twilight view of a charcoal paver patio with a round fire pit, warm 2700 K step lights, and layered privacy planting.”
Caption: “Material and lighting tests in ReimagineHome.ai help you dial tone and texture before you commit.”
Visualization Scenario
Upload your current backyard photo to ReimagineHome.ai, mask the slab, and apply a 14 x 20 foot patio with a 2% slope arrow set, add a 10-foot fire-pit clearance ring, and preview charcoal vs. buff pavers under warm 2700 K path lighting.
8 quick answers homeowners search before renting the jackhammer: FAQ
5 inches of concrete with rebar—can I DIY the removal?
Yes. Rent a jackhammer and a concrete saw for rebar, break from the farthest point toward the bin, and haul as you go. Use full PPE and a concrete‑only bin to reduce fees.
6–8 inches base vs. 4–6 inches—what’s right for Winnipeg clay?
Use 6–8 inches for patios and 4–6 inches for walkways. Compact in 2–3 inch lifts over a geotextile separation layer.
2% slope—how do I set it?
Drop 1/4 inch per foot away from the house. Set string lines, check with a level, and keep that fall consistent through base and bedding.
1 inch sand or HPB—what’s better?
Concrete sand is the standard; HPB or 1/4 inch chip drains better in saturated soils. Match bedding to your base (dense‑graded with sand, open‑graded with chip) and always use edge restraints.
10 feet from structures—does that cover my fire pit?
It’s a common minimum, but always confirm local bylaws. Use fire‑rated materials and a gravel center; add a heat shield if placing a pan on pavers.
36–48 inches—how wide should my walkway be?
36 inches is comfortable, 42–48 inches feels luxurious for two‑way traffic. Tight sites can drop to 30 inches for garden access.
3–4 compactor passes—how do I know I’ve hit density?
The plate changes tone from dull to bright, and the surface stops moving underfoot. Don’t exceed 2–3 inch lifts per pass.
2–3 days—how long does a typical DIY patio take?
One day demo and disposal, one day excavation and base, one day lay, edge, and sand. Weather and site access can add time.
15 minutes to your first visual: Visualize your home’s next chapter
In as little as 15 minutes, you can visualize multiple backyard designs—patio shapes, walkway alignments, privacy planting, even outdoor lighting—in ReimagineHome.ai and head to the rental counter with confidence. The hard part isn’t the jackhammer; it’s committing to a layout that works with your home, your climate, and your life.
- Build to cold‑climate standards (6–8 inch base, 2% slope).
- Design for movement (36–48 inch paths, clear fire‑pit setbacks).
- Finish like a pro (edge restraints, polymeric sand, soft lighting).
Ready to see your options? Start here: visualize your yard with ReimagineHome.ai.