
TL;DR
A stable paver patio depends on excavation depth, compacted base, proper slope, and solid edge restraints. Use this step-by-step guide to learn how to build a paver patio by hand, including base thickness, compaction lifts, drainage, and cold-climate tweaks that prevent shifting and puddles.
Introduction
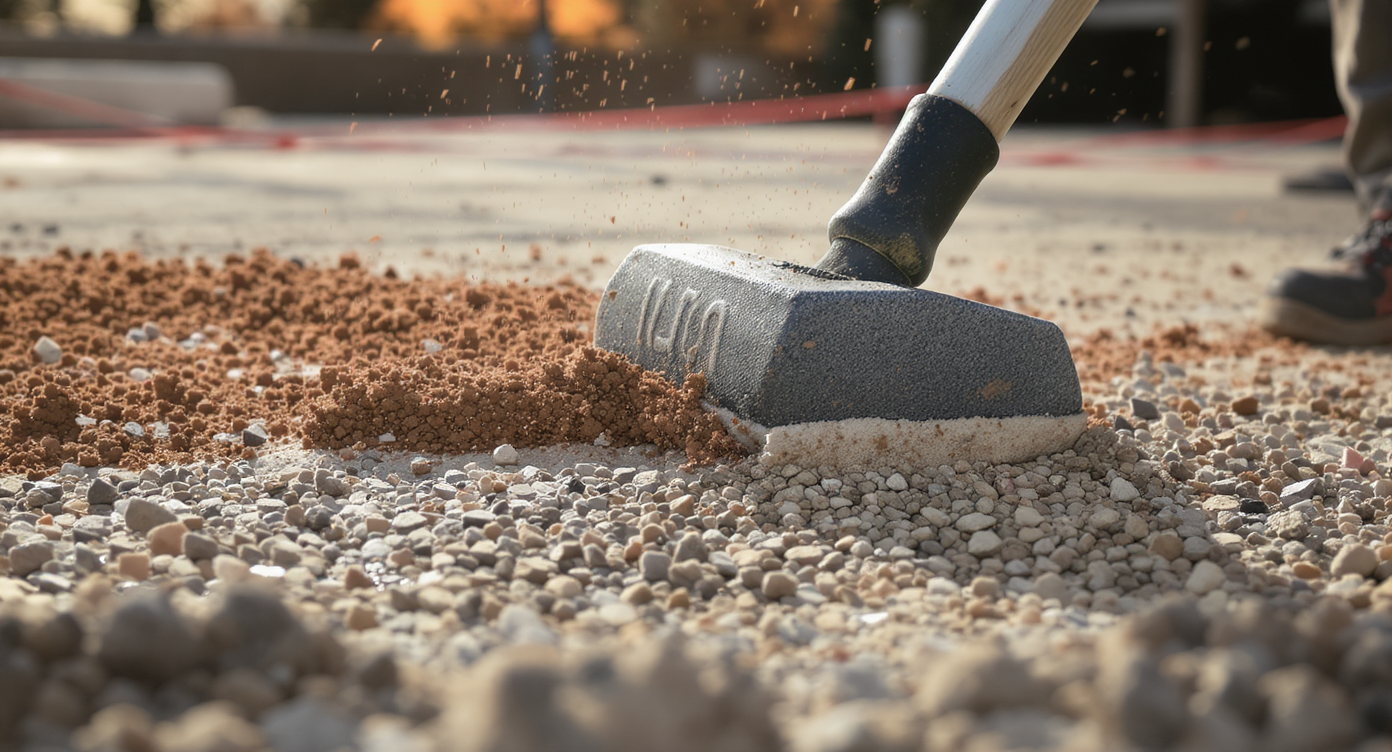
Compacting the gravel in layers builds a solid, lasting foundation for any paver patio.
Most long-lasting paver patios sit on 5 to 8 inches of compacted aggregate, plus 1 inch of bedding sand, with a 1/8 to 1/4 inch per foot slope to shed water. The sound of a hand tamper hitting dense gravel, the clean snap of a string line, and the earthy scent of crushed stone are the quiet music of a good DIY patio build.
Homeowners are taking on hardscaping with shovels, stakes, and patience. In one recent backyard, a solo builder created a roughly 13-foot-square wet-cast paver patio in about 40 hours for around $2,500, relying on a shovel, a hand tamper, and careful measuring. That job, like many I walk these days, proves you do not need machines to build something durable, but you do need the right sequence, materials, and slope.
Alt text: Hand-built paver patio framed by lawn, string lines marking a gentle 1/4-inch-per-foot fall away from the house. Caption: Compacting a 6-inch dense-graded base in 2-inch lifts creates the firm substructure patios rely on.
From Solid Base to Soft Edges: The 2025 Patio Playbook
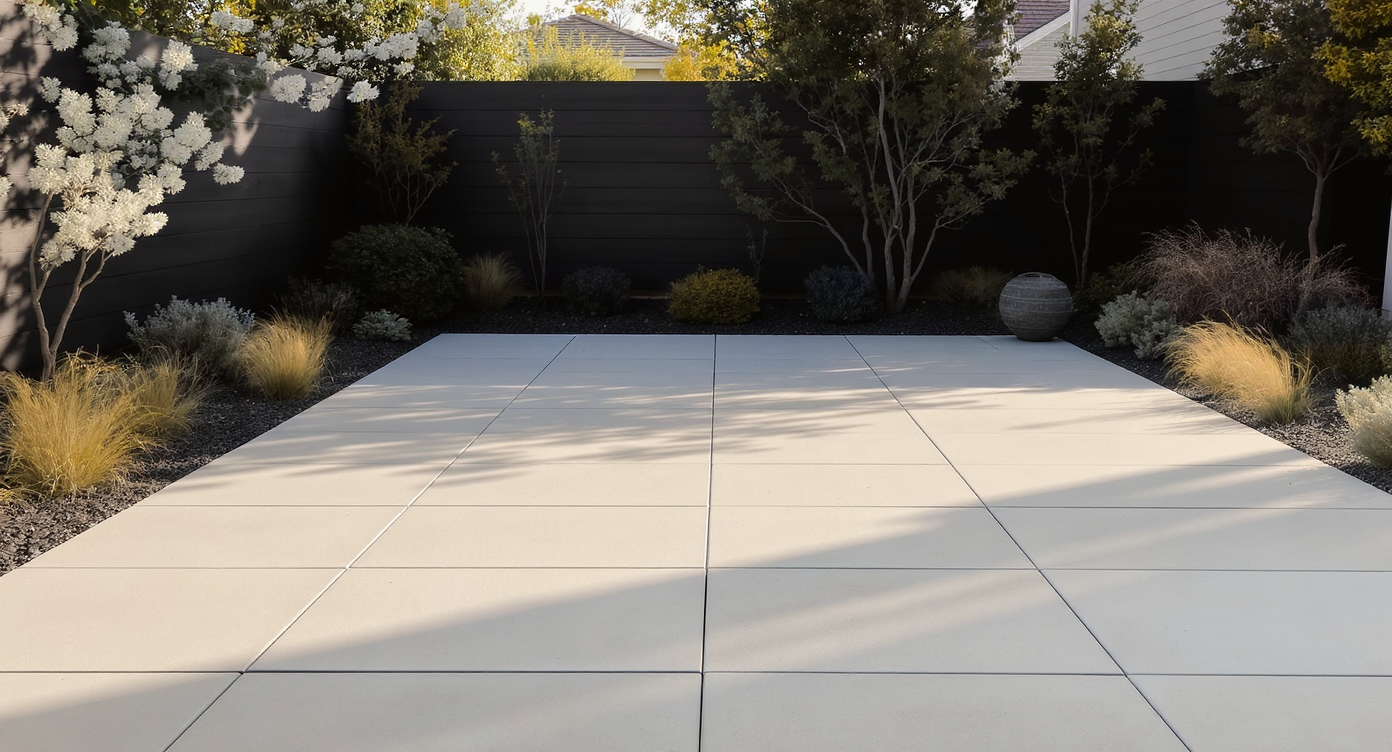
2025's trend blends solid paver bases with soft, natural planting edges for backyard harmony.
Modern backyard design leans on simple, durable hardscaping, then softens the edges with planting, mulch, and light. From paver patio base prep to drainage and edging, the goal is the same, a surface that stays flat through storm, sun, and frost.
Here is the big picture. Today’s best DIY patio builds mix dense-graded aggregate, smart compaction, and a subtle slope to prevent ponding. Designers often suggest raising the finished surface slightly above the surrounding lawn for cleaner transitions. The following tips braid together hardscaping know-how with backyard garden ideas, so your patio becomes a low-maintenance anchor for outdoor living.
Anecdote
A homeowner I visited recently shaped a 13-foot-square wet-cast paver patio in roughly 40 hours with a shovel, string lines, and a stubborn hand tamper. They stockpiled the excavated soil to fill low spots, set a slight slope to one side, and used polymeric sand to lock the joints. The budget landed near $2,500, a number that tracks with most well-planned DIY patios.
Ideas, Tips, and Designs

Careful excavation and measurement set the stage for a perfectly leveled patio base.
01. Excavation Math for a Paver Patio
Excavate deep enough to fit base, bedding sand, and paver thickness, while maintaining a 1/8 to 1/4 inch per foot slope away from structures.
What it is: Calculating dig depth so the finished patio sits at the right height and drains.
How it works: Measure your pavers, often 2 to 2.75 inches thick. Add 1 inch for bedding sand and 4 to 8 inches for a compacted base, leaning toward 6 to 8 inches in freeze zones or on soft soils. Set string lines to establish a consistent fall of 1/8 to 1/4 inch per foot away from the house or any edge you want dry. If your yard is uneven, dig deeper on the high side rather than bury the patio below grade. Think of it like building a layered roadbed, your effort now is what keeps furniture level later.
- Set stakes and string lines to finished height and slope before digging.
- Mark the footprint, then add 6 inches around for base overrun.
- Stockpile topsoil separately for later feathering and bed prep.
02. Compact in Thin Lifts
Aggregate compacts best in 2-inch layers, each moistened lightly and tamped before the next goes down.
What it is: Building density in stages so the base does not settle later.
How it works: Whether you use a plate compactor or a hand tamper, thin lifts are the secret. Lightly dampen the stone so it is like a wrung-out sponge, then make two to three overlapping passes. Horticulturists and builders alike note that consistent compaction matters more than muscle; renting a 150 to 200 pound plate for a day, often $60 to $90, saves backs and boosts quality. In the UK, crews casually call it a wacker plate, whatever the name, it is your best friend.
- Test compaction, if your boot does not imprint, you are close.
- Compact the subgrade once before the first lift for insurance.
- Re-check string lines after each lift to hold slope.
03. Carry the Base Beyond the Edge
Extend the compacted base at least 6 inches past the paver footprint to support edges and resist creep.
What it is: A load-spread buffer under turf that keeps the perimeter strong.
How it works: Ground pressure spreads like a 45-degree cone, so edge stones need bearing beyond their face. Build your dense-graded base wider, then install an edge restraint. Designers recommend plastic or aluminum edging spiked every 8 to 12 inches, or a discreet concrete toe. This small detail is the difference between crisp lines in year three and a patio that slowly opens at the corners.
- Mark layout 6 to 8 inches wider than the finished patio.
- Use edge restraint that matches your paver height and joint width.
- Set spikes at closer spacing on curves and traffic zones.
04. Choose the Right Stone and Geotextile
Angular, crushed aggregate compacts and drains better than rounded pea gravel, and geotextile fabric separates clay from base.
What it is: Pairing materials to soil type for long-term stability.
How it works: For most patios, use a dense-graded mix (often called 3/4 inch minus) that locks tight when compacted. On heavy clay or saturated sites, experts recommend laying a non-woven geotextile over the subgrade to prevent fines pumping up into the base. Some builders now opt for open-graded bases, 3/4 inch clean topped with 3/8 inch chip, to move water quickly. Both systems work when compacted correctly, the key is keeping water moving and soils separated.
- On clay, roll out non-woven fabric before your first lift.
- Avoid stone dust alone for bedding; it can hold water and heave.
- Order 10 percent extra aggregate for compaction shrinkage.
05. Set Slope, Avoid Bowls
A patio should fall 1/8 to 1/4 inch per foot away from the house to prevent puddles and icing.
What it is: Drainage graded into the design.
How it works: Water follows gravity, so give it a path. Build the patio slightly higher than the lawn, then feather soil out 3 to 4 feet to meet grade, rather than bury the surface below turf. If the site is a natural low spot, plan a gravel trench or a simple French drain to intercept runoff. I have seen homeowners who kept things perfectly level end up with a seasonal skating rink, a few eighths of an inch per foot solves it.
- Use a line level or laser to confirm consistent fall.
- Keep finished surface at least 2 inches above surrounding turf.
- Direct water away from foundations, steps, and play areas.
06. Screed a True 1-Inch Bedding Layer
The bedding layer should be 1 inch of concrete sand or chip stone, screeded flat and undisturbed.
What it is: The cushion that lets pavers seat evenly.
How it works: Set two 1-inch pipes or screed rails, pull a straight board to create a smooth plane, then remove the rails and fill the voids. Do not walk on the fresh bed. Lay pavers immediately so wind and foot traffic do not ruffle the surface. Garden designers often suggest screeding only what you can lay in a few hours, patience here pays off in tight joints.
- Use concrete sand, not play sand or dusty screenings.
- Cover screeded sections with plywood if you must cross them.
- Check thickness with a ruler before laying the first stone.
07. Lay Pattern and Set Joints
Consistent 3 to 5 mm joints help pavers lock and look intentional.
What it is: A layout that balances beauty and strength.
How it works: Start from a straight reference edge and work out. With wet-cast pavers, minor size variations are normal, so adjust with spacers and a rubber mallet. Stagger seams to avoid long, straight joints. Once set, run a compactor with a pad to seat stones into the bedding layer, making two passes in perpendicular directions. In one New England yard I visited, the sloped site meant digging to 17 inches at one end and 8 at the other, but that careful prep delivered dead-flat joints two winters later.
- Dry-lay the first few rows to confirm pattern and square.
- Keep a 6-foot level and spacers handy for quick corrections.
- Compact gently with a protective pad to avoid scuffs.
08. Lock With Polymeric Sand
Polymeric sand swept into joints and lightly misted resists weeds, washout, and ant tunnels.
What it is: A stabilizing joint filler activated by water.
How it works: After the first compaction, sweep sand diagonally to fill joints, then compact again to settle. Top off, blow dust off the surface, and mist in light passes until joints are uniformly damp, not flooded. Let cure 24 hours. Experts recommend avoiding rain for a day and sealing later only if the paver manufacturer approves.
- Work in cool, dry weather for easier cleanup.
- Use a leaf blower on low to clear residual dust.
- Block off pets and traffic until joints harden.
09. Build for Frost and Thaw
In USDA Zones with freeze-thaw, deeper base and good drainage are the best defense against heave.
What it is: Cold-climate insurance for a flat patio in spring.
How it works: Water expands as it freezes, so keep it moving. Aim for 6 to 8 inches of compacted base on most sites, more on weak soils, and avoid water-holding fines under the pavers. Salt is hard on wet-cast surfaces, so use sand or a calcium-based deicer sparingly. Many northern DIYers are relieved to see no shift after spring thaw when they invest in base and slope instead of thicker pavers alone.
- Choose angular, well-graded stone for maximum interlock.
- Brush snow with a plastic shovel to protect edges.
- Inspect and top up joints each spring if needed.
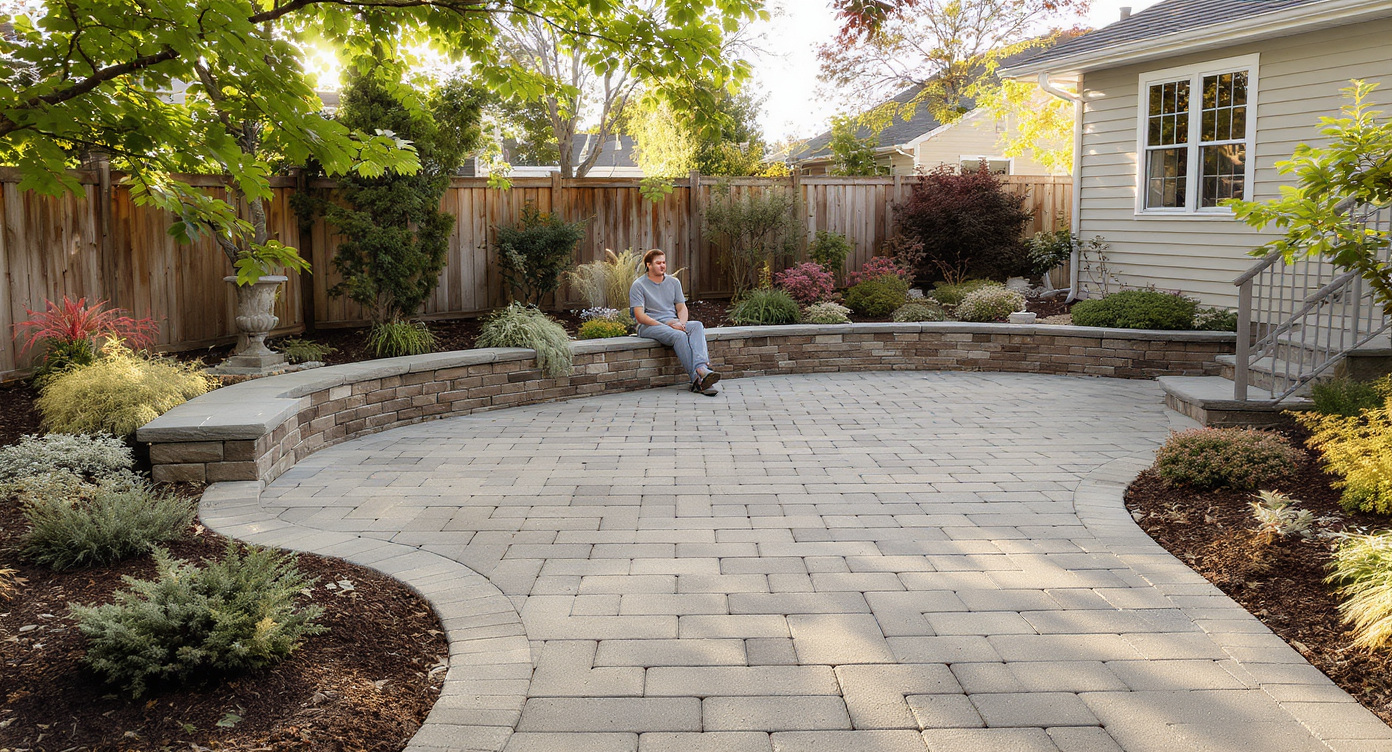
10. Finish With Softscaping and Light
Mulch, turf feathering, and low-voltage lighting turn a slab into a room.
What it is: The comfort layer that invites daily use.
How it works: Backfill edges with topsoil, then feather to lawn over a 2 to 3 foot run so boots do not track mud. Tuck in native landscaping, think sedges, lavender, or coneflower along the border for pollinator color and curb appeal planting. Low-voltage path lights spaced 6 to 8 feet apart create a soft rhythm at night. I have seen weekend builds go from rugged to refined with nothing more than a crisp edge, a mulched bed, and a warm wash of light on the new stone.
- Blend topsoil and compost for quick turf repair at edges.
- Add a 2 to 3 inch mulch layer to stabilize soil and retain moisture.
- Use 12-gauge wire for longer lighting runs to reduce voltage drop.
Transitional Reflection
A well-built patio offers calm underfoot and seamless transition to softened edges.
Every step above is small, but together they add up to a patio that feels calm underfoot and quiet to maintain. The beauty of modern hardscaping is not perfection, it is participation, and a base that honors water, soil, and season.
How to Visualize It

Virtual planning tools help visualize and perfect your patio before building begins.
Before you plant a single border or order pavers, map your space virtually to avoid guesswork. Platforms like ReimagineHome let you preview patio layouts, edge curves, planting pockets, and even lighting beats, turning sketches into living blueprints you can tweak in minutes.
Visualization Scenario
Visualize a 14-by-14-foot patio raised 2 inches above the lawn, with a curved pollinator bed on two sides and path lights every 7 feet. In ReimagineHome, toggle between herringbone and running bond, preview slope direction, and test native plant palettes before committing.
FAQ
How deep should I dig for a DIY paver patio?
Most patios need 6 to 10 inches of excavation to allow 4 to 8 inches of compacted base, 1 inch of bedding sand, and the paver thickness.
What slope should a patio have for drainage?
Design a fall of 1/8 to 1/4 inch per foot away from buildings to move water off the surface and reduce icing.
Do I need a plate compactor, or can I hand-tamp?
A plate compactor gives more consistent density and is usually worth the one-day rental; hand-tamping works if you compact in 2-inch lifts and are patient.
What base material is best under pavers?
Use angular, crushed aggregate, either dense-graded 3/4 minus or an open-graded clean stone system, paired with geotextile on clay soils.
Can I build a patio slightly below the lawn?
It is better to finish slightly above grade and feather soil out; below-grade patios can collect water unless drains and slope are carefully planned.
How much does a DIY paver patio cost per square foot?
DIY builds commonly range from $10 to $18 per square foot for materials, depending on paver type, base depth, and site access.
Closing Reflection
A patio is more than stone, it is a stage for everyday life, coffee steam in cool air, a dog circling the sun-warmed edge. Build it a little higher than the lawn, give it a firm, compacted heart, and let water slip quietly away. Do that, and you will spend next summer arranging chairs instead of chasing puddles. When you are ready to test shapes and planting ideas at full scale, use ReimagineHome to visualize your outdoor space before you ever lift a shovel.