
TL;DR
This guide shows how to build a paver patio by hand with proper slope, base, compaction, and edging for long-term durability. Learn the exact steps, from digging depth to polymeric sand, plus field-tested tips and the best way to avoid standing water and frost heave in cold climates.
Introduction
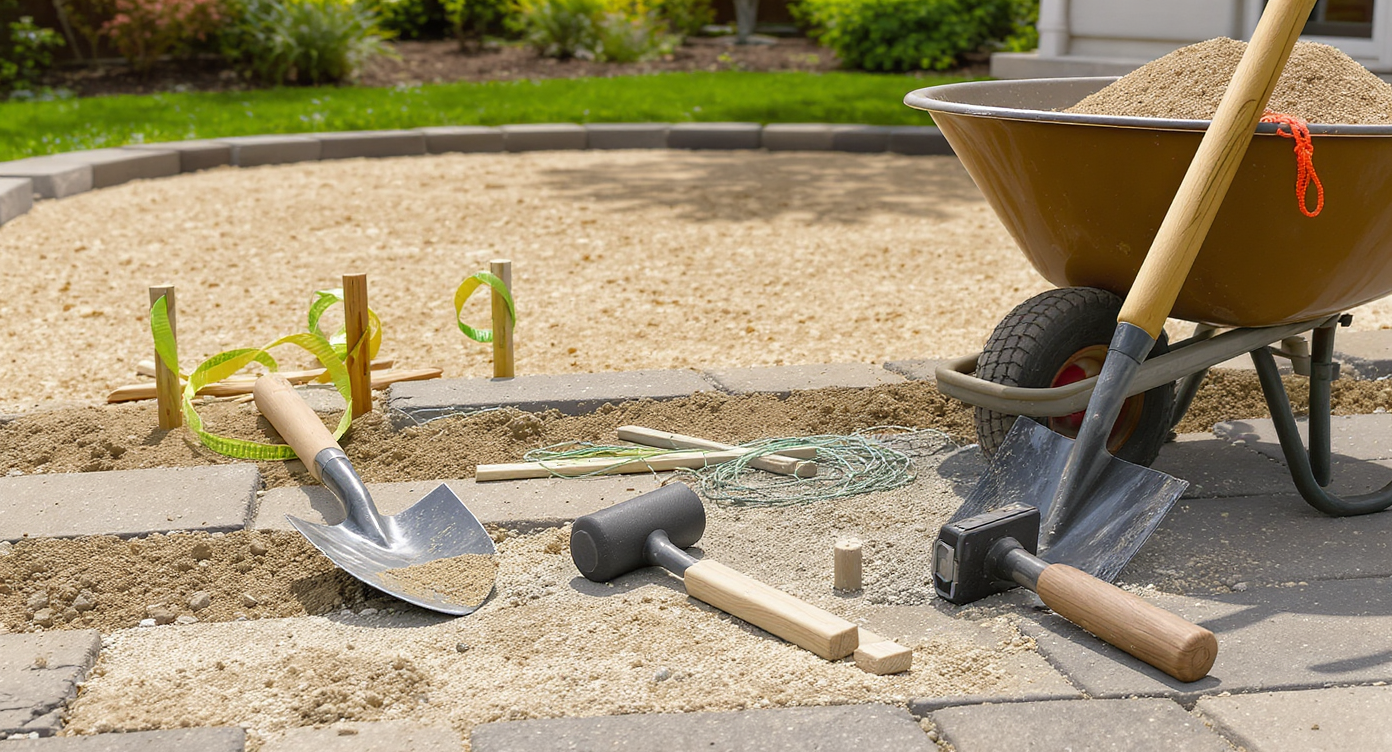
Essential tools and layered base materials ready for building a durable DIY paver patio by hand.
Most patios perform best with a subtle 1 to 2 percent slope away from the house, roughly 1/8 to 1/4 inch per foot. I was reminded of that rule last week watching a homeowner finish a 13.5-foot square paver patio by hand, a week of vacation exchanged for tamping, screeding, and the kind of sore muscles that make dinner taste better. He spent about $2,500 on materials and basic tools and logged 35 to 40 hours—proof that a DIY patio build is doable if you respect the sequence.
Climate-smart hardscaping is having a moment. We want outdoor rooms that drain after storms, shrug off freeze-thaw cycles, and feel good underfoot. This is the backbone of backyard design right now: build the base right, and everything above it—seating, plantings, lighting—becomes simple. Here’s how to plan a drought-tolerant, low-maintenance patio that looks sharp on day one and even better in year five.
From Plan to Patio: The Theme
Most paver patios rely on three fundamentals—slope, compaction, and edge restraint—to resist settling and washouts. From native landscaping to curb appeal planting and eco-friendly yard upgrades, today’s hardscapes blend function with feel: drainage layers that work invisibly, stone textures that play with sunlight, and layouts that welcome morning coffee and evening conversation.
Think of it like building a road in miniature. A stable subgrade, a well-graded base layer, a 1-inch bedding layer, then pavers locked by joint sand and edges. Do these steps in order and your patio design will survive heavy rains, foot traffic, and frost heave. Skip them and you’ll be re-leveling bricks by spring.
Anecdote
Field note: A homeowner I visited built a 13.5-foot square patio by hand in about 35–40 hours over a week, using stakes, strings, and a hand tamper. Materials and basic tools totaled roughly $2,500, and the patio has a slight slope to shed water into the lawn.
10 Essentials For A DIY Paver Patio That Lasts
01. Set the Slope, Then the Stakes
A 1 to 2 percent fall, or 1/8 to 1/4 inch per foot, moves water off the patio without feeling tilted. What it is: A gentle grade built into the bedding layer so water never lingers or runs back toward the house.
How it works: Water follows gravity. Establish a reference line on the high side with string and stakes, then drop the opposing string line by 1/8 to 1/4 inch for every foot of run. Horticulturists note that patios draining toward lawns reduce puddling at joints and discourage algae. In small yards, I’ve seen DIYers run slope to a gravel strip or a native rain garden that swallows storm bursts.
- Tip 1: Use a string level and a tape; measure the drop before you dig.
- Tip 2: Aim slope away from foundations or toward a permeable border.
- Tip 3: Keep the surface “true” by rechecking slope during screeding.
02. Dig to Climate, Not Just to Plan
In freeze-prone regions, excavate 8 to 12 inches below finished grade, plus paver thickness; in mild climates 6 to 8 inches often suffices. What it is: Excavation tailored to local frost depth and soil type for a stable patio build.
How it works: The total assembly is usually 4 to 8 inches of compacted base, 1 inch of bedding sand, and 2 to 2.75 inches of paver. Designers often recommend finishing slightly above surrounding turf, then feathering lawn up to the stone to avoid a muddy moat along the edges. If the yard undulates, build a touch high and taper the grade.
- Tip 1: Call 811 (US) or local utility locate before digging.
- Tip 2: Stockpile good topsoil for later lawn repairs or raised beds.
- Tip 3: Cut clean vertical edges; it speeds edging installation.
03. Overdig and Widen the Base
Extend the compacted base at least 6 inches beyond the paver footprint to resist edge failure. What it is: A wider “shoulder” that supports load spread at roughly a 45-degree angle under traffic and furniture.
How it works: Without a base halo, edges chip, sink, and wander after heavy rain. Experts recommend pairing the overbuilt base with rigid edge restraints spiked every 8 to 12 inches. I’ve watched this small detail double the lifespan of DIY patios on sloped, loamy sites.
- Tip 1: Paint the layout, then overdig your excavation by 6 to 8 inches.
- Tip 2: Compact base in the overdig, not just under the field.
- Tip 3: Backfill outer edge with topsoil and turf to lock it visually.
04. Compact in Lifts, Not All at Once
Compact the base in 2-inch lifts with 2 to 3 passes per lift; plate compactors rent for about $60 to $90 per day. What it is: Progressive densification that prevents future settling.
How it works: Angular, well-graded aggregate interlocks when compacted, creating a firm, frost-tolerant platform. A hand tamper works for very small patios, but most DIYers save time with a 200-pound plate compactor or a rammer for clay soils. The sound changes from hollow to solid when density is right.
- Tip 1: Lightly mist dusty base before compacting to aid interlock.
- Tip 2: Avoid compacting more than 2 inches at a time.
- Tip 3: Check depth with a ruler after each lift to stay on target.
05. Use Geotextile, Not Plastic
A woven or nonwoven geotextile separates soil from base while remaining water-permeable. What it is: A fabric layer that stops fines from pumping into the base and preserves drainage.
How it works: Weed barriers are often too flimsy, and plastic sheeting traps water. A proper geotextile resists puncture and lets stormwater pass, keeping the base dry and strong. Garden designers often add a second strip along soft edges for extra insurance on loamy or silty sites.
- Tip 1: Lay fabric smooth, overlapping seams by 12 inches.
- Tip 2: Pin it with landscape staples so it doesn’t wrinkle under compaction.
- Tip 3: Trim fabric after edging goes in, not before.
06. Choose the Right Base and Bedding
Most patios use 3/4-inch minus crushed stone for base and a 1-inch layer of concrete sand for bedding. What it is: A stable, free-draining foundation topped by a levelable layer for pavers.
How it works: Well-graded “minus” stone compacts into a tight matrix; sharp sand screeds flat and sheds water. Some regions specify open-graded bases or hybrid systems. When in doubt, follow local best practices, especially for heavy clay or very wet sites.
- Tip 1: Set two parallel screed rails 1 inch high, then pull a straight board.
- Tip 2: Don’t walk on screeded sand; lay pavers directly from boards.
- Tip 3: Maintain that 1-inch bedding; too thick leads to settling.
07. Lay With Strings, Keep Joints Consistent
Typical paver joints run about 1/8 to 3/16 inch wide for clean lines and strong lock-up. What it is: A consistent grid that reads intentional and resists shifting.
How it works: Snap chalk lines or stretch strings to keep courses straight. Tap each paver into the sand with a rubber mallet, checking alignment every few rows. I’ve seen homeowners use wet cast pavers for a chiseled-stone look; the same rules of joint spacing and alignment apply.
- Tip 1: Start on the longest, straightest edge and work out.
- Tip 2: Keep a margin trowel handy to correct bedding dips.
- Tip 3: Cut edge pieces with a masonry saw for a tailored border.
08. Lock the Edges So They Don’t Wander
Rigid edge restraints spiked every 8 to 12 inches prevent lateral creep and joint failure. What it is: The hidden frame that keeps the patio square and tight.
How it works: Once the field is laid, install edging on the compacted base shoulder, not on loose soil. Where edging meets curves, cut the restraint back fins so it bends smoothly. In budget builds, a compacted concrete haunch can stand in, but plastic or aluminum edging stays neater and is easier to repair.
- Tip 1: Set edging slightly below the paver surface to hide it.
- Tip 2: Spike at joints and corners first, then infill the runs.
- Tip 3: Backfill and turf tight to the edge for a finished look.
09. Sweep, Compact, Then Polymeric Sand
Polymeric sand needs dry weather and light misting 2 to 3 times to cure without haze. What it is: A jointing sand that hardens to lock pavers and discourage weeds.
How it works: After a first pass with the plate compactor and a protective pad, sweep sand diagonally into joints, compact again, then top off. Mist until damp, never puddled, and avoid rain for about 24 to 48 hours. Experts recommend blowing powder off the face of pavers before wetting to avoid residue.
- Tip 1: Use a compactor pad to prevent scuffing, especially on wet cast.
- Tip 2: Work in small sections on warm, dry days.
- Tip 3: Seal only after the sand has fully cured, if desired.
10. Finish High, Feather the Lawn, Add Light
Ending 1/2 to 1 inch above surrounding turf prevents a muddy edge and improves drainage. What it is: A clean transition plus simple upgrades that extend patio use into the night.
How it works: Backfill edges and re-sod or seed so water sheds from stone to lawn. For comfort, allow at least a 12-by-12-foot area for four chairs and a small table, or 36 to 48 inches of walkway width. Low-voltage landscape lighting at 200 to 300 lumens along steps and borders makes the patio safer and more inviting.
- Tip 1: Add drought-tolerant grasses or a native pollinator strip as a soft border.
- Tip 2: Use warm 2700K LEDs for evening ambience.
- Tip 3: Budget $8 to $20 per square foot for DIY materials, region dependent.
A Moment Between the Stones
Small, well-built patios carry big lives. I’ve watched DIYers string lines at dusk while kids chase the dog through piles of crushed stone, and I’ve seen that first cup of coffee on new pavers feel like a reward. The beauty of modern landscaping isn’t perfection, it’s participation—each tamped lift a quiet vote for durability and ease.
See It Before You Shovel
Before you plant a single seed or set your first string line, map your backyard garden ideas on screen. Use ReimagineHome to preview patio layouts, sunlight paths, furniture footprints, and planting palettes—turning sketches into a living blueprint you can trust.
Visualization Scenario
Use ReimagineHome to compare a square 12x12 conversation patio versus a 13x18 dining layout, previewing slope direction, edge planting beds, and low-voltage lighting locations before a single shovel breaks ground.
FAQ: People Also Ask
How deep should a paver patio base be?
Most patios need 4 to 8 inches of compacted base plus 1 inch of bedding sand, deeper (8 to 12 inches) in freeze-prone zones or weak soils.
Should my patio sit above or below lawn level?
Finish 1/2 to 1 inch above surrounding turf and feather the lawn up to the stone to prevent a muddy trench and improve drainage.
What is the ideal slope for a patio?
A 1 to 2 percent slope, or 1/8 to 1/4 inch per foot, directs water away from structures without feeling tilted underfoot.
Can I build a paver patio by hand without a machine?
Yes, but a plate compactor greatly improves density and speed; rentals typically cost $60 to $90 per day.
Do I need fabric under my patio?
Use a geotextile separator to keep soil fines out of the base; avoid plastic sheets that trap water.
How much does a DIY paver patio cost?
Expect roughly $8 to $20 per square foot for materials depending on paver type, base depth, and regional prices.
Closing Reflection
Gardens ask us to listen—where water wants to go, what soil can bear, when stone is set right. Build your paver patio with slope, compaction, and clean edges, and the rest of your outdoor living will feel effortless. In 2025, backyard design is less about square footage and more about smart foundations that honor climate and care.
Ready to see your space evolve? Test-drive a few layouts and curb appeal planting schemes with ReimagineHome so installation day feels like déjà vu.