TL;DR
Fix uneven pavers before polymeric sand: re-screed problem zones, compact the base in 2" lifts with 2–3 passes, and lock everything with edge restraint. Most pros won’t “tune up” a half-built patio, but with the right tools and a clear plan, you can correct lippage and finish like a pro.
10 inches of excavation and 5/8-inch aggregate: what a solid DIY patio foundation really needs
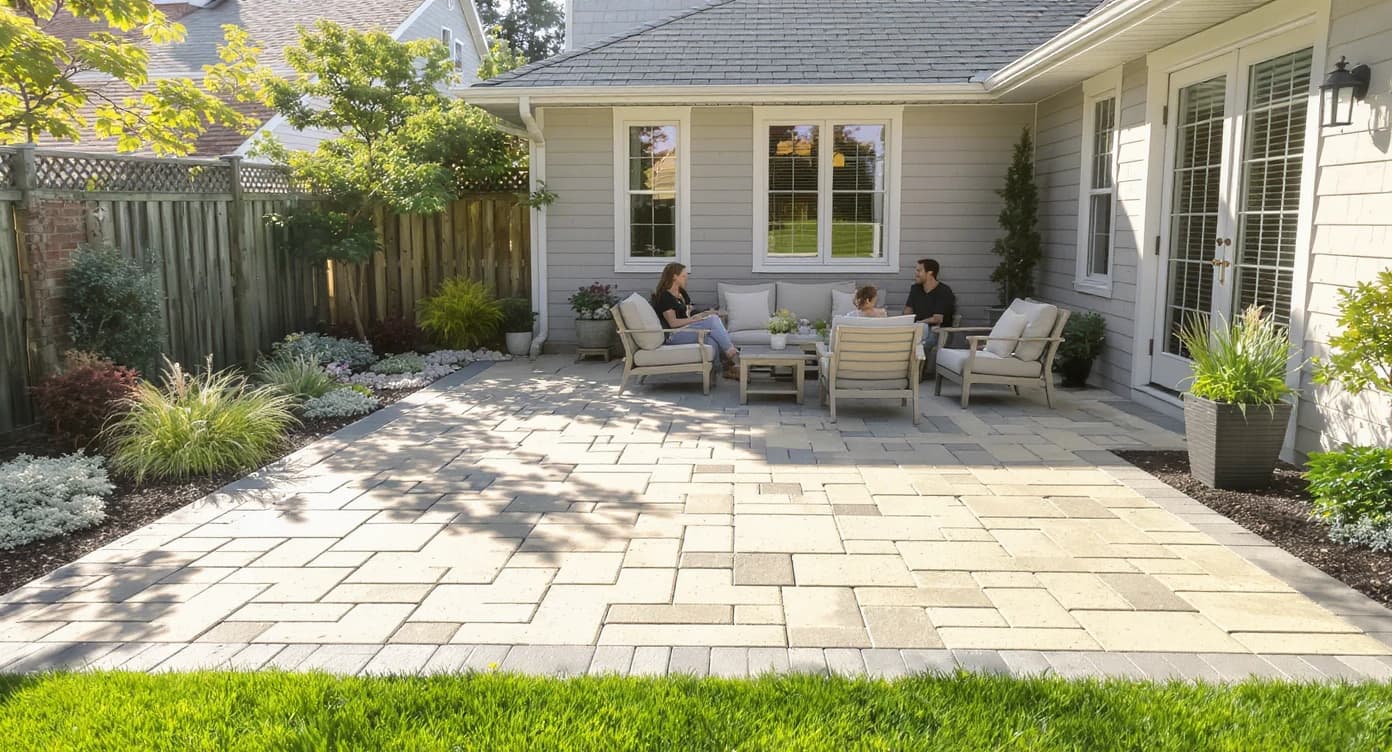
Proper base preparation and bedding help set a smooth, durable paver patio foundation.
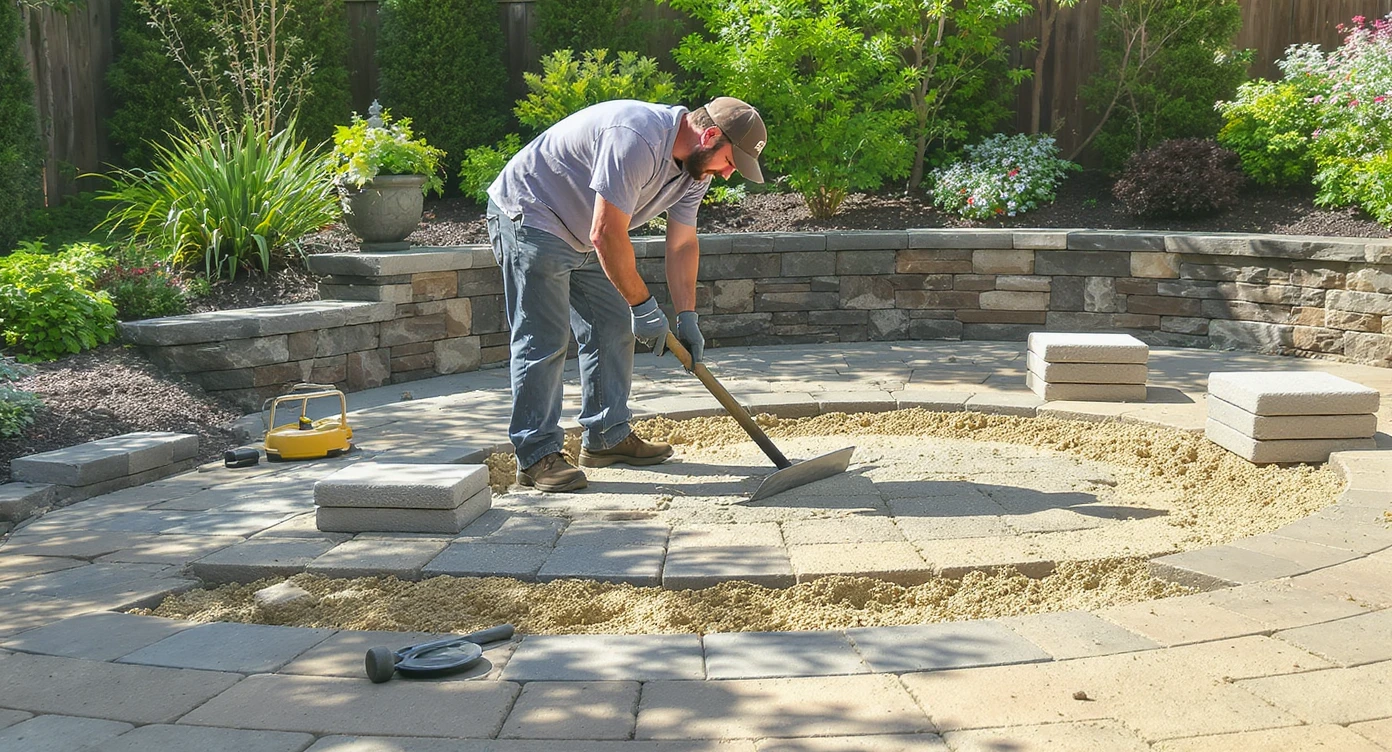
You’ve dug about 10 inches, compacted crushed limestone in lifts, and started laying a paver patio. If your slabs aren’t perfectly flat, don’t bank on them “settling” into perfection—pavers typically embed roughly 1/8 inch into bedding during final compaction, which evens micro-variations but won’t erase bigger humps or dips. The good news: you can fix uneven areas now, keep your curb appeal rising, and lock in long-term durability. At a Glance - Run 2–3 compactor passes per 2-inch base lift; keep lifts thin and even. - Re-screed bad zones; use 1-inch rigid metal conduit or a true screed bar, not flexible PVC. - Install edge restraint early to prevent spread while you work. - Compact over pavers with a rubber mat, remnant carpet, heavy cardboard, or a roller-style compactor. - Expect manufacturer thickness tolerance of about 1/16–3/32 inch; aim to correct lippage, not chase perfection. - Choose bedding: coarse sand for most patios; consider 1/4–3/8-inch washed chips in heavy freeze–thaw regions. Try your own exterior layout instantly on ReimagineHome.ai: https://www.reimaginehome.ai/?utm_source=blog
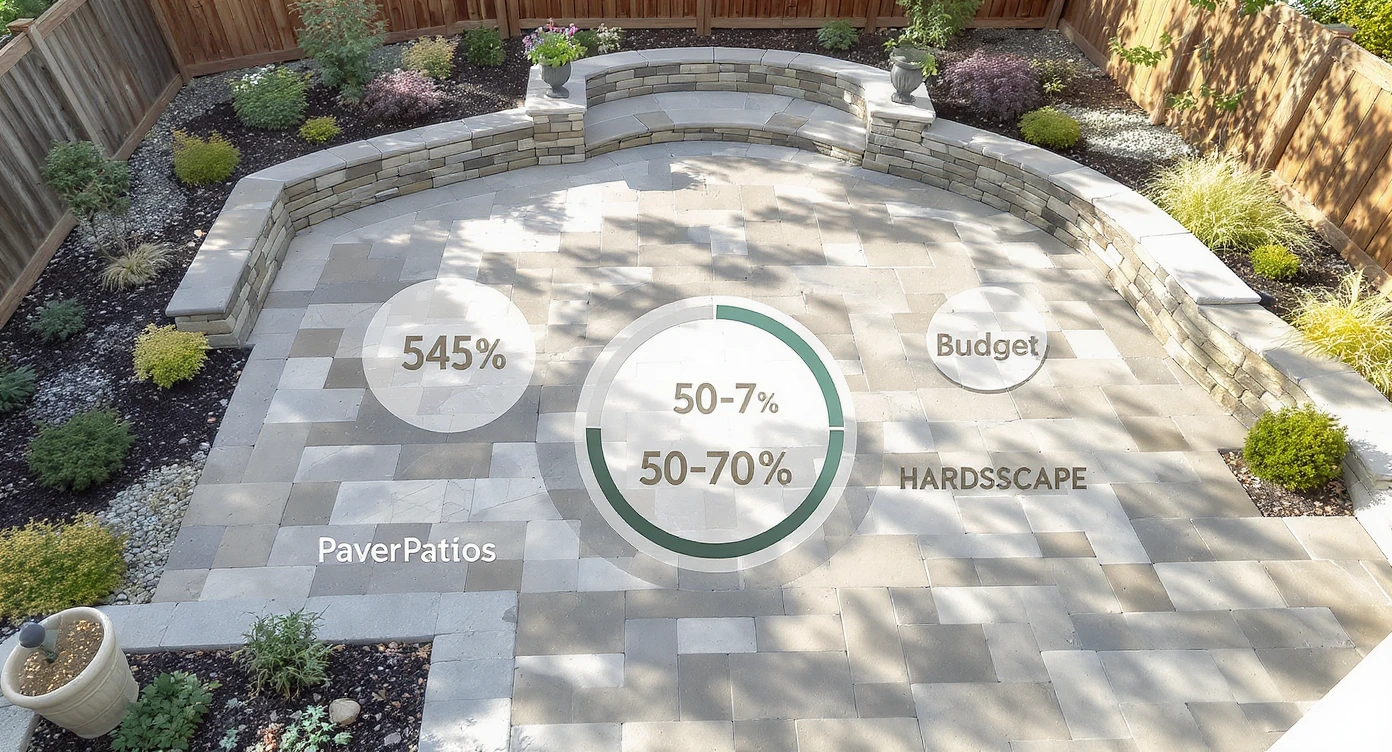
50–70% of low‑maintenance yard budgets go to hardscaping: why paver patios are evolving
Hardscaping dominates budgets as paver patios evolve into durable, stylish backyard features.
Hardscape elements—patios, walkways, seating walls—often consume the majority of low-maintenance landscape budgets because they set the structure for outdoor living. As homeowners invest in backyard makeovers and modern landscaping ideas for small front yards, a well-built stone patio pays off daily in durability and comfort. What’s changing? Two things: installation methods and expectations. Open-graded bases (crushed stone without fines) are popular for drainage, especially in regions with aggressive freeze–thaw. At the same time, AI visualization tools make it possible to test walkway ideas, patio sizes, and furniture clearances before you commit. The result is fewer re-dos and a backyard design that flows with how you actually live. If you’re midway through a patio and noticing uneven pavers, know that most pros won’t take on mid-project rescue work without reworking the base. That’s not a slight—it’s about warranties. But you’ve already done the hardest part. Pull a few feet beyond the problem areas, re-screed the bedding layer, and reinstall. It’s the smarter path to long-term stability.
Anecdote
A first-time homeowner in a clay-heavy region thought a 3/16-inch corner dip would “settle out.” It didn’t. After a weekend reset—new screed rails, early edge restraint, and a mat on the compactor—the patio felt like a finished room. The cost was a few extra hours; the payoff was years of level, creak-free gatherings.
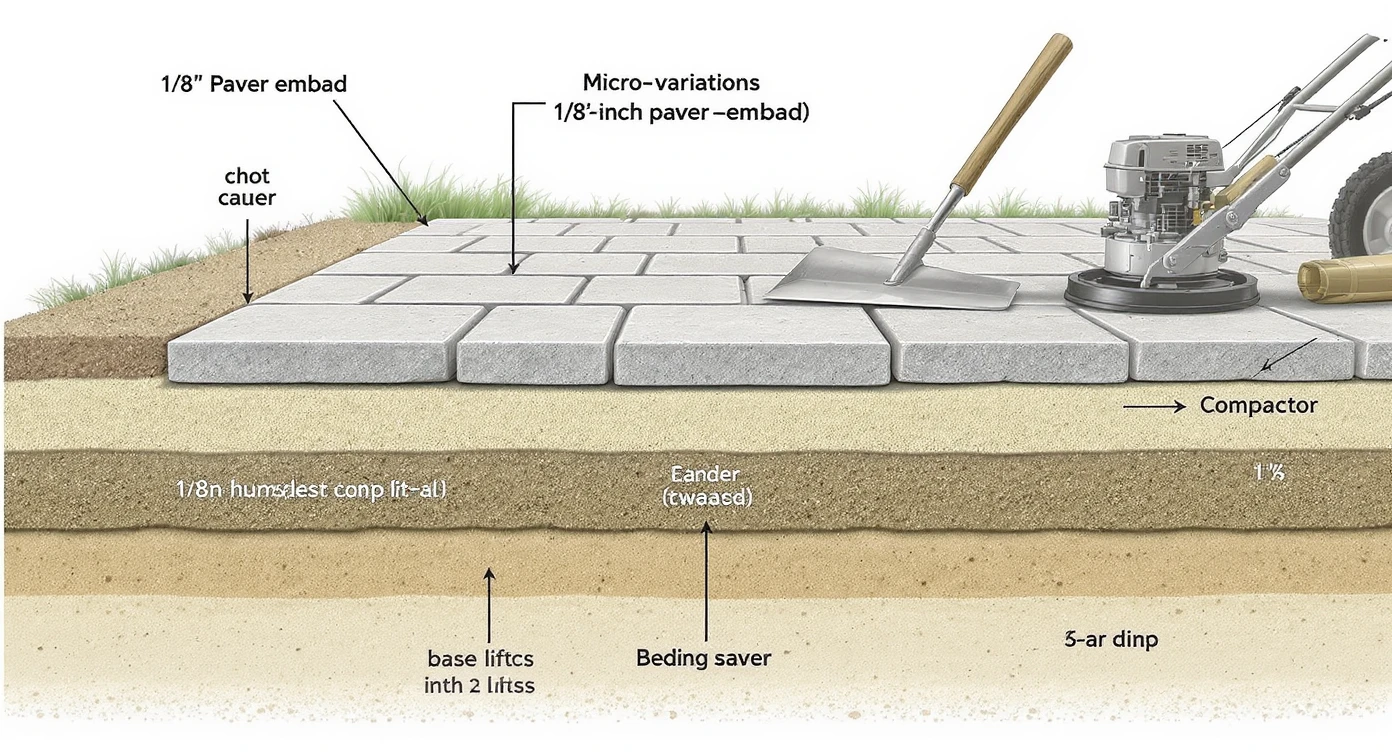
1/8-inch paver embed and 36–48-inch paths: key hardscaping practices that actually matter
Key practices ensure even embedment and proper path width for durable, level paver patios.
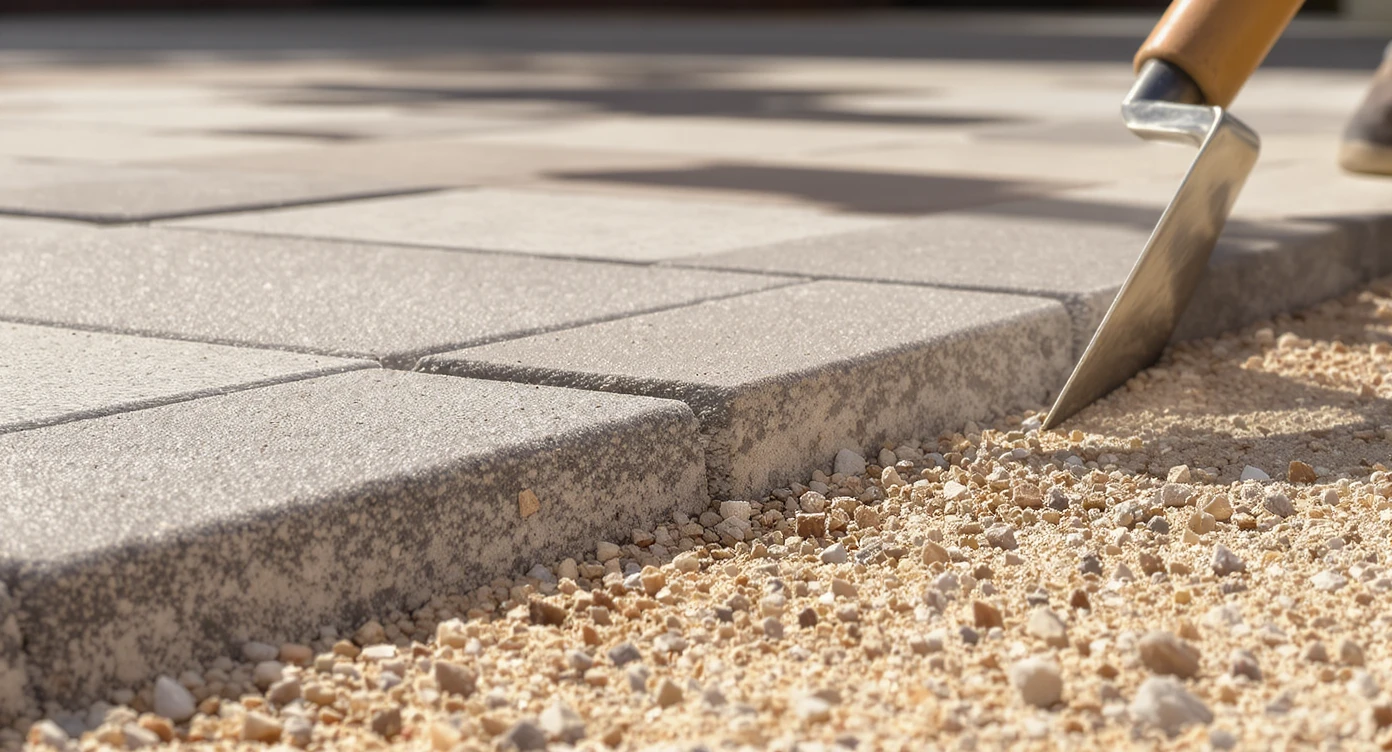
Start with the base. For most patios, 4–8 inches of compacted base (more in poor soils) set in 2-inch lifts with 2–3 plate compaction passes per lift performs well. Your 10-inch excavation gives you room for base, a 1-inch bedding layer, and the paver thickness while staying at finished grade. Bedding material: Coarse concrete sand is standard for non-permeable patios and works in most climates. In colder regions with clay soils and heavy rain, many crews successfully use 1/4–3/8-inch angular washed chips (sometimes called high-performance bedding) above an open-graded base for better drainage. Choose one path and execute precisely—both systems rely on tight compaction and clean screeding. Screeding: Avoid PVC pipe that flexes. Use 1-inch rigid metal conduit or a straight aluminum screed. Set rails to your slope, pull a stiff screed board with multiple light passes, and avoid leaning your weight on it. Re-screed any area that shows obvious highs/lows. Edge restraint: Install it early, especially along long runs, so the field can’t creep while you work. Spike it every 8–10 inches. Compaction over pavers: Pavers typically settle about 1/8 inch into the bedding during final plate compaction. Protect the surface with a rubber mat, a stall mat cut to fit, remnant carpet, heavy cardboard, or rent a roller compactor designed for pavers. Compact, sweep polymeric sand, compact again, sweep again, then mist per the product spec. Clearances and flow: For outdoor living, keep primary paths 36–48 inches wide. Around dining tables, target at least 24 inches of pull-back space per chair; 30 inches feels comfortable. These simple numbers make a stone patio feel designed, not improvised. Material tolerances: Even premium slabs can vary 1/16–3/32 inch in thickness. Focus on eliminating toe-stub lippage at transitions and steps; micro-variations fade after the final tamp and joint lock.
15 minutes to test 3 layouts: how to use ReimagineHome.ai before you set the bedding layer

Use ReimagineHome.ai to test multiple patio designs quickly before setting the bedding layer.
Before you reset a single paver, spend 15 minutes in ReimagineHome.ai to test three layouts: a tighter rectangle, a shallow L with a grill nook, or a two-terrace scheme with a single step. Visualizing hardscaping design at full scale helps you decide where precision matters most—seating zones, door thresholds, and walkway entries—and where you can relax. - Upload a photo of your yard and set your target patio size. Try a 12x16 for a compact lounge or 14x20 if you entertain. - Swap materials: tumbled concrete pavers, large-format modern slabs, or a stone patio look. Check how joint lines align with doors and seating. - Test edge restraint lines and soldier courses to see how borders visually tighten the field. - Drop in low-voltage outdoor lighting; 2700–3000 K usually looks warmest outdoors. See spill, glare, and step safety. Explore more guides: - Choosing stone patio materials for durability and style: https://www.reimaginehome.ai/blogs/stone-patio-materials-guide?utm_source=blog - Outdoor lighting design basics at 2700–3000 K: https://www.reimaginehome.ai/blogs/outdoor-lighting-design-2700k-vs-3000k?utm_source=blog - Front yard walkway widths and slope that feel right: https://www.reimaginehome.ai/blogs/front-yard-walkway-ideas-widths-slope?utm_source=blog
3 fixes under 2 hours each: real‑world DIY patio wins you can replicate
Simple patio fixes like re-screeding sinking sections are DIY projects under two hours.
A homeowner in the Midwest pulled a 6x8-foot section where a corner sank. They re-screeded with 1-inch rigid conduit, compacted the base with three passes, reset the field, and the final tamp erased the remaining 1/8-inch wobble. On the coast, a DIYer with 75-pound slabs rented a vacuum lifter for the day, then used a simple scissor-style slab grab to pop isolated pavers. They installed edge restraint before rework; with the perimeter locked, re-screeding was faster and flatter. In the Northeast, another crew switched to 1/4-inch washed chips over an open-graded base due to heavy freeze–thaw. They compacted, swept polymeric, compacted again, and had no joint drop a year later. The takeaway: pick a system that suits your soil and climate, then execute by the numbers.
Visualization Scenario
Upload a photo, place a 14x20 patio flush to the back door, and test two options: a soldier-course border that tightens the field versus a no-border modern slab layout. Add warm 2700 K path lights and a corner fire pit, then rotate furniture to confirm 36–48-inch walkways. Download the favorite render and use it as your on-site plan.
9 fast answers to first‑time paver patio questions
Q1. How much lippage is acceptable on a paver patio? A. Aim for less than 1/8 inch between adjacent pavers in pedestrian areas; correct anything that catches a toe. Q2. Will final compaction level an uneven patio? A. It can seat pavers about 1/8 inch into bedding and smooth micro-variations, but it won’t fix major highs/lows—re-screed those zones first. Q3. Should I use bedding sand or washed chips? A. Coarse sand is standard for non-permeable patios; 1/4–3/8-inch angular washed chips are common in heavy freeze–thaw regions over open-graded bases. Choose based on climate, soil, and your base type. Q4. How many compactor passes do I need? A. Run 2–3 passes per 2-inch lift on the base, and at least two passes over the pavers (with a protective mat or roller) before and after sweeping polymeric sand. Q5. Can I compact over pavers with a steel plate? A. Yes, but protect the surface with a rubber mat, stall mat, heavy cardboard, or rent a roller compactor designed for pavers. Q6. What if my screed pipes flexed? A. Replace with 1-inch rigid metal conduit or an aluminum screed and re-screed the affected areas. Multiple light pulls beat one heavy push. Q7. When should I install edge restraint? A. As soon as a border run is set; spike every 8–10 inches. Early restraint prevents the field from spreading as you work. Q8. How long can bedding material sit exposed? A. Minimize exposure; rain can crater sand or migrate fines. Work in manageable sections and cover if weather threatens. Q9. Should I call a pro to “fix” my halfway patio? A. Many won’t warranty a tune-up without rebuilding the base. If your base is sound, pull back problem areas, re-screed, and finish—you’ve already done the hardest part.
1 click to compare stone, steps, and seating: visualize your patio’s next chapter
One click, three versions, zero second thoughts: ReimagineHome.ai lets you see the difference between a border and no border, a single step or a gentle terrace, warm pavers or cool-toned stone, all before you spend another weekend moving 75-pound slabs. When you can picture the patio as an outdoor room—with right-sized walkways, seating clearances, and lighting—the build becomes a series of confident, well-sequenced steps. Alt: “Twilight view of a large-format stone patio with crisp border, low-voltage lighting at 2700 K, and a grill nook, visualized in ReimagineHome.ai.” Caption: “ReimagineHome.ai helps you test patio shapes, materials, edge restraint lines, and lighting before you commit.” Alt: “Close-up of a paver edge restraint spiked at 8-inch intervals beside a re-screeded bedding layer.” Caption: “Early edge restraint keeps your field from creeping while you reset uneven pavers.” If you’re staring at a few uneven corners, take a breath, pull back several feet, re-screed, and finish strong. Then enjoy the first coffee on a patio that feels level, solid, and entirely yours.