
TL;DR
Real estate image enhancement uses AI to correct exposure, color, contrast, and verticals so photos look clear, bright, and consistent across the set. It’s the fastest way to address common complaints like inconsistent white balance, blown windows, or dark twilight interiors — and a practical answer to long-tail needs like how to fix tilted real estate photos. If you’re ready to test a tricky file, upload it to ReimagineHome.ai and try the image enhancement workflow today: https://www.reimaginehome.ai/image-enhancement?utm_source=blog. You’ll get MLS-ready results without reshooting.
The Real Cost of Showing Rooms “As They Are” Online
Accurate exposure and neutral whites make listing photos inviting and trustworthy for buyers.
Image enhancement is the process of correcting exposure, color, contrast, and perspective so real estate photos look clean, accurate, and inviting. It matters because buyers judge in seconds, and small issues — purple-tinted “whites,” uneven brightness, or leaning walls — read as low quality. At a glance:
- Results first: brighter rooms, neutral whites, clean contrast, straighter lines, and skies that match the story.
- Realism: keeps materials, views, and finishes believable — no gimmicky oversaturation.
- Speed: batch-enhance a whole set in minutes instead of reshooting.
- Cost: far cheaper than a second shoot or hand-retouching every frame.
- Workflow: upload, enhance, review, export for MLS and portals.
- ROI: better click-through on hero images and fewer “quality” objections from clients.
- Peace of mind: batch consistency across kitchens, baths, and exteriors.
Why This Visual Problem Hurts More Than You Think

Twilight photos rank high; precise color and light correction boost listing appeal.
Twilight-style exterior photos frequently rank among the most clicked images in a listing carousel — but only when the light and color balance feel natural. When whites go lavender, windows blow out, or interiors look like nightfall, buyers scroll past because the space feels dim, smaller, or “not premium.” Here’s how the pain shows up: - Scroll behavior: A dull hero image gets fewer taps; a crisp, contrasty exterior or a bright kitchen holds attention. Image enhancement nudges highlights and shadows so key features pop without looking fake. - Buyer perception: Inconsistent white balance across a photo set feels messy. Neutralizing whites and aligning color temperature gives a professional, trustworthy look. - Agent confidence: When every room has even brightness and straight verticals, agents spend less time explaining the photos and more time booking showings. That perfect-but-empty condo that no one can picture living in is one problem; “bad photo quality” is another. The second is faster to fix — and often the real issue behind slow engagement.
Anecdote
The backyard listing shot where the grass looks tired and the sky looks flat? A quick enhancement warmed the siding, neutralized the lawn’s neon tint, and evened the twilight sky — the agent swapped it to the first slot and click-through jumped immediately.
What Image Enhancement Actually Is (In Plain Language)
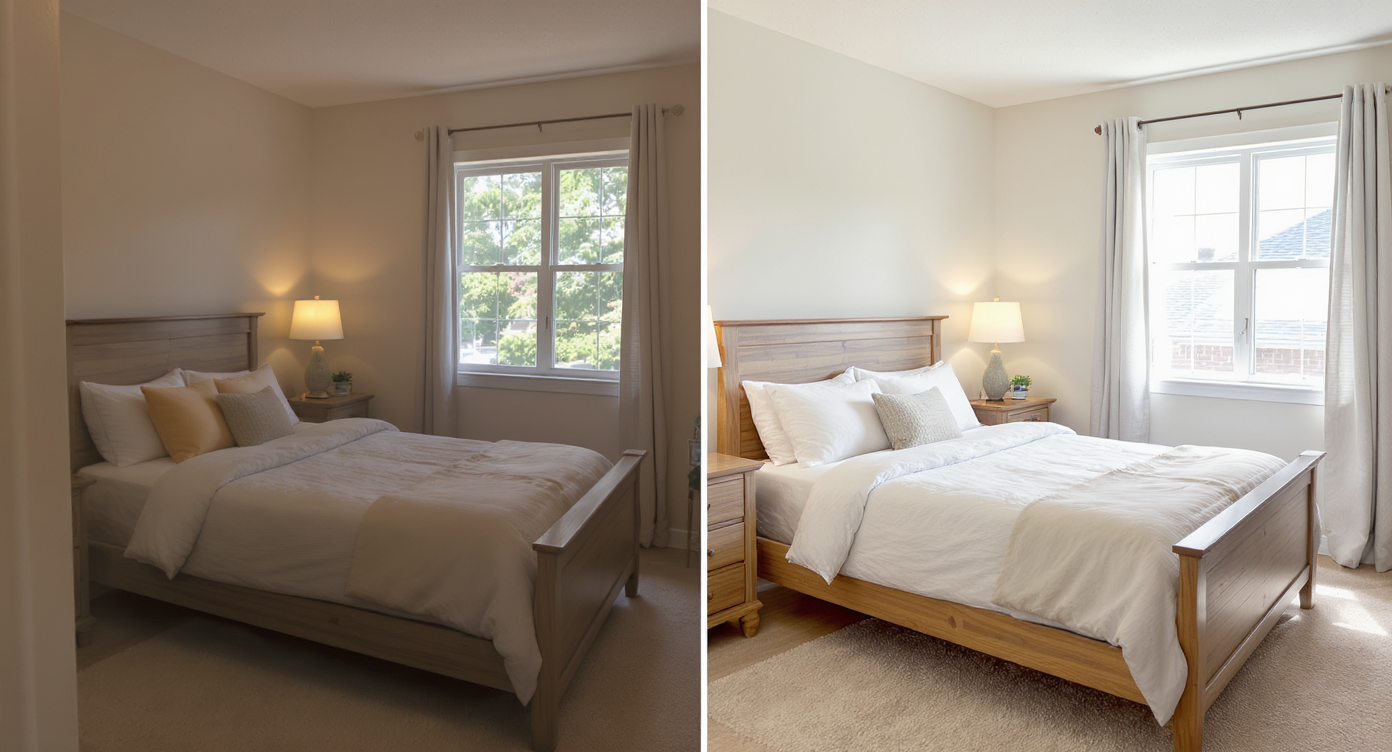
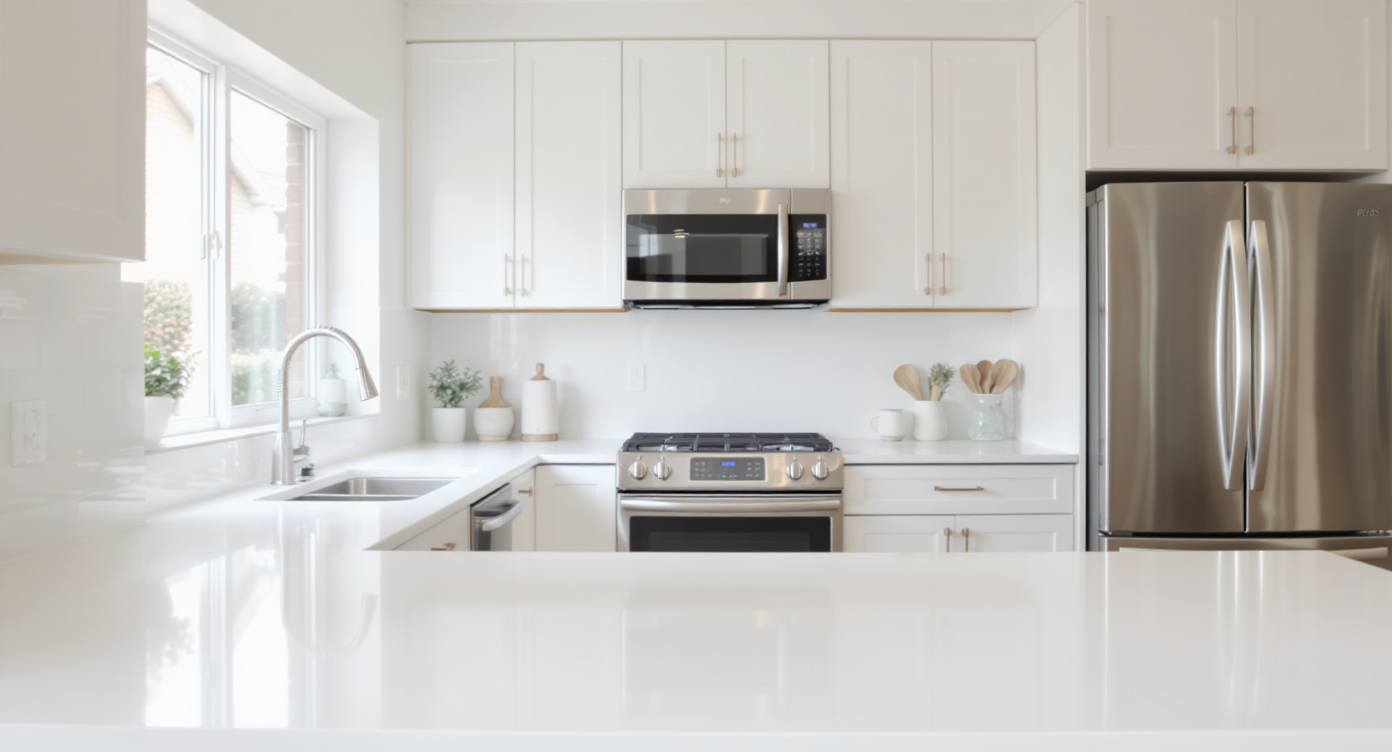
Image enhancement corrects color, contrast, and perspective for trustworthy photos.
MLS and portal guidelines often recommend high-resolution images, ideally above 3000 pixels on the long edge — and image enhancement is the fastest way to make those pixels earn their keep. In plain language, image enhancement is AI-powered correction for exposure, color casts, contrast, noise, and perspective so your real estate photos look consistent and clean. You provide a photo (interior, exterior, day, or twilight). The output is a refined, MLS-ready image with balanced whites, lifted shadows, controlled highlights, and straighter lines. If you need a turnkey workflow, try ReimagineHome.ai’s image enhancement tool; it’s designed to fix dark interiors, tame blown windows, reduce color shifts, and normalize the look of a full set in minutes.
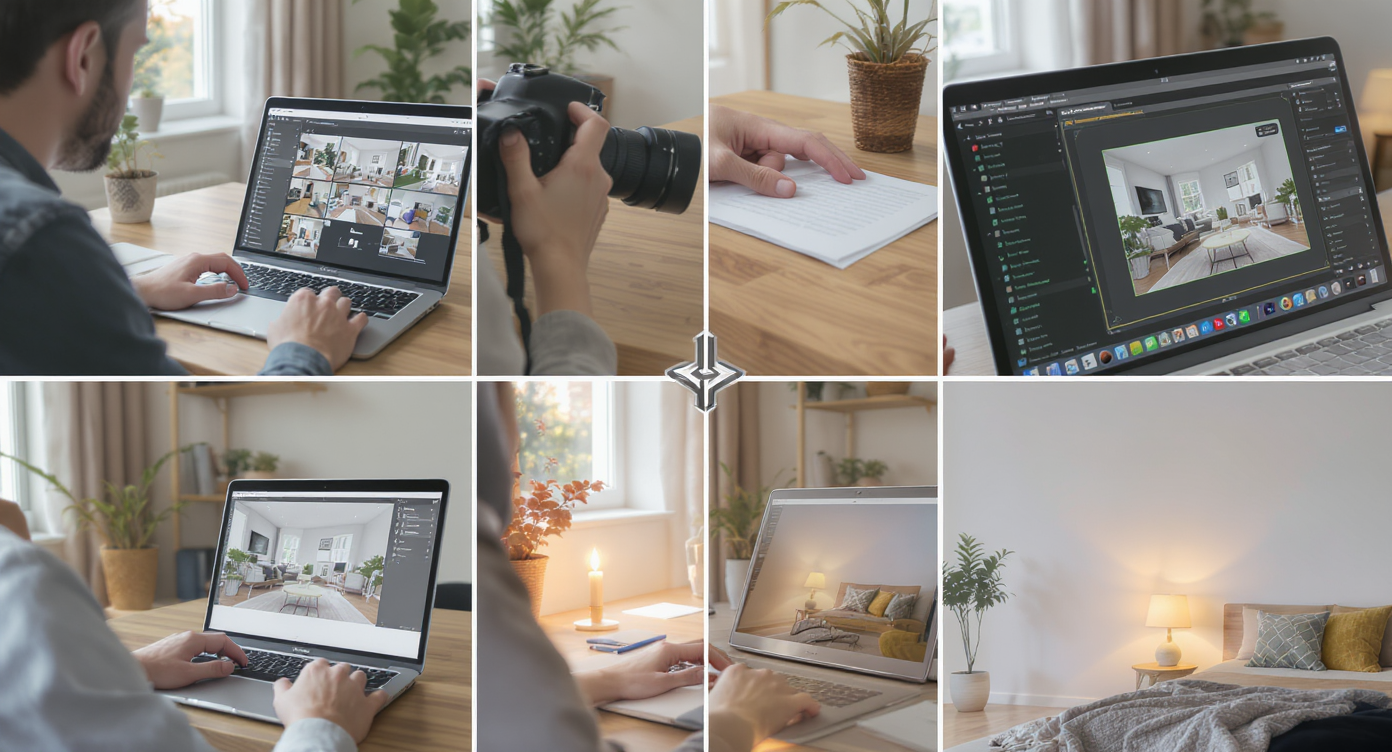
How Image Enhancement Works Step by Step
Simple workflow: pick, enhance, and export photos for fast, consistent results.
Good enhancement starts with a good source file and a simple workflow. 1) Choose the right photo(s) - Prioritize compositions with level horizons and minimal ceiling; keep verticals close to true in-camera to preserve resolution when straightening. 2) Upload your images - Drag and drop to ReimagineHome.ai. For best results, use images at 3000–6000px on the long edge. 3) Select Image Enhancement - Pick the tool and start with balanced defaults. It will correct exposure, color, and contrast; then you can fine-tune. 4) Set intentions - Aim for neutral whites (no purple or green cast), realistic saturation, and window detail that doesn’t feel HDR-y. If you need extra clarity on small images, run the result through ReimagineHome.ai’s Upscale Resolution to boost sharpness for MLS. 5) Generate and review - Check straight lines in cabinets, door frames, and shower glass. Compare a few frames side-by-side to ensure white balance is consistent across the set. 6) Refine and export - Tweak brightness for rooms that skew dark, slightly warm kitchens/baths for a welcoming feel, and export at your portal’s preferred aspect ratio/size. Constraint to remember: enhancement can’t fully fix tiny, blurry files or extreme tilts; give the AI a level, well-exposed base whenever possible.
Tips and Tricks for More Realistic Results

Realistic staging and smart edits enhance the home's true appeal and buyer engagement.
Even simple clutter removal can make key features easier to spot, but start with a realism rule of thumb: if a buyer would notice it on a showing, don’t edit it out; fix tone, color, and clarity instead. Practical tips: - Lock in neutral whites: Whites should be white, not lavender or green. Subtly desaturate “white” surfaces to remove color cast and keep finishes honest. - Brighten without blowing: Lift shadows and midtones to make interiors feel daylight-bright, but protect window edges and glossy backsplashes from halos. - Keep saturation in check: Oversaturated grass and ceilings read “cheap.” Favor a clean, modern palette over punchy colors. - Straighten photos first: Correct verticals early so enhancement doesn’t amplify distortions. It’s a quick credibility win for bathrooms, kitchens, and facades. - Match skies across frames: For twilight sequences, keep the blue-hour tone consistent across exteriors and through windows. Consistency sells the story. - Standardize camera height: When heights vary, rooms feel disjointed. Enhancement helps, but a consistent viewpoint across a set looks more premium. - Prep for MLS sharpness: If an image feels a touch soft or small, finish with the Upscale Resolution tool to boost clarity before upload. These small, repeatable moves answer the real question behind “the photo quality is bad”: “Can you make the set feel brighter, straighter, and more consistent?”
Visualization Scenario
Picture the same kitchen three ways: harsh overheads, purple-leaning “whites,” and a dim window; then the AI-enhanced version with straighter cabinets, neutral walls, softened highlights, and a subtle lift in mids. It reads as twice as expensive — and you didn’t move a single light.
FAQ
Can AI really fix dark interiors from a late shoot?
Yes — image enhancement can lift shadows and rebalance color so low-light interiors feel brighter and more natural. For extreme cases, it improves visibility but can’t replace true daytime light.
How do I fix tilted or leaning walls in listing photos?
Use perspective correction to straighten photos before enhancing. ReimagineHome.ai aligns verticals so rooms feel larger and more credible, a common need in real estate photo enhancement.
What resolution do I need to get good results with AI edits?
Aim for at least 3000px on the long edge for MLS and portals. If your originals are smaller, enhance first and then use Upscale Resolution to lift clarity without artifacts.
Will AI image enhancement make my photos look fake?
Not if you keep whites neutral, saturation moderate, and window detail believable. The goal is clean and accurate, not stylized.
Is image enhancement faster than reshooting?
For common issues like color casts, dim rooms, or slight tilt, yes. You can batch-fix a set in minutes with ReimagineHome.ai and publish the same day.
Visualize Your Next Listing (or Project) Before You Commit
Previewing a cleaner, brighter version of your photos before you reshoot can save hours and client goodwill. Image enhancement is like a rehearsal for your listing — a way to refine the light, straighten the frame, and remove the quiet distractions that undermine trust. If you want to fix dark rooms, purple-tinted “whites,” or leaning lines without starting over, run your next set through ReimagineHome.ai’s image enhancement. You’ll publish with more confidence, spend less time defending “quality,” and tell a clearer visual story faster.