Why Poorly Placed Shutoff Valves Frustrate Homeowners—and How to Avoid DIY Plumbing Regrets
TL;DR
Poorly positioned shutoff valves and home plumbing mishaps can quickly derail even the smallest bathroom updates, leaving homeowners frustrated and sometimes facing unexpected repairs. Many of these headaches trace to common DIY mistakes or outdated materials, often hidden from sight until a project begins. Knowing what to look for and how to plan upgrades with foresight makes all the difference when aiming for functional, hassle-free improvements.
Hidden Plumbing Pitfalls: An Unexpected DIY Reality
Inside an open bathroom vanity: blocked shutoff valve, tangled supply hoses, and outmoded plumbing highlight common DIY frustrations.
Bathroom upgrades are supposed to be straightforward—switching out a faucet, updating supply lines, maybe even replacing a valve. Yet, opening up a vanity often reveals a different story. Valves are blocked by drain pipes, supply hoses look decades old, and what seemed like a twenty-minute fix can quickly spiral into hours of head-scratching. These moments crystallize a simple truth familiar to experienced remodelers: the smallest details in utility placement underpin the entire function and longevity of any remodel. While most homeowners focus on finishes and faucets, it’s frequently the hidden, utilitarian components that cause the most frustration. Shutoff valves that are hard to reach, materials that outlasted their prime, or homemade workarounds from previous generations often resist the gentle optimism of the weekend DIY spirit. The real value lies in discovery—learning how to spot and resolve these pain points before they turn into regrets.
-
When the Valve Won’t Turn: The Anatomy of a Frustration
A cramped bathroom cabinet reveals a shutoff valve jammed behind pipes, illustrating how poor placement leads to plumbing frustration.
Many homeowners begin a simple bathroom refresh, only to encounter a valve situated awkwardly behind a drain pipe or squeezed into a corner. The original intent—usually, making plumbing accessible for repairs—can vanish under poor planning or hasty installation. This misplacement ripples forward in time: future homeowners must use pliers instead of fingers or remove panels just to shut off water during emergencies. Some discover handles that can’t fully rotate or valves that seize after decades of neglect, requiring the entire home’s water to be shut off for minor updates. A classic scenario unfolds when replacing a bathroom faucet: you reach for the shutoff, but a tangle of pipes leaves no room for the handle to turn. This realization typically comes only after crawling under the sink, flashlight in hand, after already buying new fixtures. Beyond annoyance, these missteps highlight how small misalignments can multiply problems down the line—especially in homes with layers of history from multiple owners.
Expert Insight
A friend once purchased a vintage bungalow, thrilled by its character but sober about its quirks. During the first plumbing repair, he discovered a shutoff tucked directly behind a welded drain, accessible only with a thin-walled socket wrench. After much frustration and a hallway puddle, he replumbed the cabinet with all fresh quarter-turn valves. His lesson: always check accessibility before finalizing any install.
-
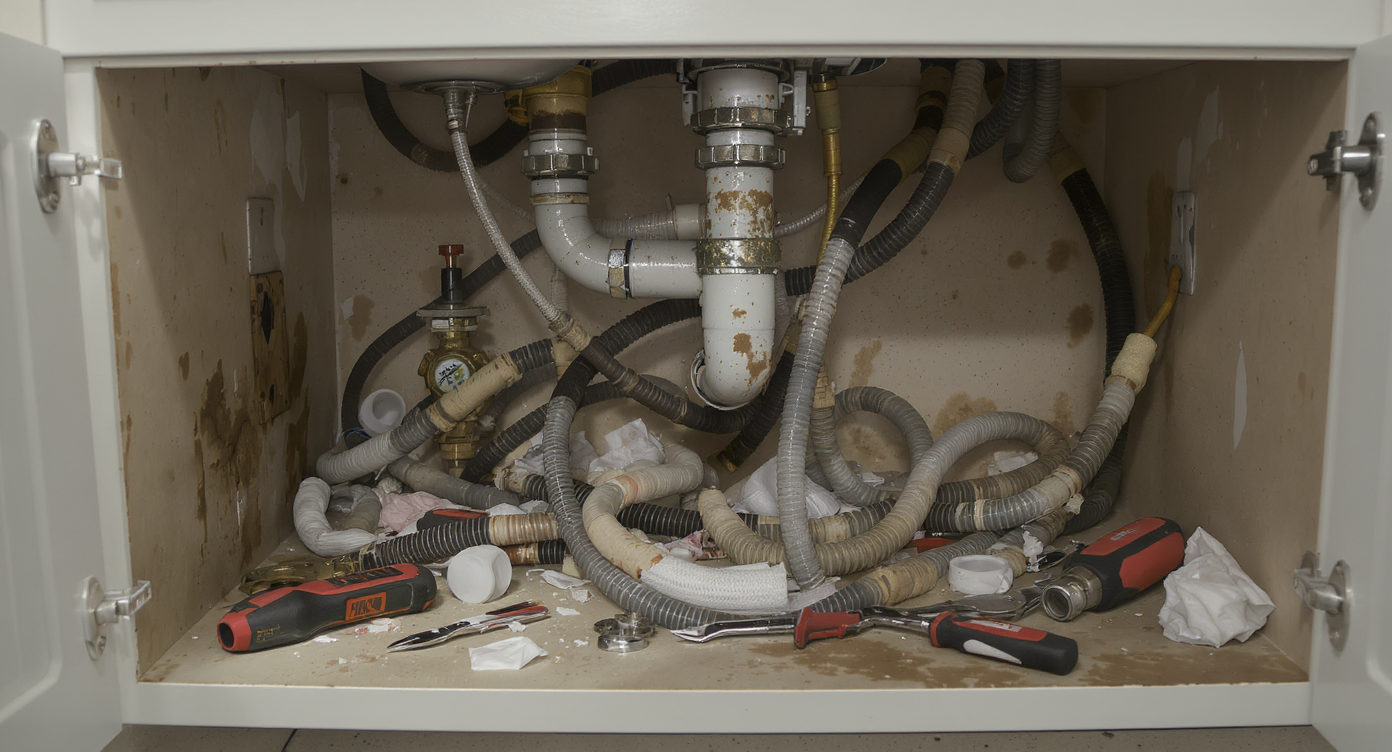
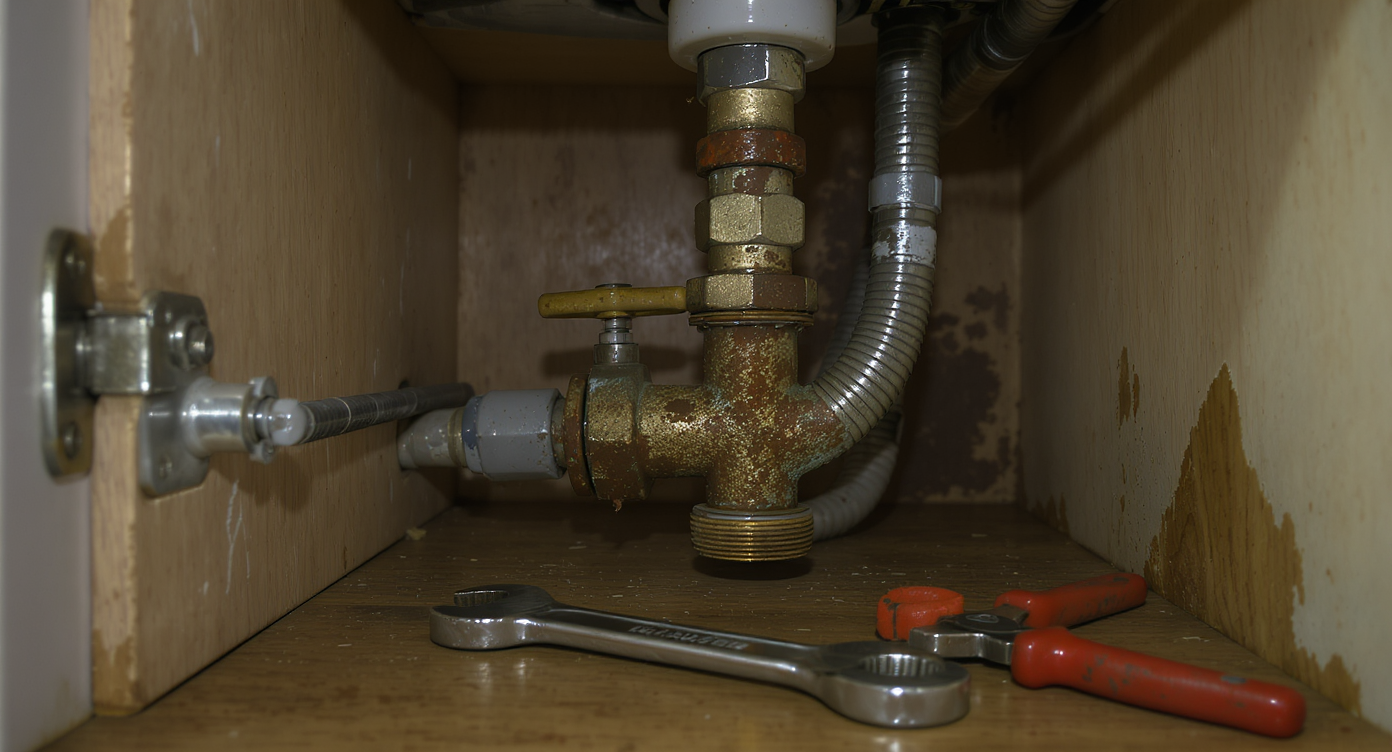
DIY Overconfidence and Legacy Shortcuts
Confined under-sink plumbing reveals blocked shutoff valves and improvised supply lines—common results of legacy DIY shortcuts.
Homeowners often inherit the quirks of previous renovations—sometimes pragmatic, sometimes perplexing. Stories abound of makeshift fixes: valves blocked by oddly angled drains, supply lines jury-rigged with flexible pipe, or plastic connectors well past their lifespan. The urge for a quick solution rarely results in a better one, and it’s not unusual to find a previous owner’s improvisation turning a simple task into a puzzle. Designers and remodelers alike see the results of short-term thinking: handles installed where they can’t swing freely, pipes run without regard for future access, or the use of cheap, hard-to-turn valves instead of smoother, quarter-turn ball valves. In these moments, a little extra planning—sometimes just a few inches—could have saved hours and money. Even professional workmanship isn’t immune from such issues, particularly when the focus is on rapid completion rather than careful consideration.
-
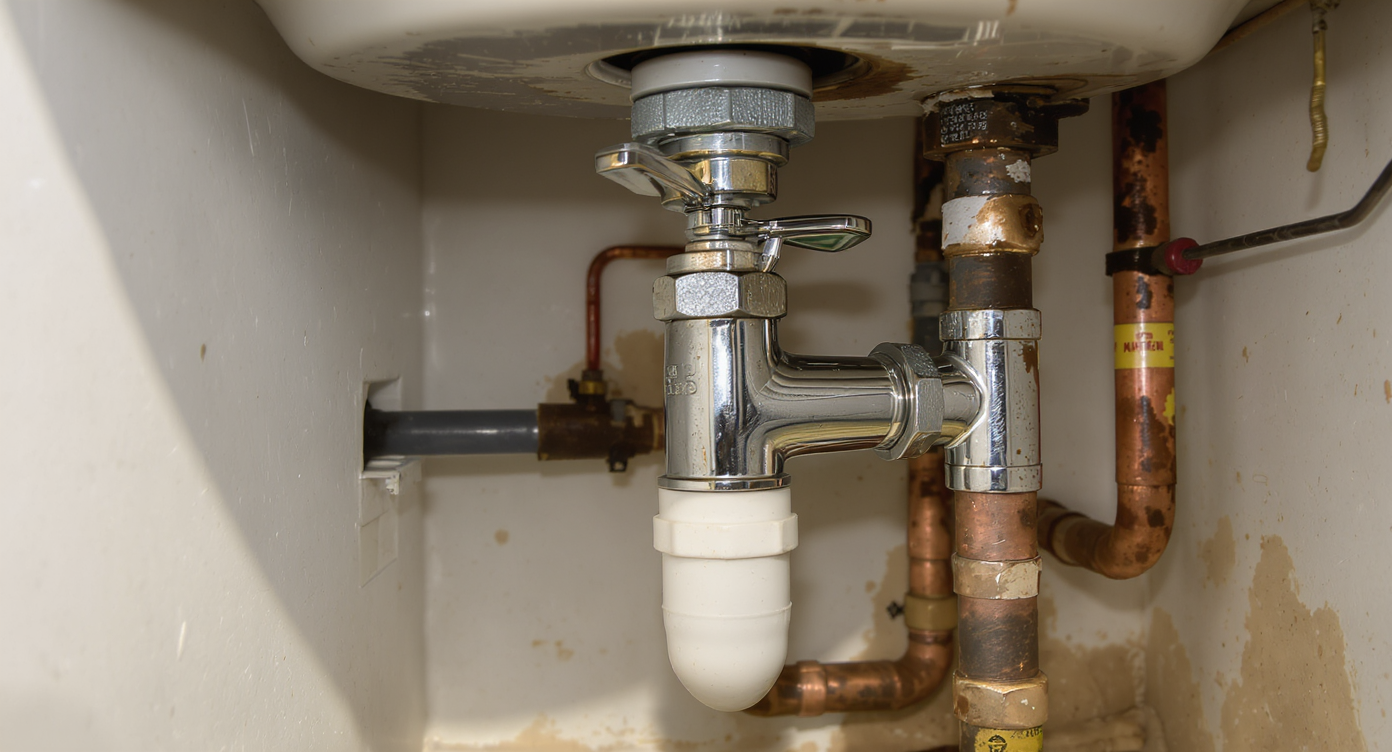
The Cost of Small Mistakes: More Than Minor Inconvenience
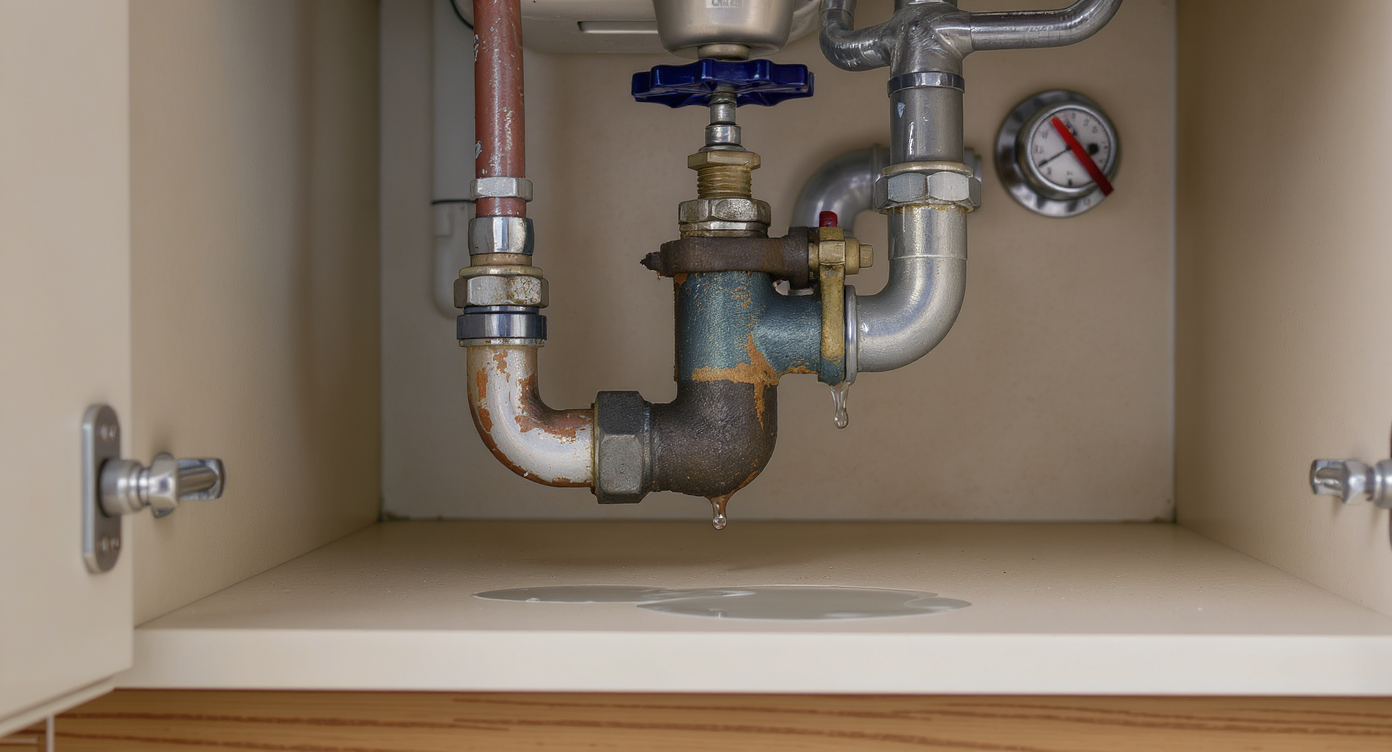
Neglected, aging shutoff valves under sinks can leak and cause costly water damage—often only discovered too late.
When overlooked, simple errors like valve placement cascade into much larger consequences. Not being able to shut off water at the fixture means working with the main shutoff, disrupting the whole house. If anything goes wrong—like a supply line rupture—delays in response can cause significant water damage. There is also a practical cost: older valves are notoriously susceptible to leaks once they are finally twisted after years of dormancy. Every home improvement project, no matter how minor, reveals hidden risks if previous work was rushed or ill-thought-out. Plumbers often suggest inspecting shutoff valves annually, but many homeowners are unaware until forced to intervene themselves—sometimes right before a holiday or major event. These seemingly small errors are also among the top diy home improvement mistakes homeowners regret.
-
Anecdote: An Unexpected Plumbing Adventure
An awkwardly placed shutoff valve behind a crooked drain pipe complicates what was meant to be a quick faucet upgrade project.
"It began as a weekend project—replace an old faucet with a sleek, modern fixture. But halfway under the cabinet, I realized the shutoff valve handle was wedged behind a crooked drain pipe. There was no way to turn it off by hand. After several minutes of improvising with pliers and some gentle cursing, I managed to clamp the old valve shut, only to discover that the supply line was original to the house—aged, brittle, and liable to break at any pull. The quick project became an afternoon of replacing valves and supply lines, learning first-hand that what you can't initially see can turn a half-hour refresh into a masterclass in patience."
-
Common Mistakes to Avoid
Inside a bathroom vanity, outdated shutoff valves and supply lines are awkwardly positioned, making access and maintenance difficult.
Several recurring pitfalls surface in remodel projects: failing to check shutoff valve accessibility before planning a fixture swap, using outdated plastic supply lines prone to failure, and neglecting to replace old multi-turn valves with modern quarter-turn options. Another frequent DIY error is forgetting to test turnability of handles after adjusting adjacent plumbing or drain lines. These oversights can all be traced to a lack of holistic thinking during project planning. A practical example: a homeowner upgrades their vanity without considering the positioning of the supply stub outs. Rather than rerouting a slightly off-center drain or supply pipe, they adapt by bending or squeezing components in—and later regret the result when a quick shutoff becomes impossible. Attention to basic access and usability can prevent countless headaches.
-
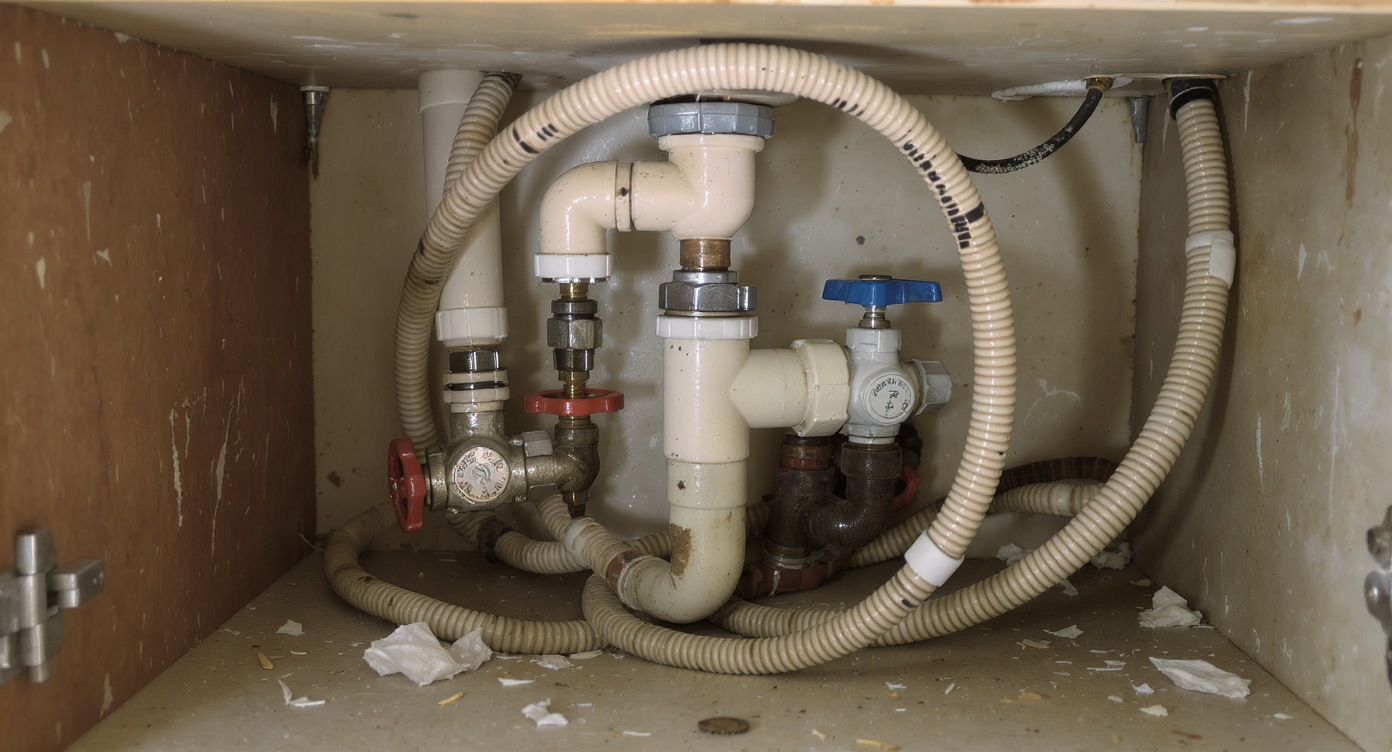
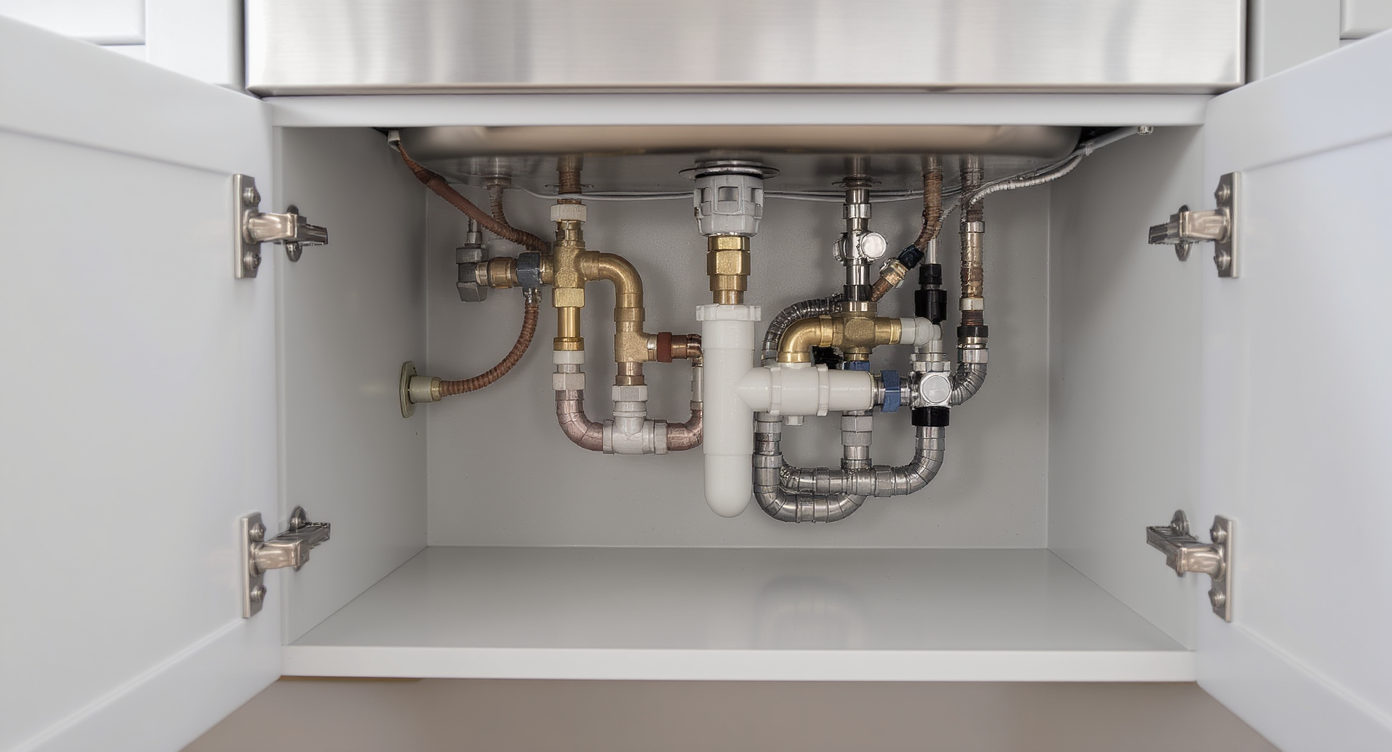
Tips and Insights from Remodel Experts
Organized, accessible under-sink plumbing with upgrade features like quarter-turn valves and offset connectors for easy maintenance.
Professional plumbers and designers advocate examining the entire setup before making any change. Before replacing a fixture, test the shutoff’s operation and check for signs of corrosion or stuck handles. If the valve is difficult to access or appears aged, plan to replace it as part of your upgrade—using a quarter-turn model for durability. Don’t hesitate to reroute supply lines or adjust piping to ensure handles have open space to pivot. Inspect adjacent drain pipes for potential obstructions and consider if a low-profile valve or offset connector would simplify future maintenance. Consulting the installation guides for new fixtures helps anticipate possible interferences that might not be obvious until you’re mid-project. And, as countless anecdotes suggest, if you sense you’re beyond your depth, it’s always wise to call in a professional rather than risk a cascading problem.
-
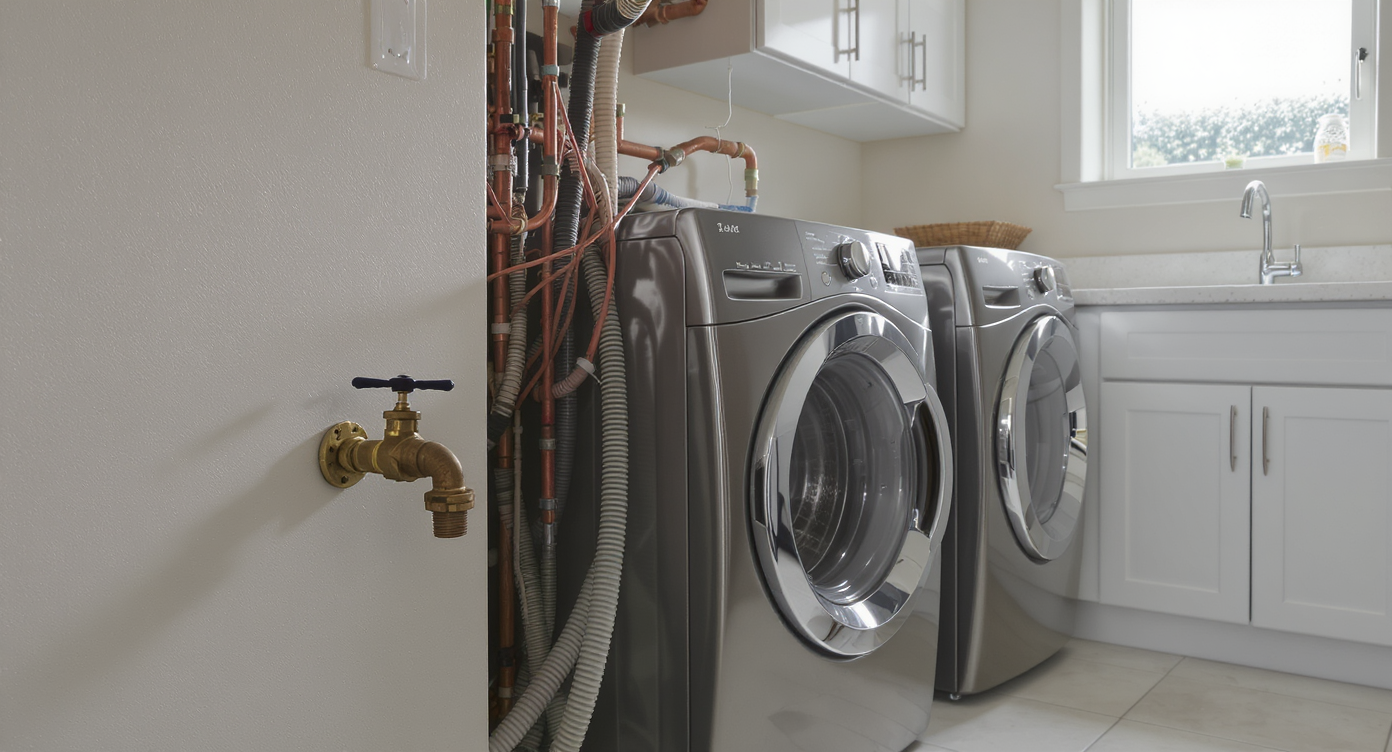
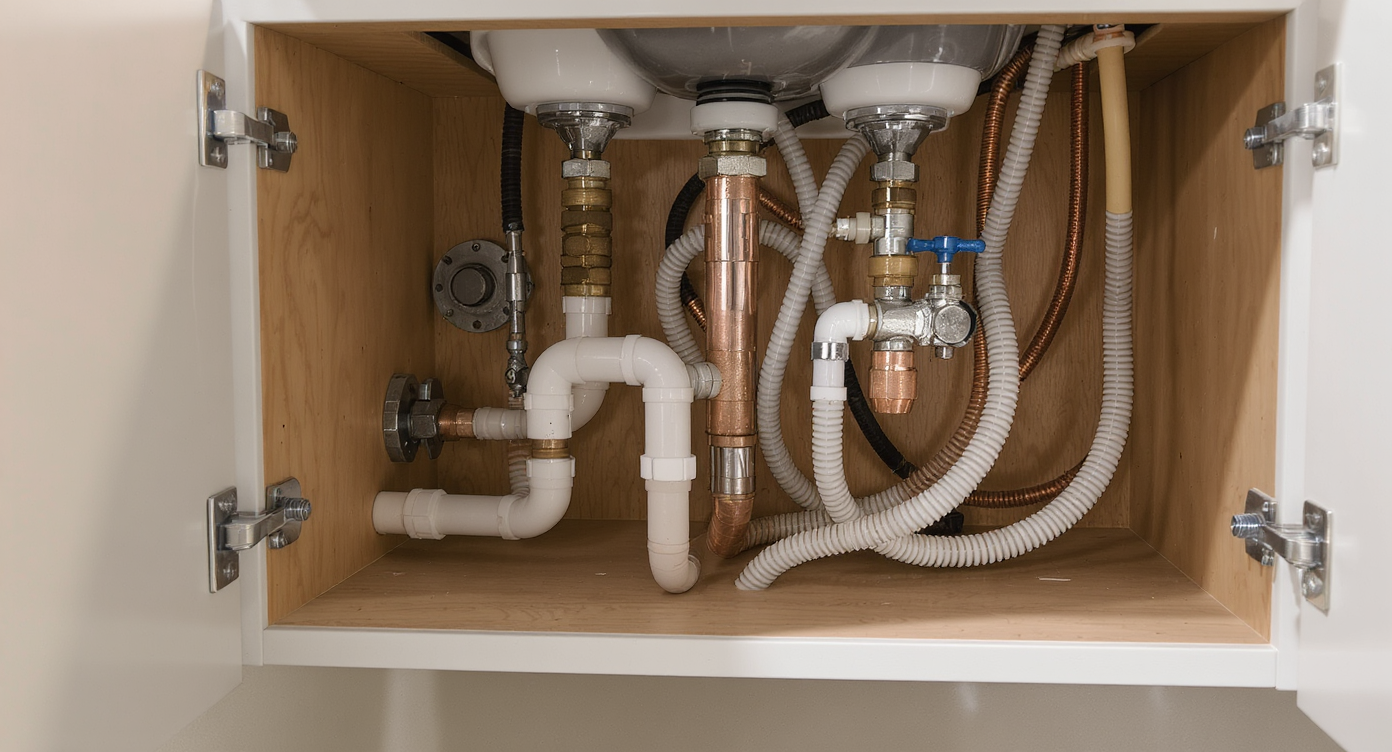
Integrating What You’ve Learned Into Future Designs
Thoughtfully designed kitchen plumbing with accessible brass shutoff valves ensures stress-free maintenance and long-lasting reliability.
Forward-thinking design pays dividends, whether you’re tackling a weekend upgrade or planning for a full-scale remodel. Visualize the finished installation and walk through each maintenance step: can you reach and turn every valve? Are all connection points accessible, or do you need a specialized tool just to tighten a nut? These checkpoints matter not only for you, but for anyone who may service the space in years ahead. For those eyeing bigger changes, consider the lifespan of all parts—not just the visible ones. Brass or stainless steel components withstand the passage of time better than plastic, while ball-type shutoffs offer confidence in emergencies. If renovating a space with a checkered DIY past, don’t be surprised if a simple swap snowballs into extensive updates. Treat these bumps as upgrades to your home’s future reliability.
-
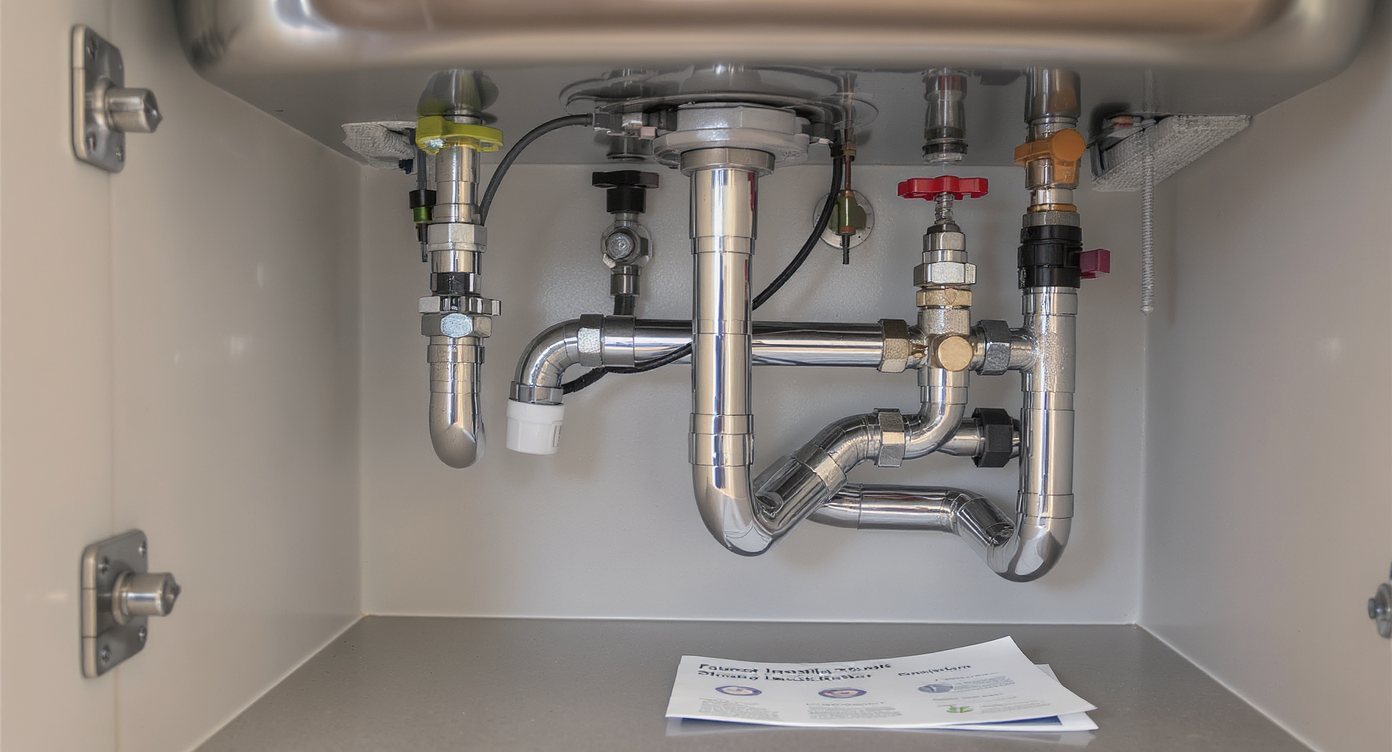
Visualization: Planning for Accessible Plumbing in a New Bath

Well-planned plumbing beneath a powder room vanity, featuring accessible shutoff valves and durable supply lines for hassle-free maintenance.
Picture this: You’re about to redesign a powder room. Before the vanity goes in, you map out not only the location of the sink but also the precise routes for water supply and drain lines. Valves are installed facing forward with open space on either side, ensuring that a quick twist is always easy. You select braided steel supply lines for their strength and longevity. As each component is connected, you imagine yourself—or another homeowner in a decade—reaching under the sink to turn everything off during a fast repair. Every detail is visible, reachable, and simple. The difference shows not just in appearance, but in peace of mind and daily convenience.
Visualization Scenario
Imagine entering your bathroom for a quick repair and finding every valve labeled, each handle turning freely and no supply line hidden or twisted. The lighting makes it easy to see all connections, and materials look as fresh as the day they were installed. This isn’t mere wishful thinking—it’s the future-proofed benefit of clear planning, careful part selection, and avoiding shortcut solutions. Every routine check or minor upgrade becomes a straightforward task, not an all-day ordeal.
Plumbing Remodel FAQs: Avoiding Common DIY Mistakes
Many install valves in hard-to-reach places, creating future access headaches. Proper planning before any project ensures shutoff handles remain clear and turn freely.
How do I know if my water shutoff valve should be replaced?
If a valve feels stiff, shows signs of corrosion, or is an older multi-turn style, it’s prudent to upgrade to a reliable quarter-turn variant during any fixture change.
Are flexible plastic supply lines safe for long-term use?
Experts generally recommend braided steel lines over plastic for durability and lower leak risk, especially in high-use bathrooms or kitchens.
Should I replace all old valves during a remodel?
Even if not urgently needed, updating aged valves in accessible areas is a wise preventative step that can save costly troubles down the line.
Where can I find visual planning help for bathroom upgrades?
Online design platforms such as ReimagineHome.ai let you experiment with layouts and component placement before committing—making future-proofing your project far easier.
Remodel Decisions That Save Future Regret
Much of what defines a smart home remodel isn’t on display but rather tucked inside walls and cabinets. Proper shutoff valve placement and material selection can spare homeowners unforeseen trouble and unnecessary expense. By thinking holistically and planning for both today's style and tomorrow's repairs, you can avoid the most common pitfalls in DIY home improvement. For inspiration on how professional tools might reshape your next planning process, explore solutions at ReimagineHome.ai.