
TL;DR
To create a rainbow doorway between a dining room and living room, map equal stripe widths (typically 2–4 inches), tape clean edges, and paint from the outer bands inward; renters can use peel-and-stick decals or removable vinyl. You can preview colors, stripe counts, and square-vs-arched looks in minutes by uploading one photo to ReimagineHome.ai. This renter-friendly, DIY room makeover idea is budget-light, style-heavy, and solves that “empty transition” feeling without new furniture. Try your own version on a photo in ReimagineHome.ai.
Why Furniture & DIY Decisions Feel So High-Stakes
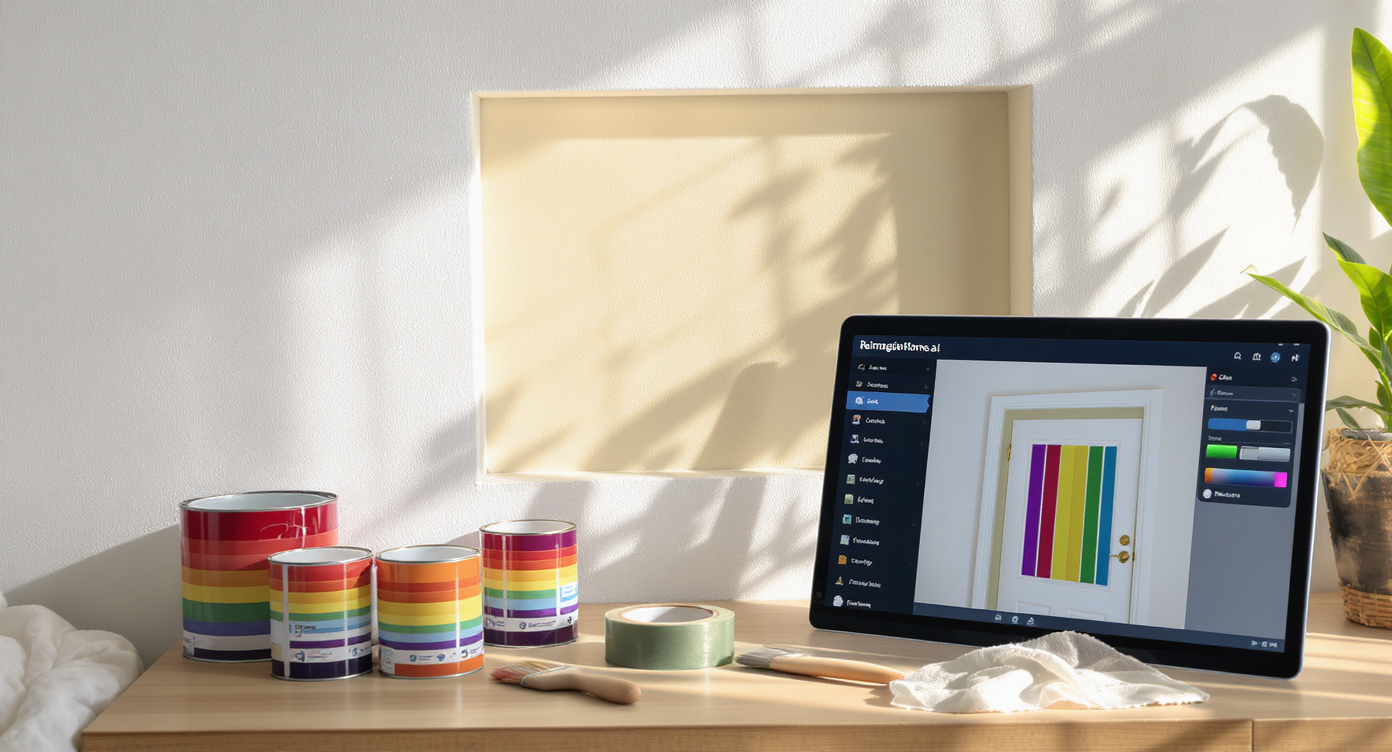
Plan your perfect rainbow doorway stripes digitally before painting with accessible DIY tools.
Direct answer: A rainbow doorway works best when you calculate consistent stripe widths (2–4 inches), tape precisely, and paint outer colors first; for rentals, use peel-and-stick decals or removable vinyl. Preview color combos and stripe counts from one photo using ReimagineHome.ai before you buy paint.
- How wide should the stripes be, and how many colors can fit without looking messy
- Paint vs. decal (renter-friendly) options and how they hold up
- Square openings vs. arches—why both work, and how to map corners
- Color planning so the doorway bridges two rooms (e.g., a deep dining blue to a lighter living room)
- Tools, tape techniques for crisp lines, and sample-pot coverage
- Using AI interior design tools to visualize this DIY safely first
Before you move a single sofa or pick up a paint roller, upload a photo to ReimagineHome.ai and test a few ideas safely.
If you’re also reworking your living room flow, this companion read on small living room layouts shows clearances and sofa placement rules; it pairs well with a bold doorway moment so the color and circulation both feel intentional.
Why Interior Design Dilemmas Are Usually About Layout, Scale, and One Wrong Piece

Proper layout and scale keep walkways clear and harmonious in interior design dilemmas.
Most designers recommend maintaining 30–36 inches of clear walking space through a main pass-through so the threshold reads as a calm, intentional path. That’s why a painted rainbow at the opening feels satisfying: it celebrates the route you actually use and defines the handoff between two zones.
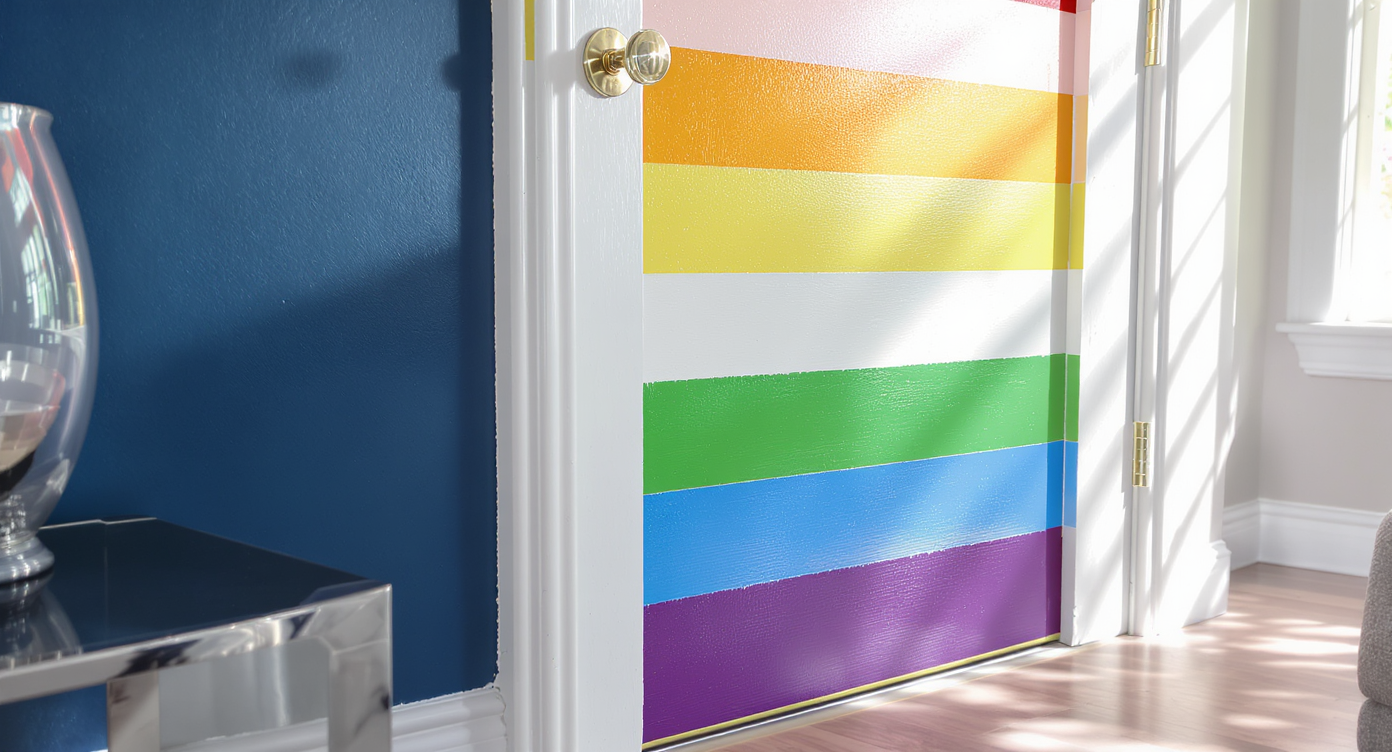
Most “this room feels off” moments trace back to three things: scale, circulation, and one wrong piece—or, in this case, one under-designed boundary. Dining rooms often carry a saturated paint (think a deep blue that glows at night), while the living room leans lighter and softer. The square opening becomes a blank frame between moods. Treating that frame as art solves the disconnect without replacing furniture.
If your opening is arched, the curve naturally suggests a rainbow; if it’s square, crisp 90-degree corners make the bands look graphic and modern. Both work. What matters is proportion: stripe widths that are too thin look fussy; too wide can crowd the trim. As a rule of thumb, aim for 2–4 inches per stripe on standard casings, and leave a 1/8–1/4 inch reveal next to any white trim so the transition reads clean.
Have real wood you love? Keep it unpainted and place the rainbow on the wall face just beyond the casing, or switch to removable vinyl. For a deeper dive into scaling moves that keep small spaces from feeling chaotic, see this guide to small living room layouts and borrow its sightline tips for your threshold, too.
Anecdote
That corner where the armchair never quite fit? Someone painted a rainbow on the square opening instead, and suddenly the “portal” became the feature—no new chair needed.
Furniture (and Paint) Rules That Quietly Solve Doorway Transitions
Sealing painter’s tape with base color ensures crisp, professional rainbow doorway edges.
For crisp DIY paint results, seal painter’s tape with the wall’s base color before applying the stripe color to minimize bleed-through. This one step is the difference between “crafty” and “custom.”
- Stripe width: 2–4 inches works on most openings; test 5–7 bands max if your casing is narrow. If you want all seven rainbow hues, extend bands onto the head (top) run.
- Coverage: Most paint sample pots cover ~8–16 sq ft; for doorway bands, five 8-oz samples are often enough for two coats.
- Finish: Use satin on walls for wipeability; semi-gloss on trim if you’re painting it, to match typical sheen.
- Dry time: Plan 2–3 light coats; allow 1–2 hours between coats per manufacturer directions before pulling tape back on itself at a 45-degree angle.
- Sightlines: From your dining table and the living sofa, the rainbow should frame the view, not interrupt it; stop stripes shy of artwork edges to avoid collisions.
If you’re pairing a rich dining hue (e.g., a deep blue) with a living room neutral, repeat one color from each room in the rainbow so it feels like a bridge, not a sticker. You can mock this in minutes by uploading your room photo to ReimagineHome.ai and using the AI to restyle the threshold with different palettes. For color decision help across adjoining rooms, this breakdown of AI interior design tools explains visual testing without guesswork.
How ReimagineHome.ai Helps You Test Layouts, Styles, and DIY Ideas
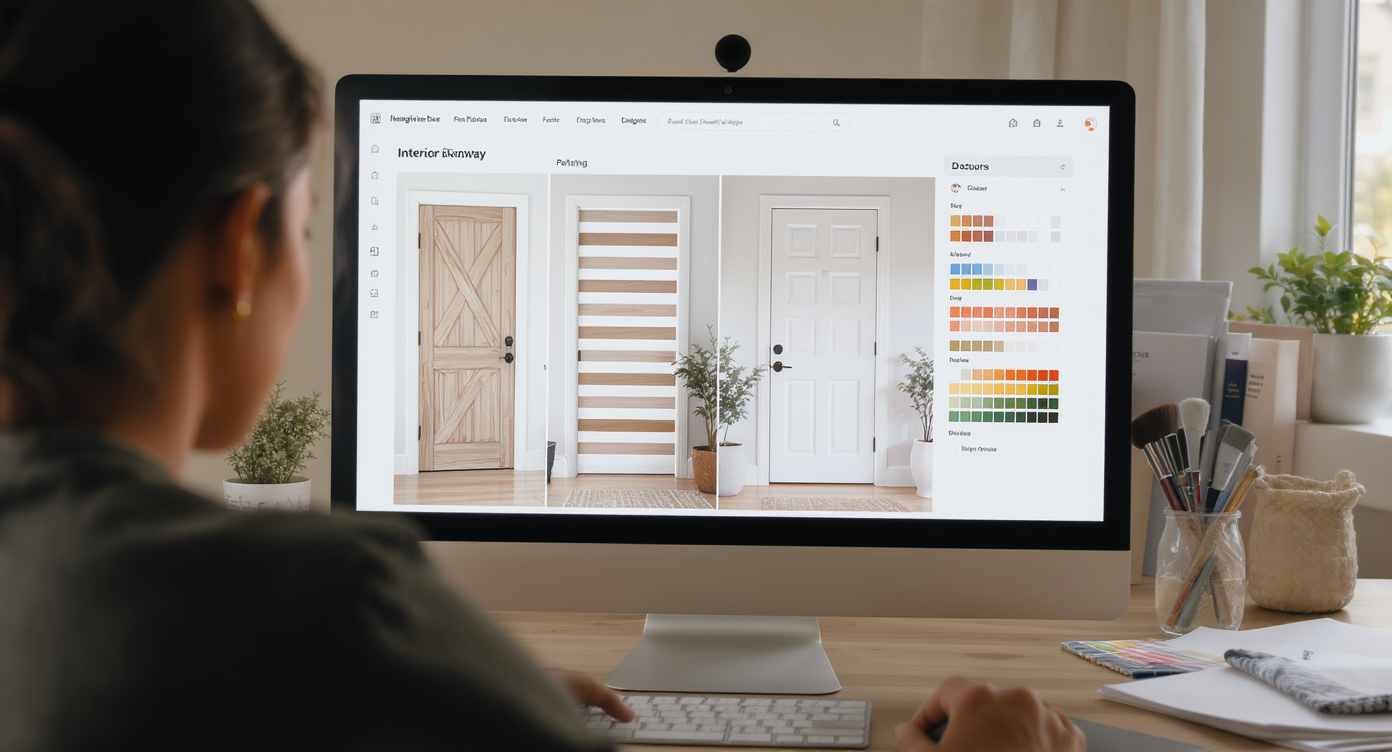
Test multiple rainbow doorway layouts and palettes quickly using AI-powered design tools.
AI tools can show multiple doorway designs and paint palettes in minutes—before you buy supplies or move a single piece of furniture. With ReimagineHome.ai, you can:
- Run an AI interior design from photo: upload one picture of your dining-to-living transition and generate several rainbow concepts—arched, square, thin vs. thick bands.
- Test a decal-first approach: visualize peel-and-stick bands vs. paint, or a hidden rainbow on the hallway side for a “secret” moment kids love.
- Try global styles: see how a bold maximalist rainbow interacts with Scandi woods, Japandi neutrals, or Boho textiles so the mix feels intentional.
- Preview paint finishes and sheens: satin vs. matte on the wall face, semi-gloss if you choose to paint trim.
- Plan adjacent tweaks: a coordinating rug, art spacing, or a slim console so the threshold color doesn’t fight the furniture layout.
If you like working step-by-step, bookmark this deep-dive on AI room makeovers for a photo-to-restyle workflow you can reuse for other projects.
Step-by-Step: Paint—or Decal—a Rainbow Doorway, with AI Confidence
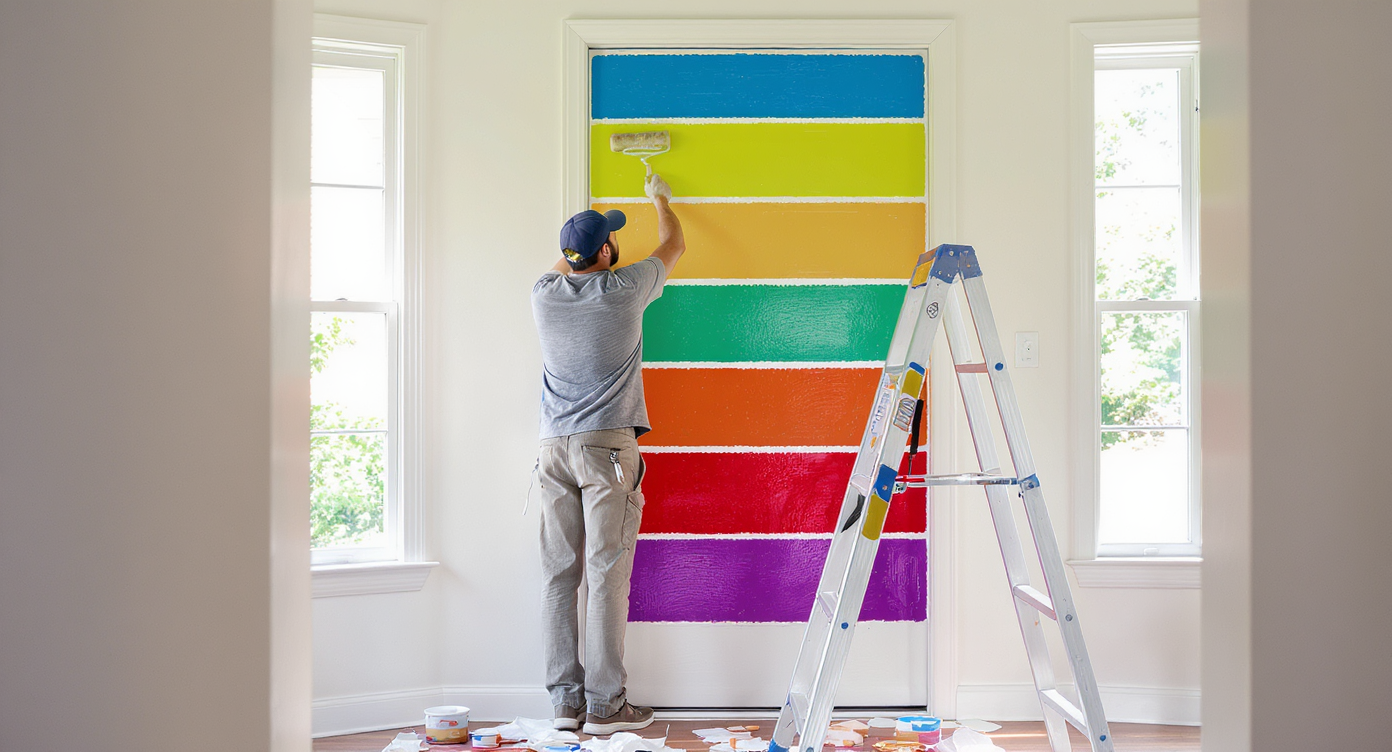
Step-by-step rainbow door painting with precise tape work ensures a confident DIY finish.
Aim for 30–36 inches of unobstructed path through the opening; if furniture is crowding it, adjust layout before painting so the rainbow frames a comfortable walk.
- Photograph and upload: Take a straight-on photo of the opening and upload to ReimagineHome.ai. Generate 3–5 variations: seven-color classic, five-color simplified, outside-in vs. inside-out order, and square vs. faux-arch paint lines.
- Count and calculate: Measure the visible width of one side casing (or the wall face you’ll paint), then divide by desired stripe count to set width. Example: 9 inches of paintable face / 3 stripes = 3-inch bands.
- Map and tape: Lightly mark guidelines with a level. Tape the outermost bands (red and blue, for example) first. Seal tape with base wall color, then apply stripe color in 2–3 thin coats.
- Work smart around corners: Continue the stripe across the head (top) run for even spacing. Miter tape at the corner so lines meet cleanly.
- Decal option (rental-friendly): Use removable vinyl or pre-cut decal bands. Burnish edges with a plastic card; if walls are textured, choose thicker vinyl and warm it gently with a hairdryer for better adhesion.
- Protect trim you love: If your casing is real wood, set the rainbow on the drywall beyond the casing or on the reveal inside the opening so the millwork remains untouched.
- Finish and repeat: Pull tape when paint is just dry to the touch. Touch up with a fine artist brush. Echo one or two rainbow colors in a pillow, runner, or lampshade in the adjacent room for cohesion.
For renters and weekend timelines, see a quick guide to rental-friendly design upgrades—it pairs peel-and-stick techniques with visual planning so you can restore walls later.
Visualization Scenario
Upload your dining-to-living photo, ask ReimagineHome.ai for a five-stripe square rainbow that repeats your dining blue and your living neutral, then generate an alternate arched version to compare before you tape.
FAQ
How do I paint crisp lines for a rainbow doorway?
Seal painter’s tape with the base wall color first, then apply stripe colors in thin coats and pull tape at a 45-degree angle while paint is just dry. Map consistent widths (2–4 inches) with a level for accuracy.
I rent—can I do this without damaging walls or trim?
Yes. Use peel-and-stick decals or removable vinyl stripes on the wall face, not on the trim. Visualize placements and colors in ReimagineHome.ai before you install for fewer repositions.
How many colors should I use, and how wide should each stripe be?
On standard casings, 5–7 bands at 2–4 inches each look balanced. If space is tight, prioritize 5 colors or extend bands across the top run to fit more.
Can AI design tools really show me this idea on my own walls?
Yes. Upload a photo and generate options with ReimagineHome.ai’s room design AI—different palettes, stripe counts, and finishes—so you can decide before buying supplies.
Will decals stick to textured walls?
They can, but choose thicker vinyl, clean the surface well, and apply gentle heat for better adhesion. If texture is heavy, paint may yield cleaner edges.
Visualize Your Room’s Next Chapter
Painted doorways are the overlooked stage of a home, and a rainbow is the quickest way to give that stage a plot twist. Think of it as a color bridge that links the mood of dinner to the mood of lounging, without demanding new furniture or a demo day.
When you can see possibilities, it’s easier to move with confidence. Start by uploading one honest photo to ReimagineHome.ai and let your next version of the room come into focus—bold, joyful, and completely yours.