AI Image Annotation: The Smarter Way to Design Any Room
-
What is image annotation in AI interior design?
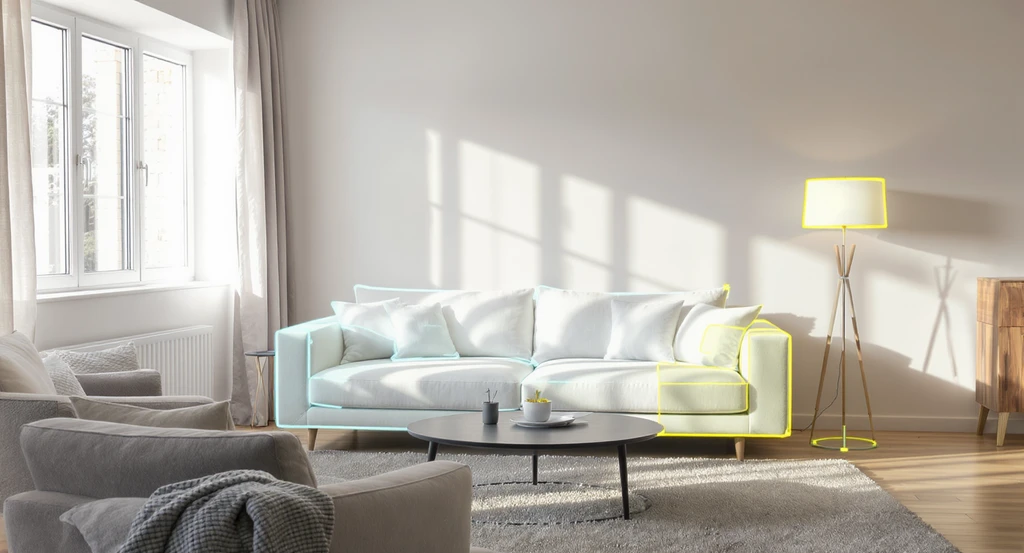
A living room demonstrates ai image annotation for interior design, showing how to mark room changes in ai home design. An outlined sofa and lamp highlight best practices for ai room visualization annotations, ensuring precise edits and preventing unwanted ai changes during the process.
Image annotation in AI interior design is the process of visually marking certain areas of a room photo and attaching a specific instruction so the AI knows where and how to make changes. Instead of typing long written prompts, you use a digital marker or outline to specify what to fix or improve. This process brings clarity and targets your edits, according to our guide on how Mark & Edit makes AI home design changes easier. For example, you can mark a lamp to change its color or outline a sofa you want replaced.
-
Why use annotations instead of only text prompts?
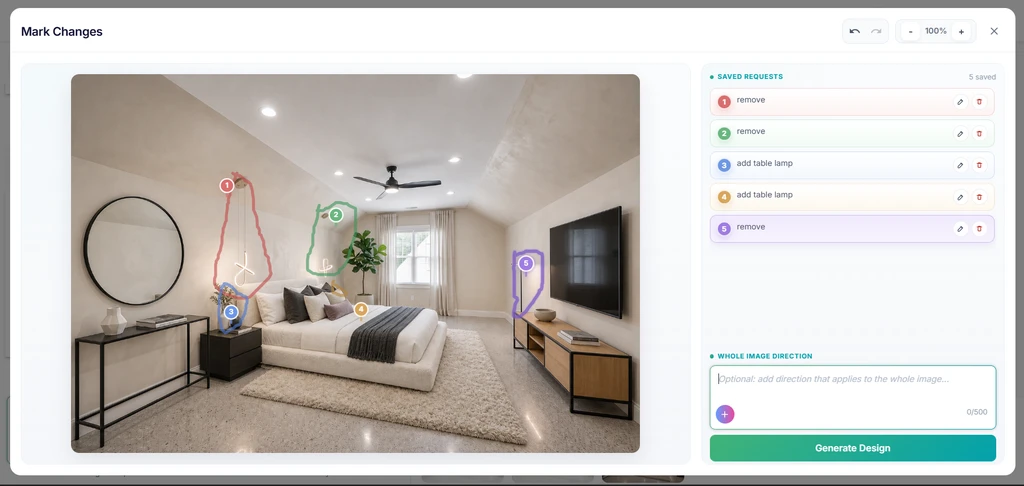
Using ai image annotation for interior design, this setup demonstrates how to mark changes in ai home design and visualize best practices for accurate room edits, preventing unwanted ai changes through precise annotations.
Annotations give the AI clear direction, showing exactly where and what should be changed. Text prompts alone are often open to different interpretations, so results may not match your vision. When you mark up the image, you take out the guesswork, leading to more accurate, focused edits. As discussed in our detailed annotation guide, marking changes on your image nearly always leads to more precise AI results, especially when you want to tweak many small elements.
-
What types of changes work best with annotations?
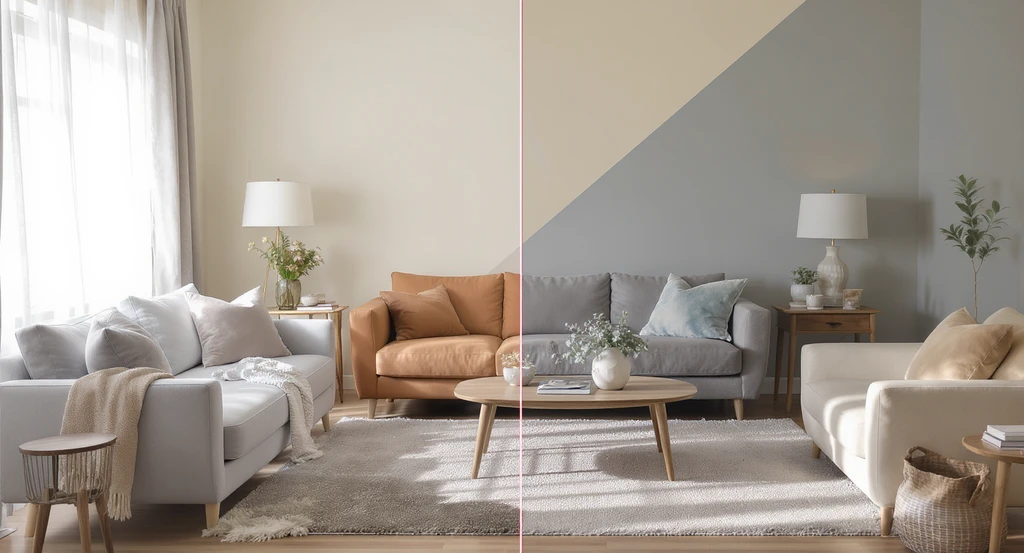
See ai image annotation for interior design in action: targeted edits like wall repainting, furniture swapping, and decluttering show best practices for ai room visualization annotations and how to mark changes in ai home design effectively.
Annotations work best for targeted, local edits, such as replacing furniture, updating accessories, shifting layout details, or fixing design errors. Common uses include swapping out a rug, adjusting lamp placement, removing unwanted clutter, or painting only a section of wall. These pinpoint instructions help the AI refine just that part without altering the rest of your space.
-
Can annotations help preserve the rest of my design?
Yes, this is one of the main benefits. By marking only the area that needs revision, you can prevent the AI from accidentally changing nearby objects or styles. This is especially valuable if you’re happy with most of your room’s design and just want to make selective improvements, like refreshing a single piece of furniture without redoing the entire look.
-
Why does AI sometimes change things I didn’t ask for?
AI tools analyze the entire image and may apply changes to more than what you intended, especially if instructions are unclear or too broad. When you give only a text prompt (like “make it brighter”), the AI can accidentally modify nearby walls, floors, or furniture. Using precise annotation with clear instructions reduces this risk, leading to more controlled edits.
-
How can I prevent unwanted changes by the AI?
To avoid accidental edits, be specific: mark the exact area for change, and add instructions like “edit only the marked region, keep everything else.” The clearer your directions, the less likely the AI is to make unintended changes. Our Mark & Edit best practices recommend always pairing your markup with explicit requests.
-
How do annotations work for furniture adjustments?
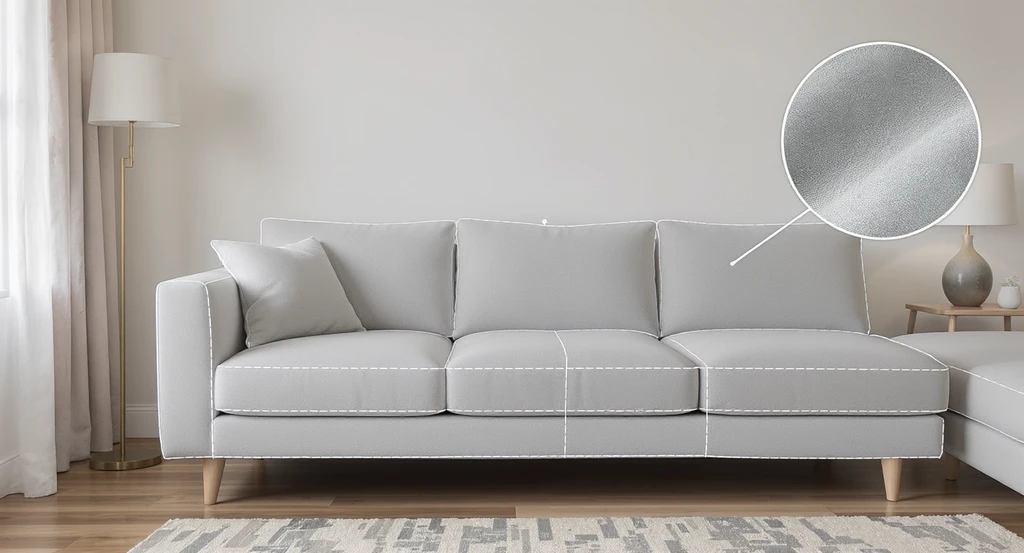
This realistic example of AI image annotation for interior design demonstrates how to mark changes in AI home design by outlining specific furniture and adding fabric swatch references, following best practices for AI room visualization annotations to prevent unwanted edits.
When adjusting furniture with AI annotation, you outline or highlight the piece in question and note exactly how you want it changed. For example: “Keep this sofa, but change the fabric to velvet,” or "shorten chaise as marked." This lets the AI zero in on only the highlighted furniture, avoiding disruption elsewhere, a must for designers or stagers who want reliable results.
-
Can annotations help fix AI glitches or mistakes?
Yes, if an AI design introduces odd patterns, duplications, or visual artifacts, use an annotation to point out the exact glitch and describe the fix you need. This is one of the fastest, least frustrating ways to correct minor design errors or photo artifacts without starting over from scratch.
-
What is the best way to combine annotations and reference images?
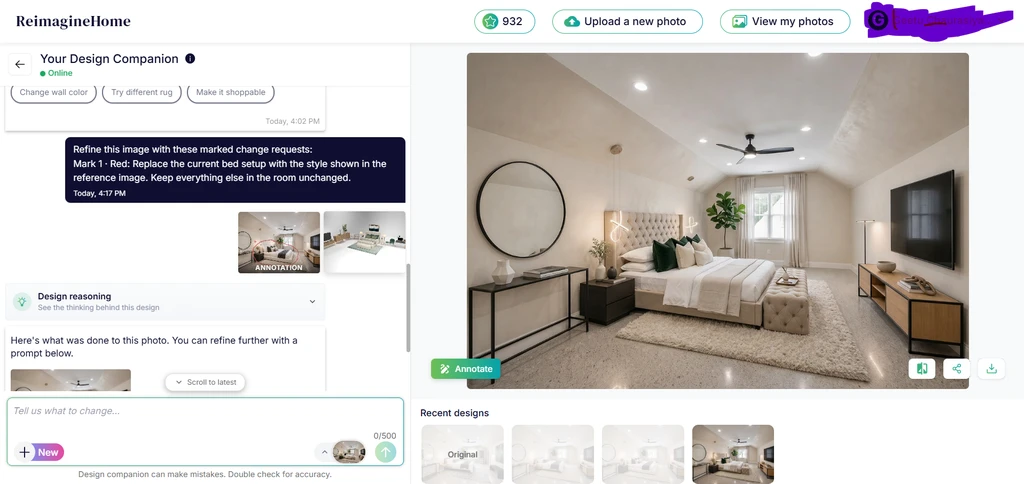
This visual demonstrates ai image annotation for interior design by marking changes on a living room wall and combining it with a style reference image—showing best practices for ai room visualization annotations and how to prevent unwanted ai changes during edits.
The most effective approach is to mark the area you want changed with annotation, then supply a reference image that demonstrates the desired style or effect. The annotation tells the AI exactly 'where,' and the reference shows it 'what kind.' As we explored in our guide to using reference images in AI interior design, this method ensures changes match your style more closely and prevents off-target edits.
-
Should I make multiple changes in one annotation?
While it’s possible to group related small changes, it’s generally safer to annotate and instruct one main change at a time. This approach helps the AI focus and reduces chances of errors or unintended side effects. If you need several unrelated changes, do them step by step for best results and greater control.
-
How do annotations improve real estate marketing or staging?
Annotations make it simple to virtually stage rooms, declutter, swap furniture, or tweak color and lighting, quickly improving photo quality for real estate listings. Agents and homeowners use this targeted editing to highlight upgrades without losing the room’s authentic feel. Learn more about smart image enhancement for real estate listings to see annotation’s value for property marketing.
-
What’s the biggest mistake people make when annotating images?
The most common mistake is using vague or overly broad instructions (e.g., “make it better” or “fix this area”). Good annotation practice means clearly identifying the target, specifying the change, and stating what must remain unchanged. This clarity is what delivers predictable, professional results with AI design tools.
-
Overlooked Insight: Annotations improve over time
An often overlooked benefit: The more you use annotations for repeated edits, the more the AI refines its responses. Each markup gives feedback that tunes the results to your taste. This iterative workflow is especially powerful for complex rooms or subtle staging tweaks.
-
Common Misconception: Annotations are only for experts
Many believe that marking up images requires technical skills or design training, but most AI platforms offer simple tools that anyone can use. You don’t need to be a professional, dragging a marker and typing a short instruction is usually all it takes.
-
Practical Recommendation: Annotate and review step by step
For best, most reliable results, annotate one area at a time, review the AI’s output, and then move to the next edit. This incremental editing keeps your overall design safe and gives you the power to steer the process at every stage.
-
Decision Support: When to use annotation versus reference images
If you want to change the style or look of a piece, use a reference image alongside your annotation. If you just want to correct or adjust something that’s already mostly right, annotation alone may be all you need. For guidance on the strengths of each method, see our visual vs written instruction comparison.
Frequently Asked Questions
- Can I use reference images together with annotations?
- Yes. Reference images are very helpful when you want to match a style, color, or finish. The annotation marks the area for change, while the reference image guides the AI on the look you want, resulting in more accurate makeovers.
- Why do repeated annotations improve AI results?
- Each updated annotation helps the AI understand your intent better, reduces confusion, and improves accuracy—especially when making detailed or multi-step changes.
- How do I annotate for real estate staging?
- Mark the specific item, such as a chair or table, and give a clear instruction like “move closer to the sofa” or “change to wood finish.” Small, focused edits work best for staging.
- Are annotations suitable for professional real estate listing photos?
- Yes. Annotation helps improve realism, declutter spaces, and enhance virtual staging, making listings more attractive while keeping the room natural.
- Can annotations help with tricky proportion fixes?
- Yes, but you need to be very specific. Mark the exact area and clearly explain what needs adjustment. For complex changes, review results step by step for best accuracy.
Key Takeaway: Mark Up for Smarter AI Design
Using AI image annotation gives you control over room edits, makes communication with the AI crystal clear, and prevents accidental changes to your finished designs. Whether you’re staging a home to sell, refreshing your living room, or solving a design dilemma, marking changes with clear instructions, and using reference images when needed, results in a smoother, more confident editing experience.