Evaluating the Best Way to Transition a Raised Paver Patio Against Your Home
TL;DR
The best way to connect a raised paver patio to your home’s exterior is to keep all base and fill materials contained with a retaining wall frame, allowing for expansion and controlling water. Proper separation, using concrete expansion joints and drainage preparation, helps protect both your patio and your home from damage in changing weather.
Understanding Patio-to-House Connections
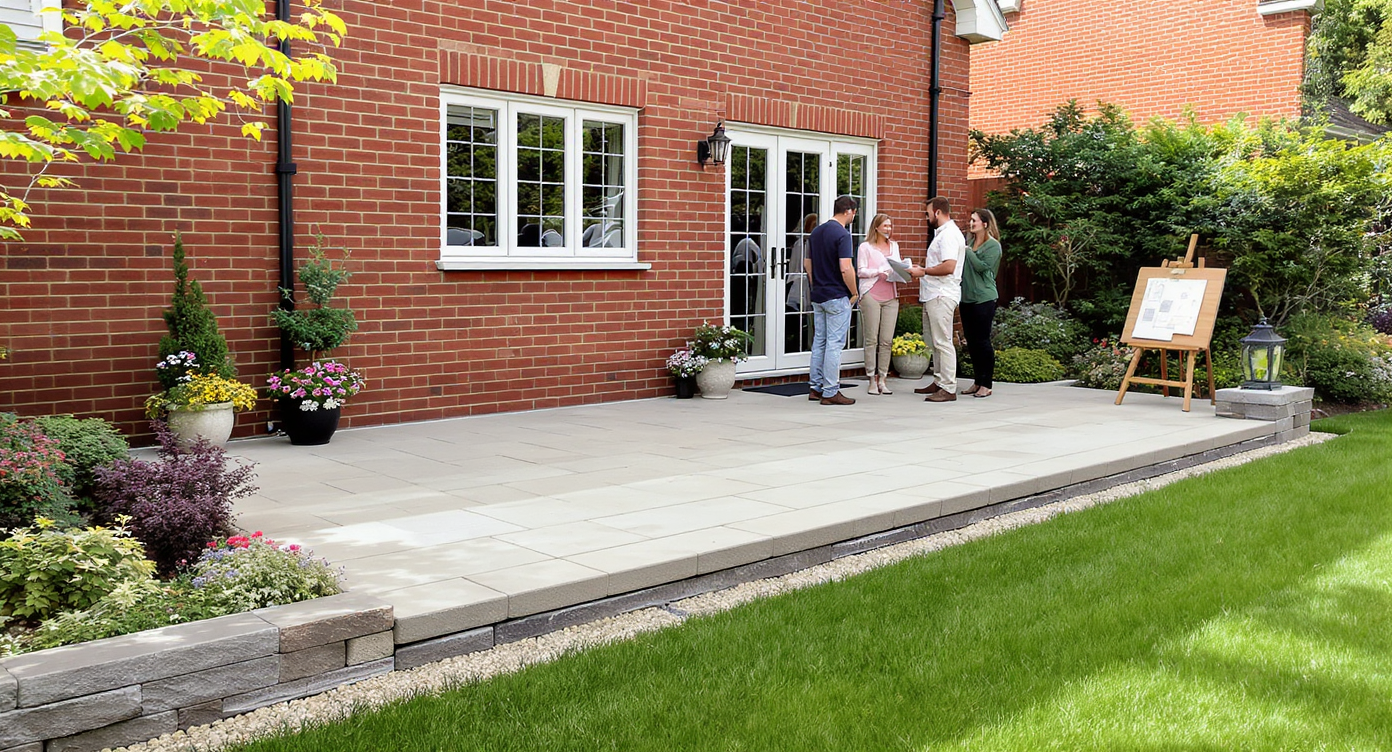
Evaluating transition details, a couple consults a designer about connecting their raised patio and home to prevent future water issues.
Designing a raised paver patio that sits directly against your home is both exciting and technically demanding. Many homeowners picture a seamless transition from patio to house, but close proximity raises valid questions about materials, water management, and long-term durability. Whether your patio is just a few inches above grade or elevated to frame a backyard retreat, the way you transition the perimeter where it meets your house can make the difference between lasting success and costly repairs. There is more at stake than first meets the eye. Moisture, settling, and thermal movement put pressure on both your new patio and your home's foundation. That is why every decision about how to wrap the patio frame, handle fills, and select separation materials deserves extra consideration before the sand and pavers ever touch the ground.
-
Why Proper Containment of Patio Materials Matters
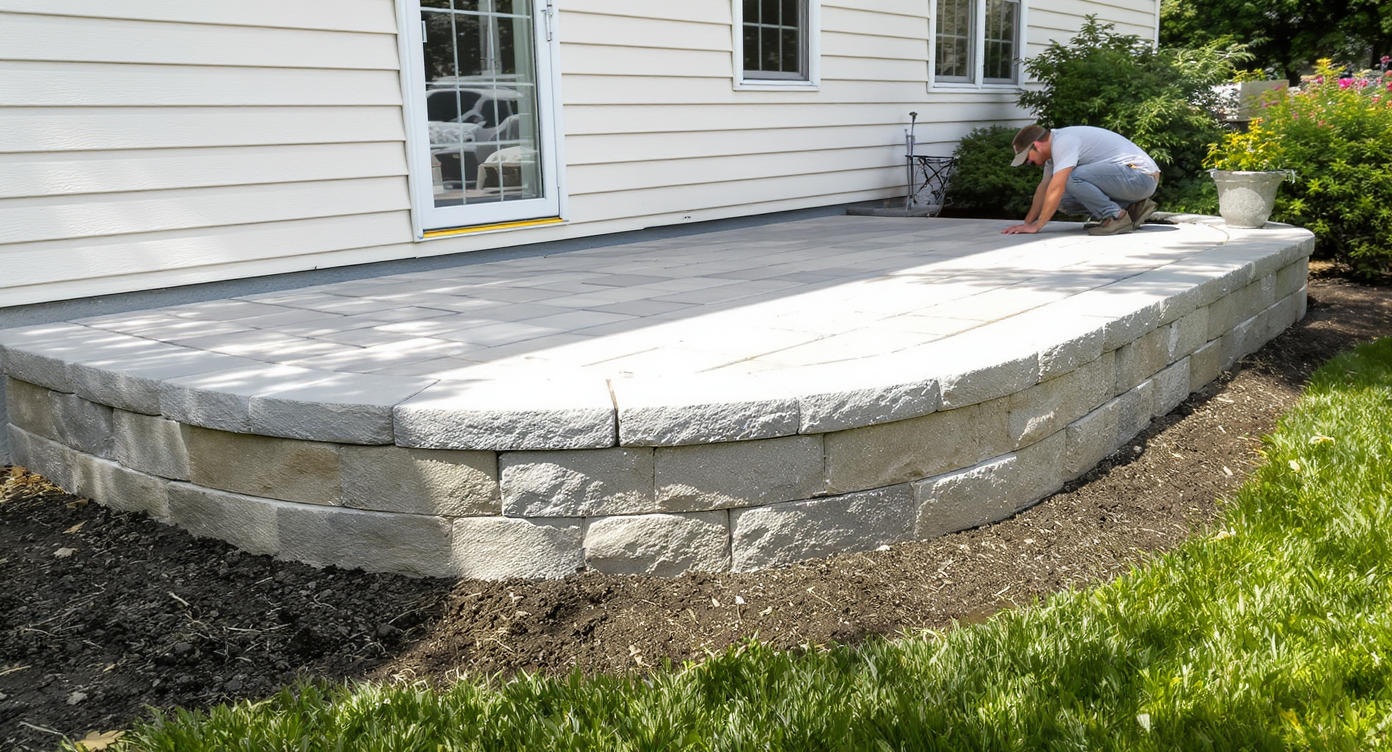
A stone retaining wall separates patio fill from house siding—an essential design step to prevent future water damage at the foundation.
When building a raised paver patio, especially one abutting a home’s exterior, the instinct is to keep things flush, neat, and integrated. However, letting loose paver base, sand, or fill touch your exterior wall—even below siding or stucco—can quickly create moisture traps. That’s the source of many water damage issues that show up years after the initial project. Seasoned landscape designers prioritize separation. The most time-tested approach is to frame the patio’s entire perimeter, including the section that meets the house, with a dedicated retaining wall. This creates a physical boundary that keeps fill and base layers neatly contained, not migrating toward or pressing against your foundation. A contained structure not only improves the visual line of your patio, but it’s also crucial for effective water management as rain drains off the new hardscape.
Expert Insight
A homeowner in the Midwest recently tackled a raised paver patio adjacent to a brick home. Initially tempted to let the sand and base run right up to the exterior, he opted instead for a separate retaining wall along the house, finishing with a foam expansion joint. A severe spring thunderstorm put his work to the test, and while neighbors contended with water intrusion, his patio drained cleanly, leaving the house dry and interior undisturbed.
-
Expansion Joints: The Buffer Every Patio Needs
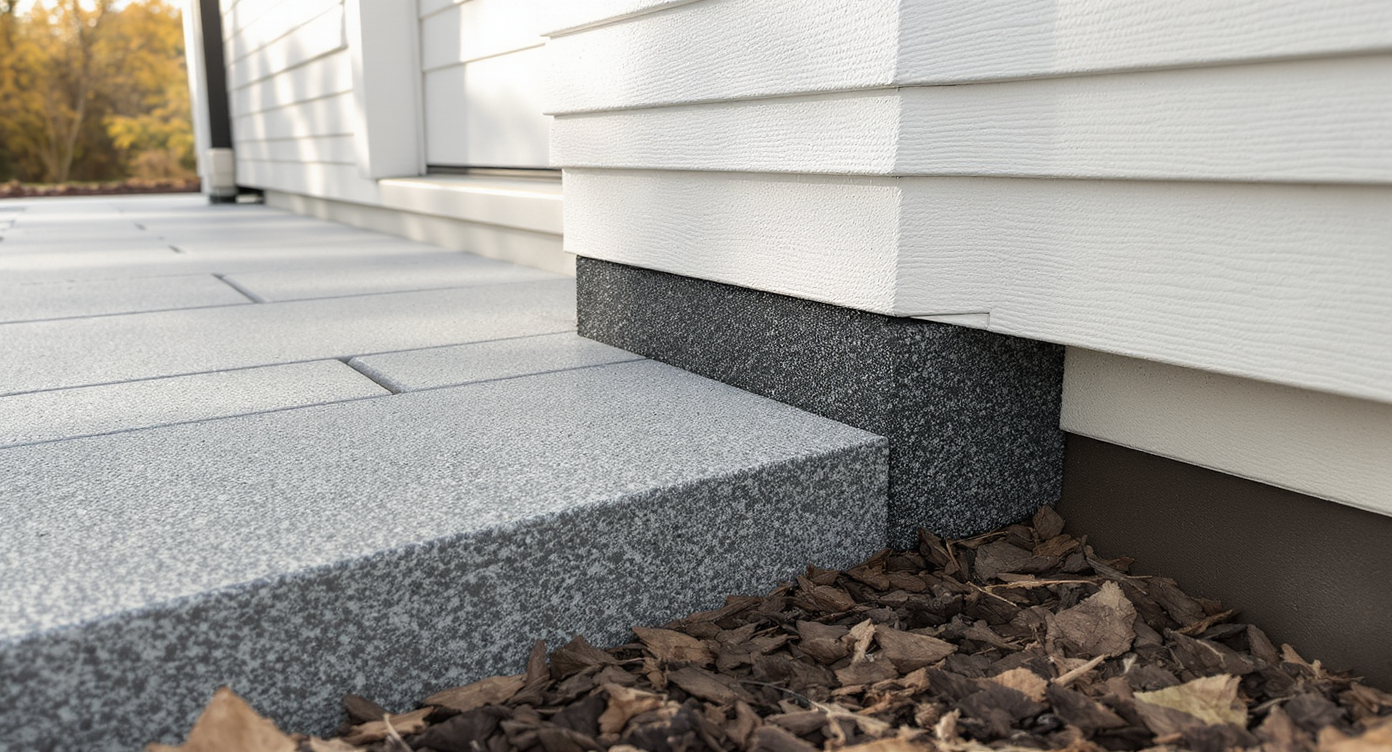
A vertical expansion joint absorbs shock and prevents damage where a raised patio meets a home's exterior wall, ensuring longevity.
One technical but vital step often gets missed by DIY builders: placing a compressible buffer between the new hardscape and the house. Concrete expansion joints, usually made of semi-rigid foam or fiberboard, slide in vertically wherever the retaining wall or pavers come near the exterior wall. Their purpose is twofold, allowing the patio to move slightly with freeze-thaw cycles and temperature shifts, and absorbing shock to avoid direct transfer to the home’s structure. Many homeowners are surprised to learn that expansion materials are available as panels, not just spray foam. These can be cut to fit and installed wherever patio edges parallel the home. The result is a professional, resilient transition that won’t crack, bulge, or let water seep where it shouldn’t. For a deep dive into base preparation, slope, and structural essentials, explore the field-tested steps for building a paver patio by hand.
-
Drainage Around Your Home: What to Consider Before Closing Up
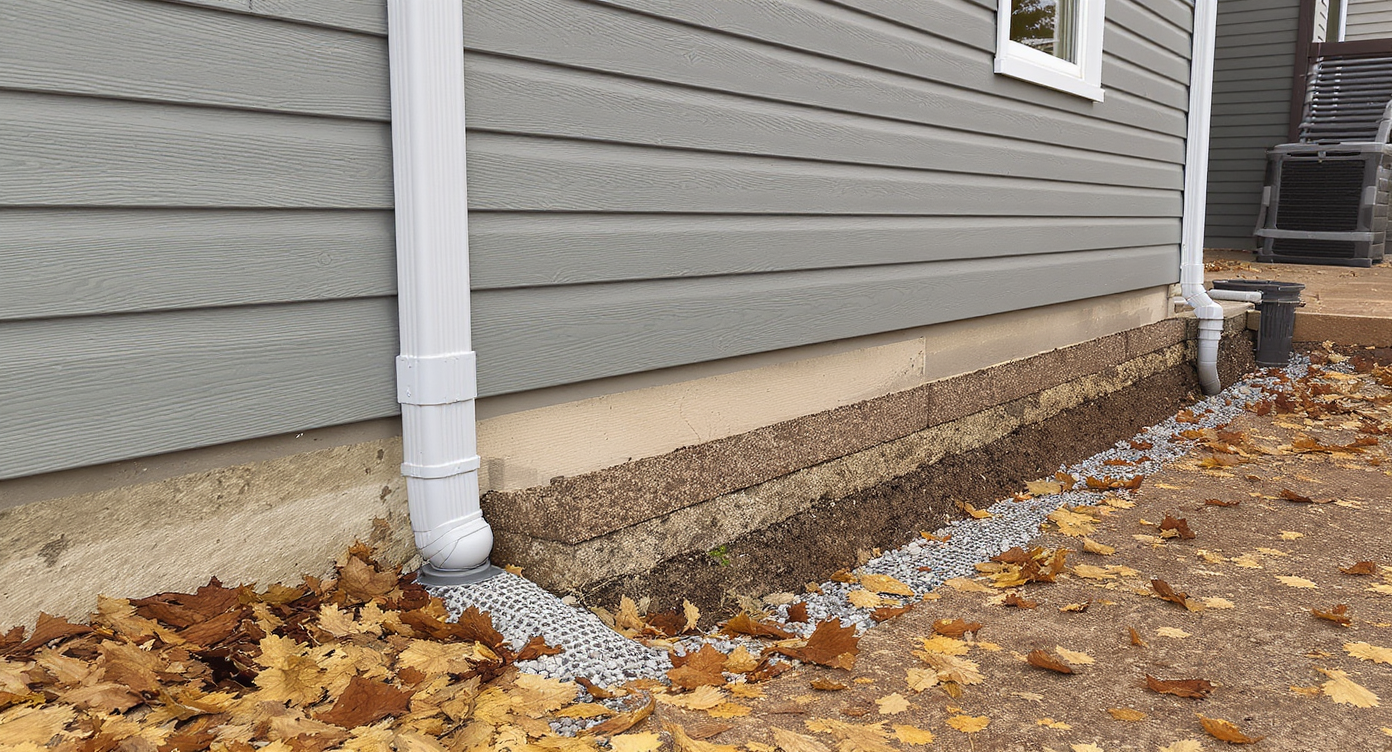
Proper patio drainage uses gravel, pipes, and geotextile to keep water away from home foundations, preventing costly moisture issues.
Directing rain and excess water away from your home—especially where patio and house meet—remains the cardinal rule for any exterior hardscape. If water is left to collect at this critical junction, it seeps along foundation walls, swelling into the microscopic cracks and eventually creating damp spots, efflorescence, or freeze-thaw hazards. Expert installers recommend deliberately sloping the patio surface away from the house, ideally at a rate of 1 to 2 percent. Installing a gravel base below the wall, along with perforated drainage tubing or a French drain, further reduces risk. Incorporate a geotextile fabric behind the retaining frame to prevent sand migration and soil movement. For projects that include retaining walls, guidelines for long-lasting hardscaping and essential drainage fixes offer practical insight.
Visualization Scenario
Picture the patio installation in motion: as a new retaining wall perimeter is placed, an expansion joint panel is slipped in where it meets the stucco. Once the patio base, sand, and pavers settle neatly inside, a light rainfall occurs. Water beads up and runs away from the house, thanks to the sloped surface and hidden French drain, granting peace of mind to the homeowner, who can now enjoy evenings on a dry, stable outdoor extension of the home.
Frequently Asked Questions
Patios can abut the house, but all fill, sand, and paver materials should be fully contained by a retaining wall and separated from the siding or stucco by a compressible expansion joint. This protects both patio and home from shifting or water damage.
Do I need drainage between the patio and my house?
Yes. Always slope the patio away from your house and consider installing a gravel base and, if necessary, a perforated drain. This reduces standing water and foundation risk.
What type of expansion joint is recommended?
Semi-rigid foam or fiberboard panels, specifically designed as concrete expansion joint material, are best for where pavers or walls meet a structure.
Is DIY patio installation practical for beginners?
With proper research and patience, beginners can install raised paver patios, especially when following clear, step-by-step instructions such as those in professionally curated resources. Digital planners like ReimagineHome.ai are helpful for testing your design in advance.
How can I visualize my patio design before committing?
AI-powered platforms allow you to upload yard photos and model different paver, wall, and drainage configurations before breaking ground.
Laying the Groundwork for a Patioscape That Lasts
Combining a robust retaining wall along the patio perimeter with expansion joints and controlled drainage is the most reliable route to a long-lasting, worry-free patio. These strategies protect your home’s foundation as well as the beauty of your new outdoor space. Simple measures taken at installation translate to seasons of enjoyment and fewer calls for repairs. For personalized patio planning and visualization, ReimagineHome.ai helps you test layouts and materials before you begin any work.