
TL;DR
ReimagineHome.ai’s Image Enhancement is an AI-powered edit that corrects color, balances exposure, and refines contrast while preserving natural shadows and textures. It’s a fast way to fix flat HDR and over-processed images so real estate photos look inviting — not plastic. Try a real file now on ReimagineHome.ai’s Image Enhancement page and compare the before/after in seconds. If you’re wondering how to fix flat HDR real estate photos or make AI real estate photos look natural, this is a strong, low-risk starting point.
The Real Cost of Showing Rooms “As They Are” Online
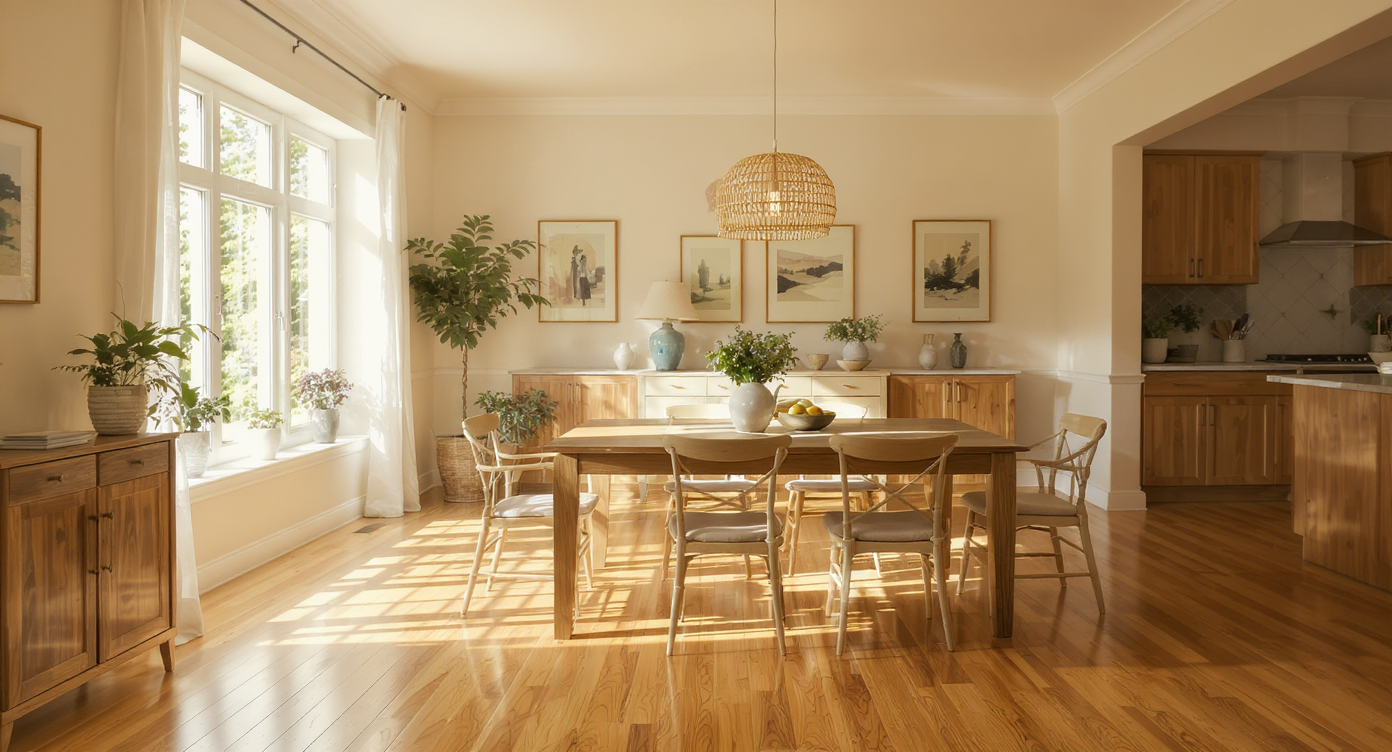
Balanced lighting and texture recovery make listing photos feel true-to-life and inviting.
Real estate photos that are too perfect often backfire: buyers read the images as generic, and showings feel riskier. Image enhancement for real estate is a targeted way to correct color, recover detail, and refine contrast — while keeping real shadows and textures so rooms still feel like rooms. At a glance:
- Results: Fix flat HDR and crunchy edits; restore believable depth, wood grain, and fabric texture.
- Realism: Preserve window highlights and soft shadow transitions so the scene feels true-to-life.
- Speed: Batch-friendly; edits generate in seconds to minutes for fast turnarounds.
- Cost: Cheaper than reshoots and simpler than heavy manual retouching.
- Workflow: Upload, enhance, review, export; consistent across shooters and teams.
- ROI: More authentic photos lead to better-qualified clicks and fewer “this feels off” in-person reactions.
- Peace of mind: A natural look builds trust with buyers and sellers.
Why This Visual Problem Hurts More Than You Think
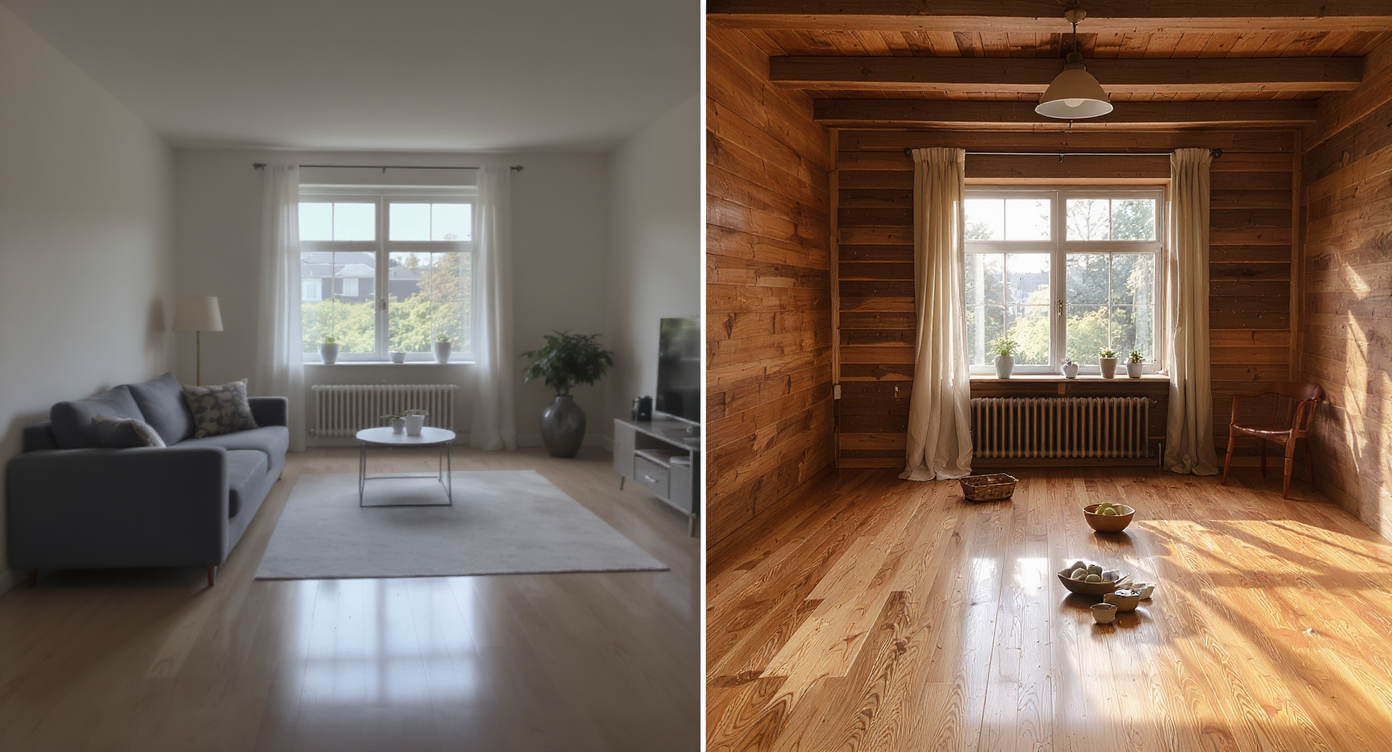
Over-processed photos reduce room warmth and make spaces feel smaller and less inviting.
Vacant or over-processed rooms tend to feel smaller and less inviting on screen than naturally edited ones. When every photo shares the same flat light, copy‑pasted window pulls, and smudged textures, buyers start skimming instead of imagining themselves in the space. Here’s how that shows up in practice:
- Scroll behavior: Carousels with identical lighting and zero shadow depth don’t earn dwell time; buyers swipe past because nothing feels specific to the property.
- Buyer perception: Overly bright, noiseless rooms read as “retouched” rather than “livable,” which can raise skepticism ahead of a showing.
- Agent confidence: Sellers expect their home to look like itself. If the images feel sterile, conversations shift from features to “why doesn’t this look real?”
Anecdote
That perfect‑but‑lifeless condo where every window was a blue postcard and the oak floors looked like vinyl? A realism‑first enhancement brought back the grain, let the windows breathe, and suddenly the space felt like somewhere you’d actually live.
What Image Enhancement Actually Is (In Plain Language)
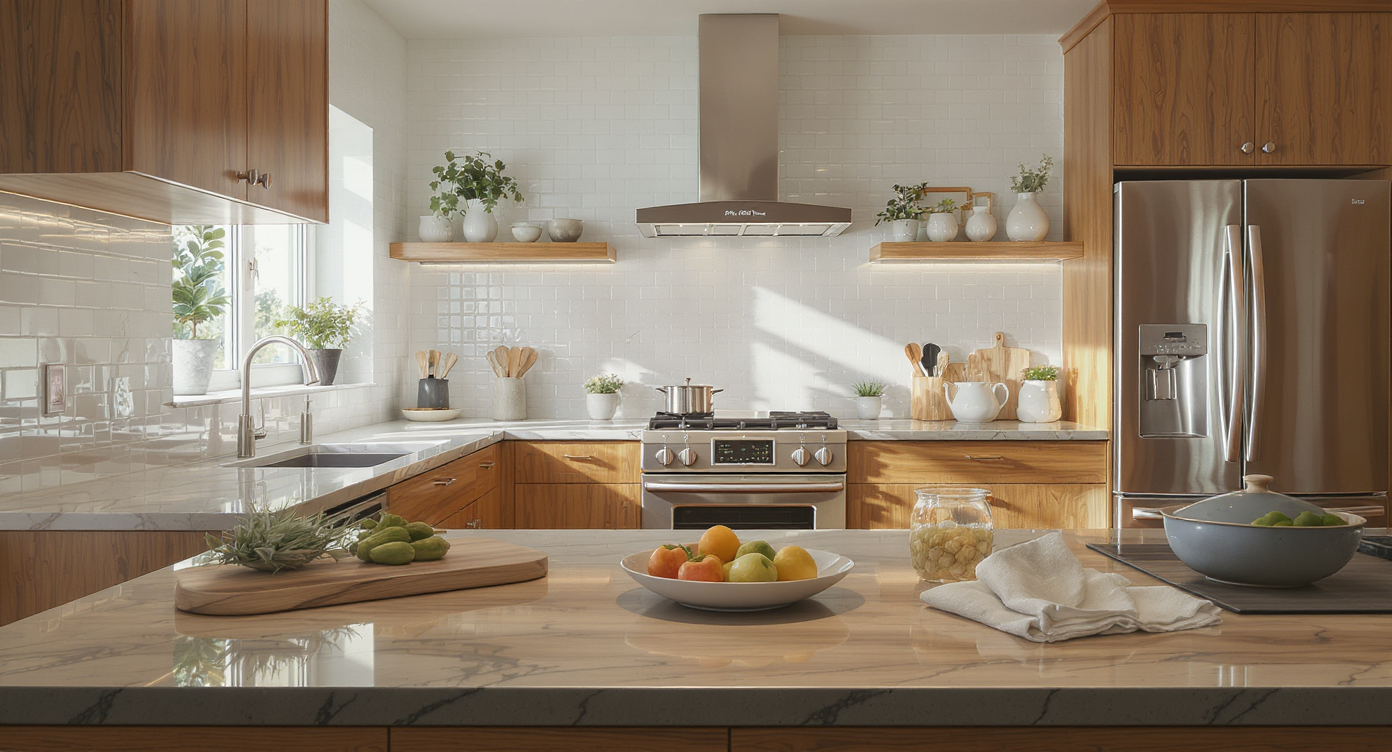
Image enhancement refines color and texture to preserve authentic room details without artificial overcorrection.
MLS and portal guidelines often recommend high‑resolution photos (ideally 3000–4000 pixels on the long edge) for crisp results after editing. Image enhancement is the step that improves a photo’s color, lighting, and micro‑contrast without changing the reality of the room. In plain language: ReimagineHome.ai’s Image Enhancement analyzes the original exposure, corrects white balance, tames glare, restores texture, and rebalances shadows and highlights so the image looks like the space — on a good day. You upload a room or exterior photo; the output is a refined version with better tonality and clarity that avoids the plastic, over‑HDR look. For a deeper look and quick test drive, visit ReimagineHome.ai’s Image Enhancement page. Related workflow note: If your source file is sharp but small, upscaling after enhancement can help meet MLS or print needs. ReimagineHome also offers an Upscale Resolution tool if you need larger, crisper exports.
How Image Enhancement Works Step by Step
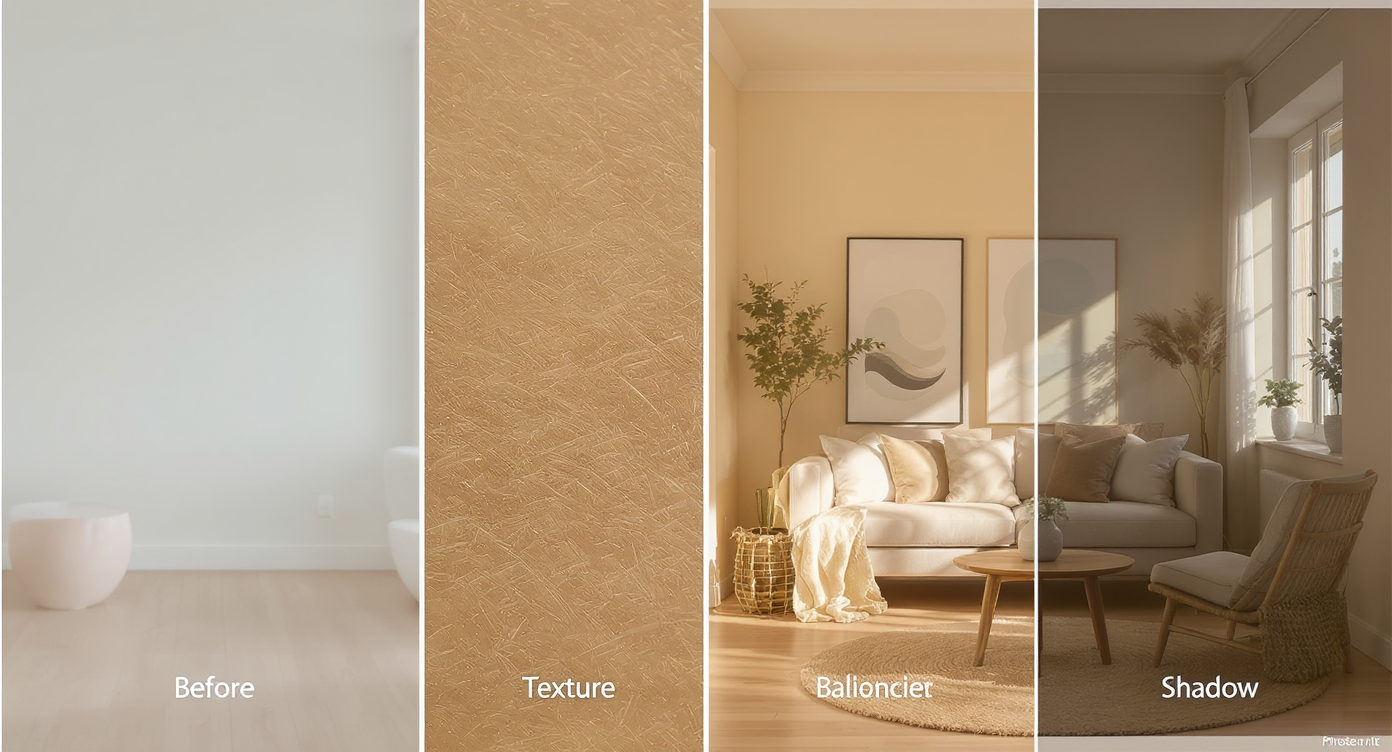
Stepwise image enhancement restores depth and realism for authentic real estate photos.
Clean, evenly lit source photos lead to the most realistic enhancements. Step by step:
- Choose the right photo: Start with the sharpest angle that best explains the room; avoid extreme wide distortion and heavy color casts if possible.
- Upload to ReimagineHome.ai and select Image Enhancement: Keep edits on a duplicate so you can A/B the before/after.
- Set a realism‑first preference: Favor natural white balance and moderate highlight recovery; let windows glow rather than pulling them dead-flat.
- Generate and review: Zoom to 100% to check wood grain, fabric texture, grout lines, and edges around windows/fixtures.
- Refine if needed: If blacks feel lifted, nudge contrast back. If whites look sterile, warm the balance by a few hundred Kelvin.
- Export for MLS/portals: Aim for 3000–4000 px on the long edge, sRGB color space, and consistent naming for the carousel order.
Tips and Tricks for More Realistic Results

Simple clutter removal and texture focus enhance realism and highlight key room features naturally.
Even simple clutter removal can make key features — flooring, windows, and built‑ins — easier to spot at a glance, but realism is the north star. Practical tips:
- Let shadows live: Preserve some corner shadow and under‑table shade to keep the scene dimensional.
- Don’t zero out the windows: A hint of highlight is more believable than a pasted blue rectangle.
- Protect texture: Over‑smoothing kills wood grain and fabric weave; check at 100% before exporting.
- Mind white balance: Aim for neutral walls that still reflect the room’s actual light (daylight, tungsten, mixed).
- Keep color gentle: Saturation should support—not steal—the eye. If a room reads yellow, fix the cast rather than nuking color altogether.
- Consistency across the set: Apply similar tonality and warmth across the whole carousel so the tour feels coherent.
- Need scale or print clarity? Enhance first, then use the Upscale Resolution tool to keep edges clean.
Visualization Scenario
Picture a north‑facing living room at 10 a.m.: soft daylight, a little falloff in the corners, trees ghosted in the windows. After enhancement, the walls read neutral, the sofa fabric has texture again, and the windows still glow — not pasted. It feels clean, calm, and real.
FAQ
What is image enhancement for real estate photos?
It’s an AI‑assisted edit that corrects white balance, balances exposure, and refines contrast and clarity while preserving realistic shadows and textures. The goal is natural‑looking results that still feel like the property.
How do I fix flat HDR real estate photos so they don’t look fake?
Start with a realism‑first enhancement: modest highlight recovery, true neutral color, and protected blacks. Generate a pass on ReimagineHome.ai’s Image Enhancement, then fine‑tune contrast and warmth.
Do I need RAW files to get good results?
RAW offers the most latitude, but high‑resolution JPEGs (3000–4000 px on the long edge) can enhance well if they’re sharp and not heavily compressed.
What resolution should I export for MLS and portals?
Many MLS/portals display best with images around 3000–4000 pixels on the long edge in sRGB. If your source is smaller, enhance first, then use ReimagineHome’s Upscale Resolution to maintain clarity.
How is AI image enhancement different from virtual staging or sky replacement?
Enhancement refines the existing photo’s light, color, and texture. Virtual staging and sky replacement change content; use those when the marketing story calls for them, but keep edits plausible for the property.
Visualize Your Next Listing (or Project) Before You Commit
Twilight‑style exterior photos frequently rank among the most clicked images in a listing carousel — not because they’re perfect, but because they’re evocative and still plausible. The same principle applies indoors: aim for authentic, refined, and specific to the home. A small shift toward realism pays off with better‑qualified clickthroughs and fewer “this felt different in person” moments. If you’re ready to clean up color, bring back shadow depth, and fix flat HDR without losing the truth of the room, try ReimagineHome.ai’s Image Enhancement or upload directly on the home page to see it on your next set.