
TL;DR
Use 100% silicone caulk at all changes of plane (every inside corner and where tile meets a tub, pan, or window) and grout only on flat, same-plane joints. Caulking over grout in corners is an acceptable stopgap; best practice is to remove enough corner grout to allow a proper silicone bead, then re-caulk. Fill grout pinholes with matching grout, let cure, then seal. If you want to preview grout/caulk color and small bathroom updates first, upload a photo to ReimagineHome.ai.
Why Bathroom Grout vs Caulk Feels So High-Stakes
Correct sealing separates silicone caulk in corners from grout filling flat tile joints for durability.
Corners and changes of plane should be sealed with 100% silicone; grout belongs only between tiles on the same flat surface. If you already caulked over grouted corners, it’s not a disaster—let it cure, monitor it, and plan a proper silicone replacement when you have time.
- What to caulk vs what to grout in a shower (plus which products last).
- Whether caulking over grout is okay—and when to redo it right.
- How to fix grout pinholes, seal correctly, and keep mold at bay.
- Window-in-shower tips: slope, silicone perimeter, and privacy.
- Maintenance timelines: silicone 3–7 years; grout reseal schedules.
- DIY steps and tools that won’t chip tile or trap moisture.
- How AI interior design from a photo helps you test colors and details first.
Before you move a single sofa or pick up a paint roller, upload a photo to ReimagineHome.ai and test a few ideas safely.
If you’re wrestling with tight footprints and tile choices, this overview pairs well with our small-bathroom layout guide and this breakdown of AI interior design tools for beginners.
Where Showers Actually Fail (and How to Stop It)
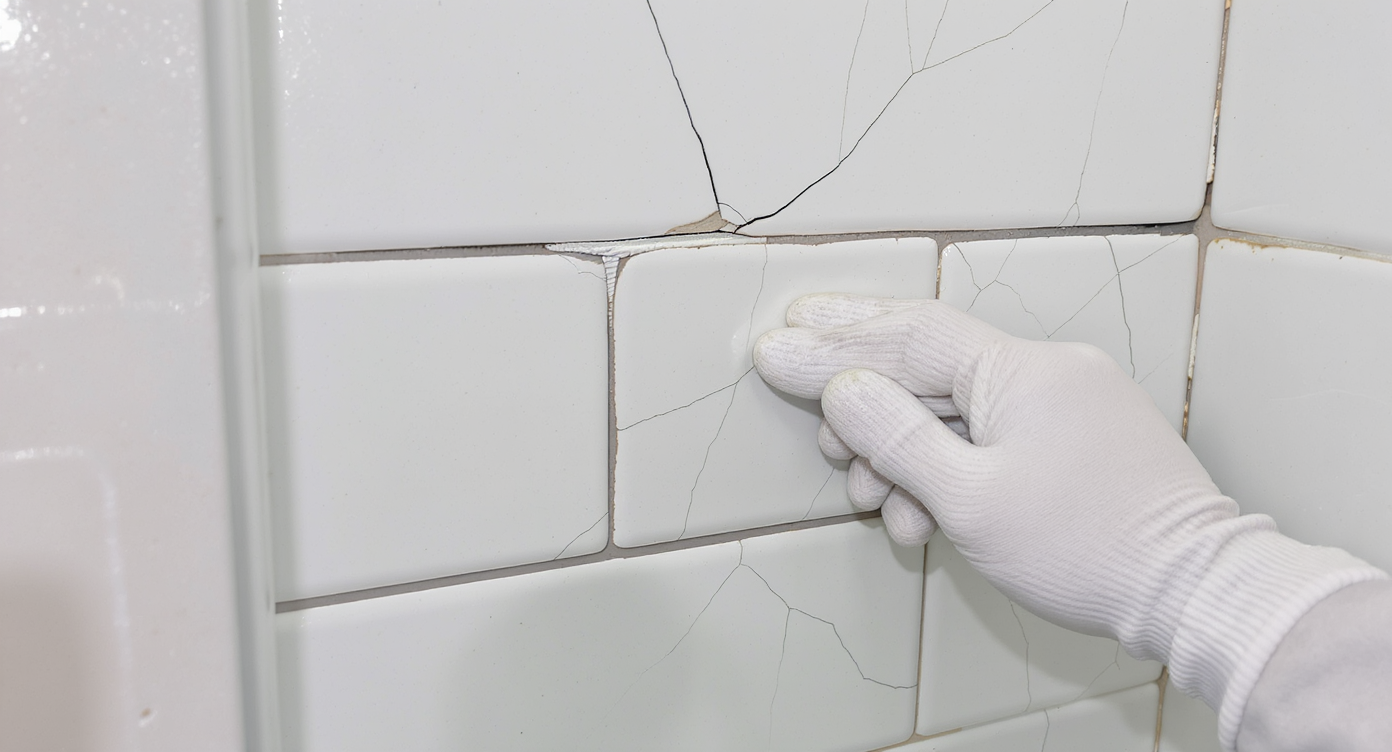
Shower failures often start at movement joints where grout cracks or caulk deteriorates—spot and secure these first.
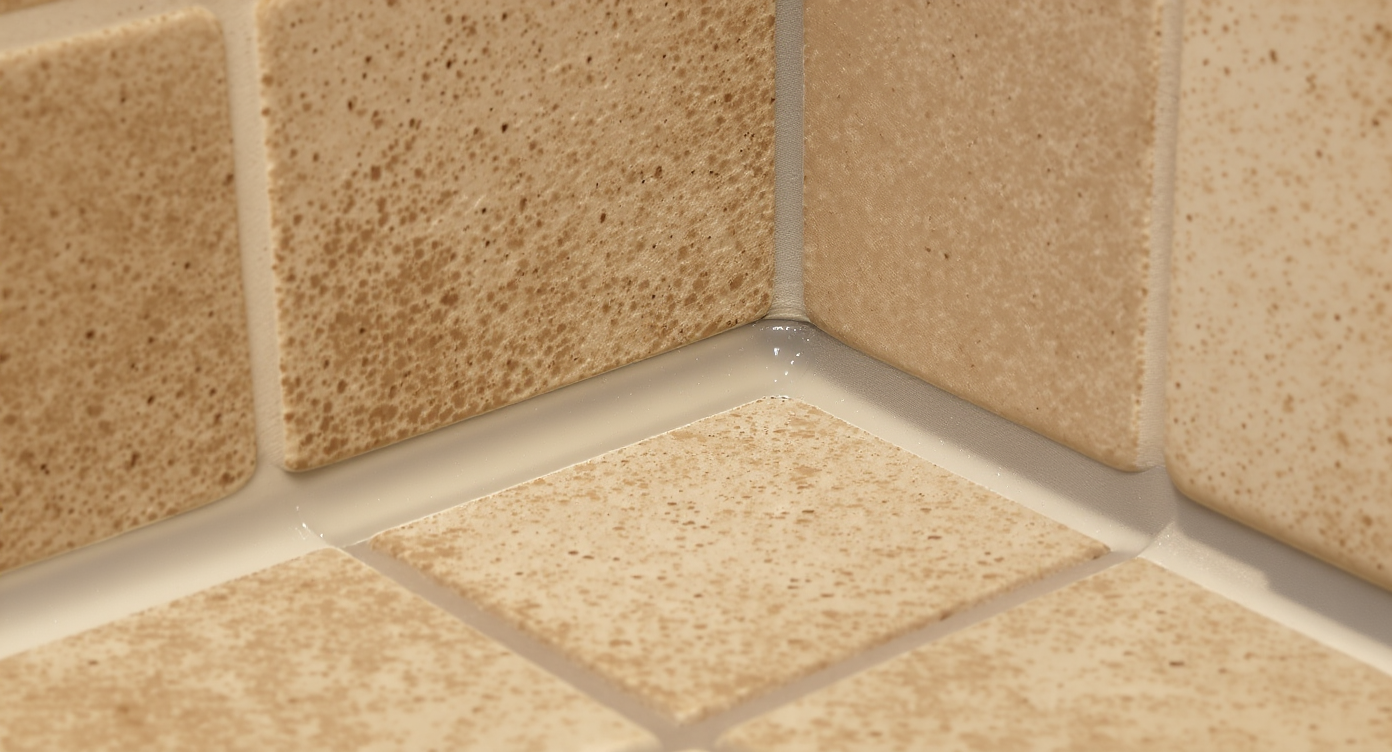
Most shower issues start at movement joints: inside corners, where walls meet a tub or shower pan, and around penetrations like windows. Tile and grout are rigid; buildings flex slightly with seasons and use. That’s why standards call for a flexible sealant—100% silicone—at all changes of plane.
Here’s the practical read: if your corners were grouted, they’re likely to develop hairline cracks long before the flat wall joints do. That doesn’t necessarily mean leaks, because the real waterproofing should be behind the tile (membranes, boards, or coatings). But cracks collect grime and look unloved. Replacing corner grout with a continuous silicone bead is the quiet, durable fix.
Windows inside the spray zone deserve special attention. A simple rule: slope sills at roughly 1/4 inch per foot toward the shower and run an uninterrupted silicone bead where tile meets the frame. Any wood trim belongs outside the wet zone; if you inherited wood here, protect it with silicone seams and plan an upgrade.
One more visual detail that changes everything: consistent, color-matched sealant. Most grout brands offer matching silicone, so your corners read as part of the field, not bright white “highlights.” For more planning pointers, see our bathroom remodel planning checklist.
Anecdote
That corner where the caulk always looks messy? It’s usually because there’s still hard grout underneath. The moment you dig out a narrow groove and switch to color-matched silicone, the joint suddenly looks deliberate—and it stays that way.
Shower Tile & Sealant Rules That Quietly Prevent Problems
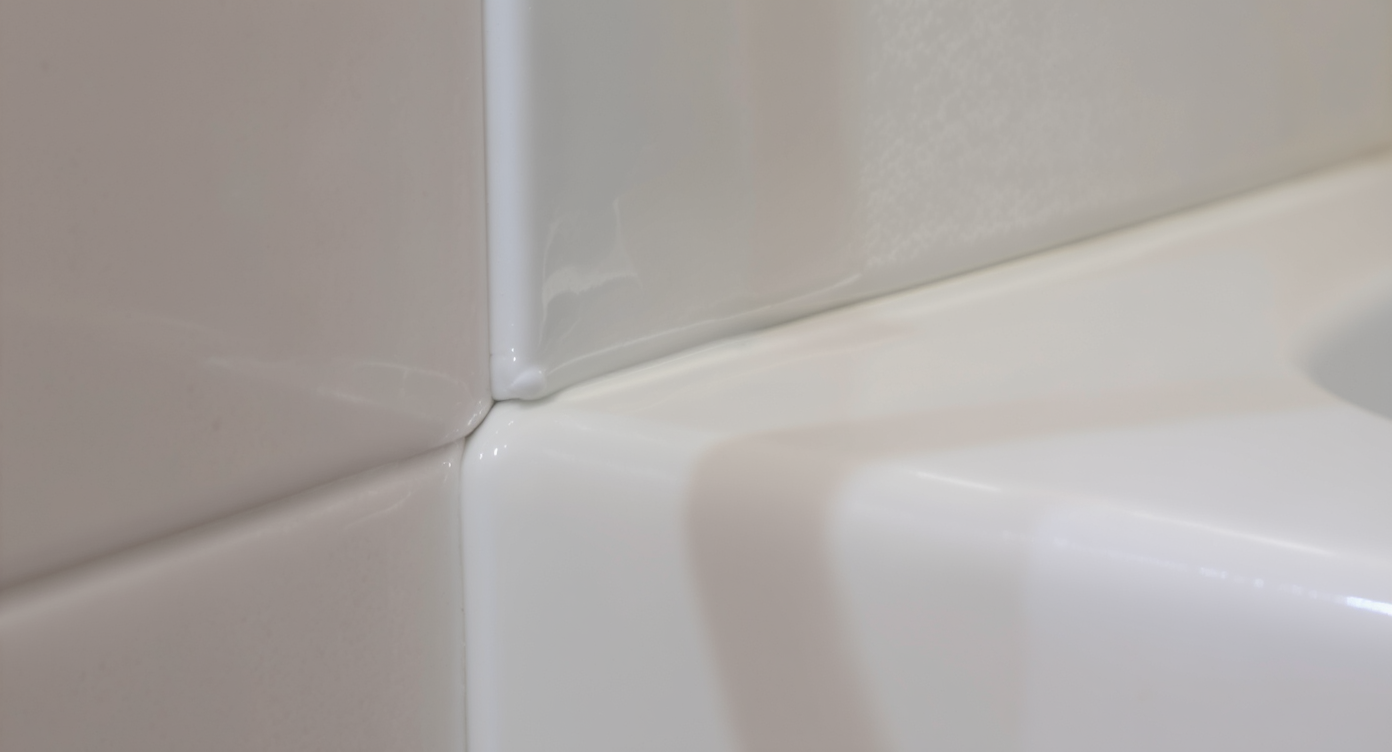
Proper silicone caulk bead width and continuity ensure effective shower waterproofing and tile-to-tub bonding.
Silicone joints work best when the bead is about 1/8–1/4 inch wide, continuous, and bonded to clean, dry tile on both sides.
- Grout on flats, silicone at changes of plane: Inside corners, wall-to-pan or wall-to-tub, and around windows or niches get 100% silicone (not painter’s caulk). Neutral-cure silicone is safest around natural stone and metals.
- Depth matters: Remove enough corner grout—often ~1/8 inch—to give the silicone room to flex. Silicone smeared over hard grout can shear prematurely.
- Clean and dry: Allow at least 24 hours of dry time before caulking; wipe bonding edges with isopropyl alcohol. Water trapped behind fresh silicone shortens its life.
- Pinholes in grout: Mix a small batch of matching grout, pack the voids, tool flush, clean carefully, then let cure fully before sealing.
- Sealing schedule: Penetrating grout sealer typically cures in 24–72 hours and needs reapplication every 1–3 years, depending on use.
- Ventilation: A properly sized exhaust fan (at least 50 CFM for small baths) helps keep joints dry and clean.
Not sure which grout or caulk color reads best in your lighting? Generate quick variations on your actual photo with ReimagineHome.ai, then pick confidently.
How ReimagineHome.ai Helps You Test Colors, Details, and DIY Plans

Use AI tools like ReimagineHome.ai to preview color and design options before starting bathroom renovations.
AI tools can show multiple bathroom colorways and material tweaks in minutes—before you scrape a single joint. With ReimagineHome.ai, you can:
- Upload one photo for an AI room restyle to preview grout vs caulk color harmony, accent tile, or a different paint color on the ceiling.
- Try small-space layout ideas virtually: a slimmer shower rod, a compact storage shelf, or a framed vs frameless window treatment.
- Test global styles—Scandi calm with warm neutrals, crisp Japandi contrast, or modern black fixtures—and see which complements your tile pattern.
- Mock up privacy options: frosted film vs ribbed glass look, and where a silicone bead would read on corners in a color-matched tone.
If you’re new to virtual room design, start with our guide to virtual room design for beginners and learn how a photo-to-room redesign can de-risk small bathroom changes.
Step-by-Step: Fix This Shower with Smart Caulk + Simple DIY
Follow careful steps with the right tools to reseal shower corners using silicone for long-lasting waterproofing.
Most pros agree: inside corners and other changes of plane get silicone. Here’s a homeowner-friendly path to put yours right and tidy.
- Dry it out: Let the shower stay dry for 24 hours. Moisture under fresh silicone causes early failure.
- Remove surface smear: Carefully cut and peel any smeared caulk. Use a plastic scraper against tile faces to avoid scratches.
- Create space to flex: With a grout saw or oscillating tool and grout blade, remove ~1/8 inch of grout along inside corners and at the pan/tub joint. Vacuum dust.
- Degrease edges: Wipe both tile edges with isopropyl alcohol; let evaporate fully.
- Tape for clean lines: Mask 1/8–1/4 inch from the corner on both sides.
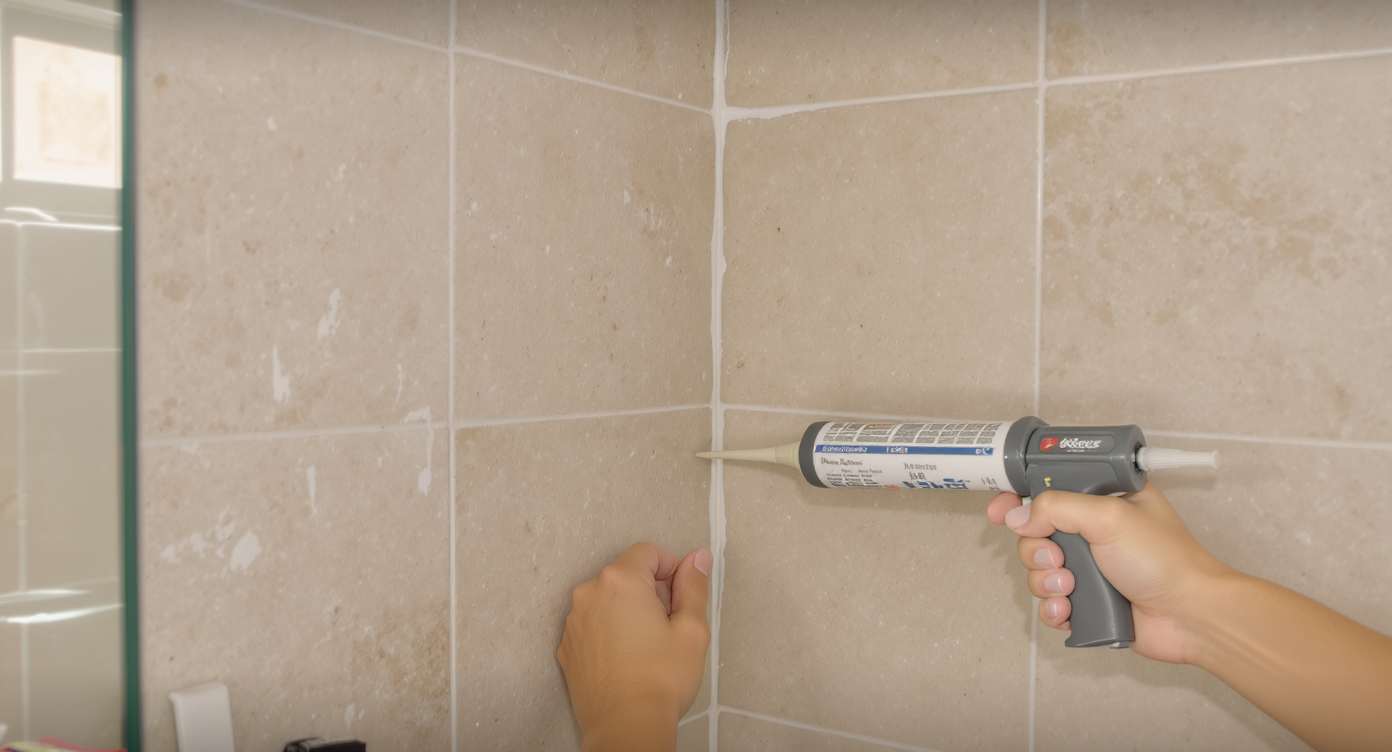
- Use 100% silicone, color-matched to your grout: Cut the nozzle to a small opening, keep steady pressure, and run a continuous bead.
- Tool once, smoothly: Lightly mist a gloved finger or caulk tool with soapy water; smooth the bead, then immediately pull the tape.
- Cure time: Avoid water for 24 hours (48 is even better).
- Fix pinholes: Mix matching grout, press into voids, wipe gently with a damp sponge, let cure per bag directions, then apply penetrating sealer.
- Window safeguard: Ensure the sill slopes toward the shower (~1/4 inch per foot) and run silicone where tile meets frame. Add frosted film for privacy.
- Maintenance: Inspect joints quarterly; plan to refresh silicone every 3–7 years depending on cleaners, usage, and ventilation.
Want to see darker grout or a warmer wall color before you commit? Generate side-by-side options from a single photo with ReimagineHome.ai.
Visualization Scenario
Upload a photo of your shower to ReimagineHome.ai, then generate two versions: one with warm gray grout and matching silicone, frosted window film, and matte black fixtures; another with crisp white grout, chrome, and a pale sage ceiling. Compare and pick your favorite before buying anything.
FAQ
Is it okay to caulk over grout in a shower corner?
Yes as a temporary fix, but best practice is to remove enough corner grout (~1/8 inch) so a 100% silicone bead can flex and bond to tile on both sides.
What caulk should I use in a shower?
Use 100% silicone (not painter’s or latex caulk). Choose a color-matched silicone from your grout brand for a seamless look.
How do I fix pinholes in grout?
Mix a small batch of matching grout, pack the pinholes, tool flush, clean carefully, let cure fully, then apply penetrating sealer.
How do I handle a window inside the shower?
Slope the sill toward the shower (~1/4 inch per foot), seal tile-to-frame with silicone, and use privacy film or a waterproof shade outside the spray path.
Which AI interior design tool helps me plan small bathroom changes?
Upload one photo to ReimagineHome.ai to visualize grout/caulk colors, finishes, and storage tweaks; see also our virtual room design starter guide.
Visualize Your Room’s Next Chapter
A calm, watertight shower is mostly about using rigid grout where surfaces don’t move, and flexible silicone everywhere they do. Clean lines, color-matched sealant, a protected window edge—small choices that make your bathroom feel finished and sturdy.
When you can picture the update, it’s easier to do it right the first time. Upload a photo to ReimagineHome.ai and let your next version of the room come into focus before you lift a tool.