What Really Happens When You DIY a Patio: Lessons in Planning, Sweat, and Satisfaction
TL;DR
Building your own patio reshapes not just your yard, but your sense of home. While the physical task is demanding and the choices are many, a well-prepared base, careful planning, and flexibility with materials lead to a space that feels deeply rewarding and lasting. The process is as transformative as the result.
Patio Dreams Meet Reality
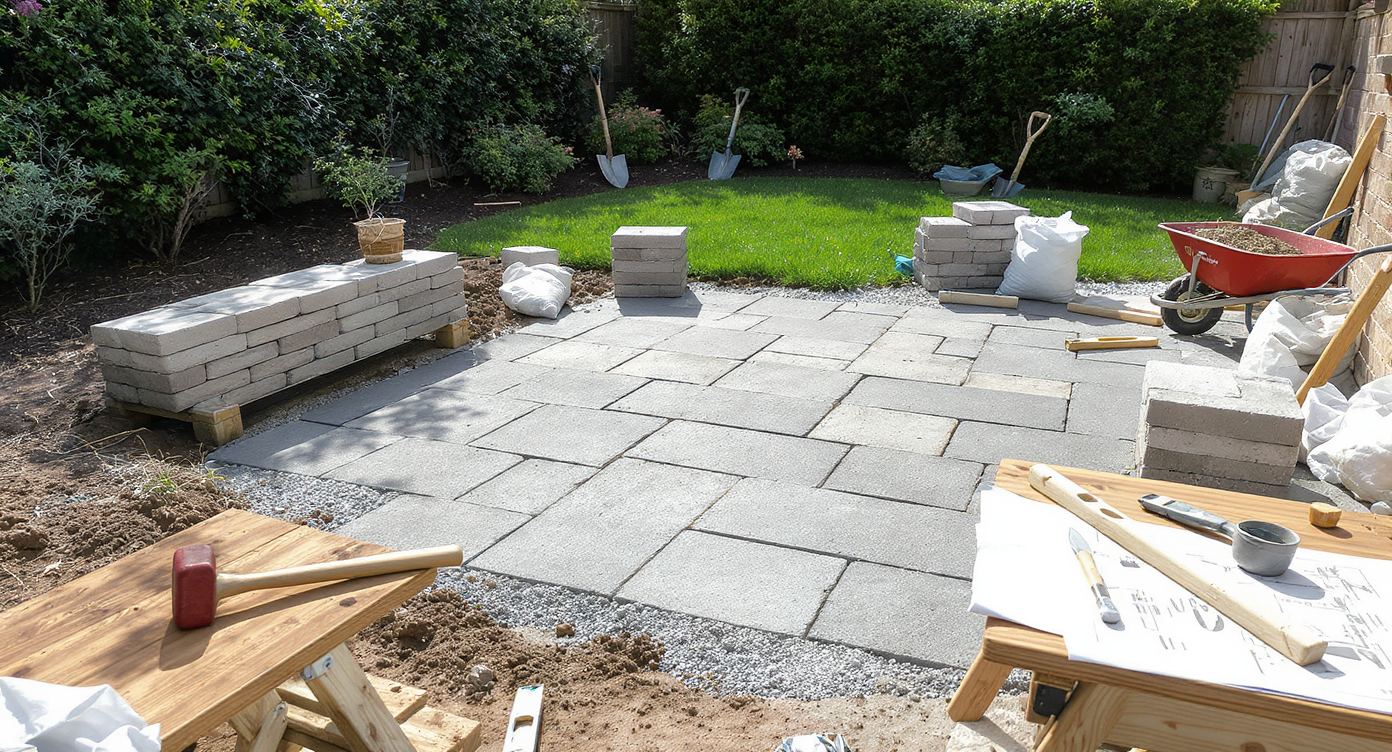
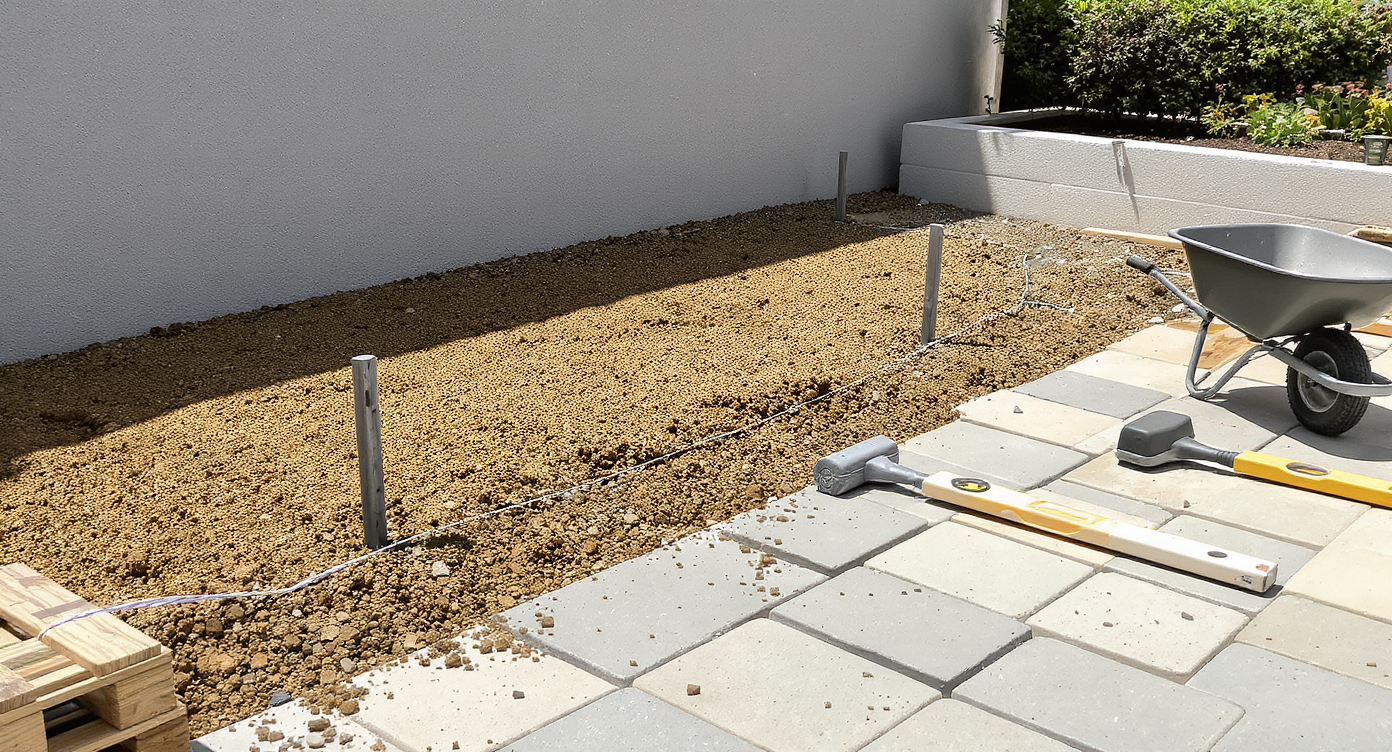
A suburban backyard mid-patio build: old shed removed, soil exposed, pavers and DIY tools poised for transformation into a new retreat.
A new patio often begins as a simple idea—a vision for more comfortable gatherings, a solution for neglected corners, or simply the urge to extend living space outward. But as many homeowners quickly discover, the journey from bare patch to finished patio can unearth unexpected challenges and satisfactions. Those who take the shovel into their own hands rarely end up with just a flat surface and a few chairs. Instead, they find themselves in the middle of a process that demands decision-making, physical labor, and no small amount of patience. The allure of an outdoor retreat is powerful. For some, it’s about reclaiming a space that previously hosted only an old shed or stubborn weeds. For others, it’s the ambition to swap asphalt for a setting that draws friends and family into the open air. What’s less obvious at the outset is how the details—excavation depth, base quality, furniture choices—can define not just the look, but the lifetime of what you build. To understand what it really takes, it helps to step inside an everyday project that, once finished, feels anything but ordinary.
-
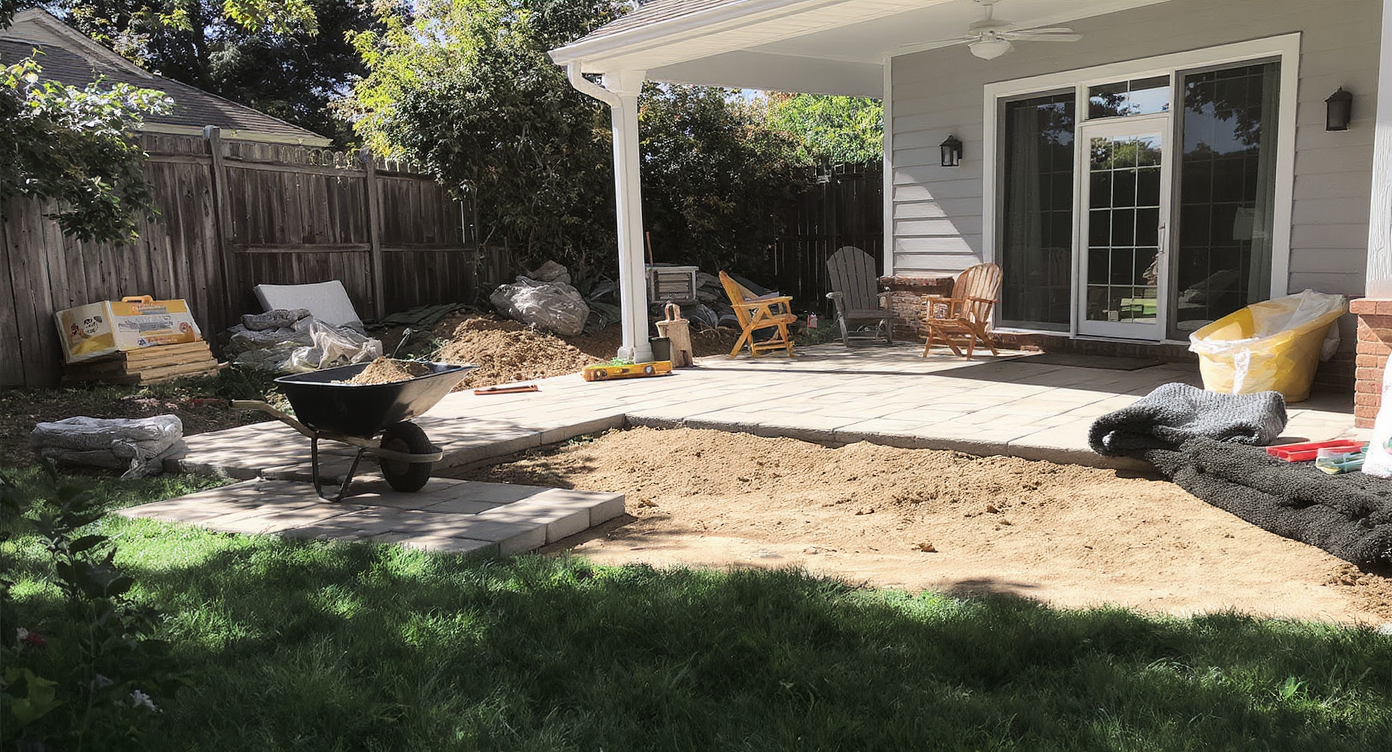
More Than Moving Dirt: The Real Work Behind a Patio
Excavation and base preparation for a patio—gravel, sand, roots, rocks, and hand tools highlight the real work beneath the surface.
On the surface, building a patio appears to be about setting stones or pavers in tidy patterns. In reality, the majority of the effort lies below: excavation, battling roots and rocks, and wrangling loads of gravel and sand into a base strong enough to last. As seen in many backyard projects, the initial plan often shifts under the weight of unexpected discoveries (think buried boulders or surprise roots), and each layer—from the dig to the final tamp—sets the stage for durability. It’s not unusual for homeowners to start with high-end aspirations—natural blue stone, perhaps—only to pivot once sticker shock sets in. Plenty opt for big-box tumbled pavers, knowing that a strong base means they can always upgrade the surface later. Choosing to dig by hand, especially near sensitive areas like a septic system, tests both resolve and endurance. Those ten or so hours wielding a shovel rarely feel brief, but few would trade the confidence that comes from knowing every inch was done with care. For more on constructing a base that stands the test of time, see our deep-dive on hardscaping tips shaping 2025 backyards.
Expert Insight
During one summer, a homeowner tackled a patio build entirely by hand, intent on preserving a nearby septic field. Just ten hours in, he found himself waging war with roots as thick as his wrist and rocks the size of bowling balls, all as the afternoon heat rose. A neighbor wandered over, beer in hand, marveling at the pit and the sheer mountain of gravel. The result, after aches subsided, was a professional-looking patio, mismatched pavers and all, that became the backdrop for countless family dinners.
-
Budget Choices That Shape the Space
The financial side of patio building is as real as the blisters. Homeowners frequently enter a project with no set budget, expecting it to be a moderate, manageable expense. However, major expenses quickly materialize in the form of aggregate base, specialty sand, and, of course, the pavers themselves. Sometimes, even otherwise budget-friendly materials end up with premium shipping or require returns if batches don’t match visually. Fortunately, flexibility pays off. When one homeowner swapped expensive blue stone for midgrade pavers, it freed up funds for details like painted concrete planters or tailored outdoor seating. Price is only part of the equation. Patios done right often carry the sweat equity of borrowed tools, repeated trips to the hardware store, and the subtle costs of learning on the job. Still, investing in a solid foundation pays dividends. According to estimates for 2025, DIY materials for a paver patio typically range $8 to $16 per square foot, making careful planning and hands-on effort a smart way to maximize both budget and impact.
-
Design Details: Small Decisions, Big Impact
Small design choices like paver color, matching planters, and quality sand joints make a patio inviting, practical, and visually unified.
Beyond the base and budget, design decisions are where a patio’s personality starts to emerge. The choice to match planter color to a home’s foundation, or to mix in darker pavers for visual texture, are small touches that can pull the whole scene together. Furniture, whether bought or hand-crafted, quickly becomes the focal point; one homeowner’s choice to finish with contemporary outdoor chairs turned the area from a mere platform to a place people want to stay. Practicality guides many of these decisions. Polymeric sand between pavers keeps weeds at bay and water from pooling. Painting or pressure-washing existing hardscape makes old concrete feel new again. Even the direction and slope of the surface—gently angled away from the house for drainage—affect both longevity and comfort. As designers often point out, mixing practical fixes with creative flourishes leads to an inviting, low-maintenance retreat. Step-by-step insight on these choices is detailed in hardscaping essentials shaping 2025 yards.
-
Anecdote
During one summer, a homeowner tackled a patio build entirely by hand, intent on preserving a nearby septic field. Just ten hours in, he found himself waging war with roots as thick as his wrist and rocks the size of bowling balls, all as the afternoon heat rose. A neighbor wandered over, beer in hand, marveling at the pit and the sheer mountain of gravel. The result, after aches subsided, was a professional-looking patio, mismatched pavers and all, that became the backdrop for countless family dinners.
-
Common Mistakes to Avoid
A DIY patio can invite missteps, especially for first-timers. One of the biggest errors is skimping on the base or compacting it insufficiently. Without stable layers, even the nicest pavers will settle unevenly and shift. Failing to grade away from the house can lead to water issues and costly repairs. Mismatched batches of pavers or forgetting to stagger seams can produce a patchwork result that draws the wrong kind of attention. Finally, rushing to use the patio before the sand and stones have properly set often leads to early wear and preventable cracks.
-
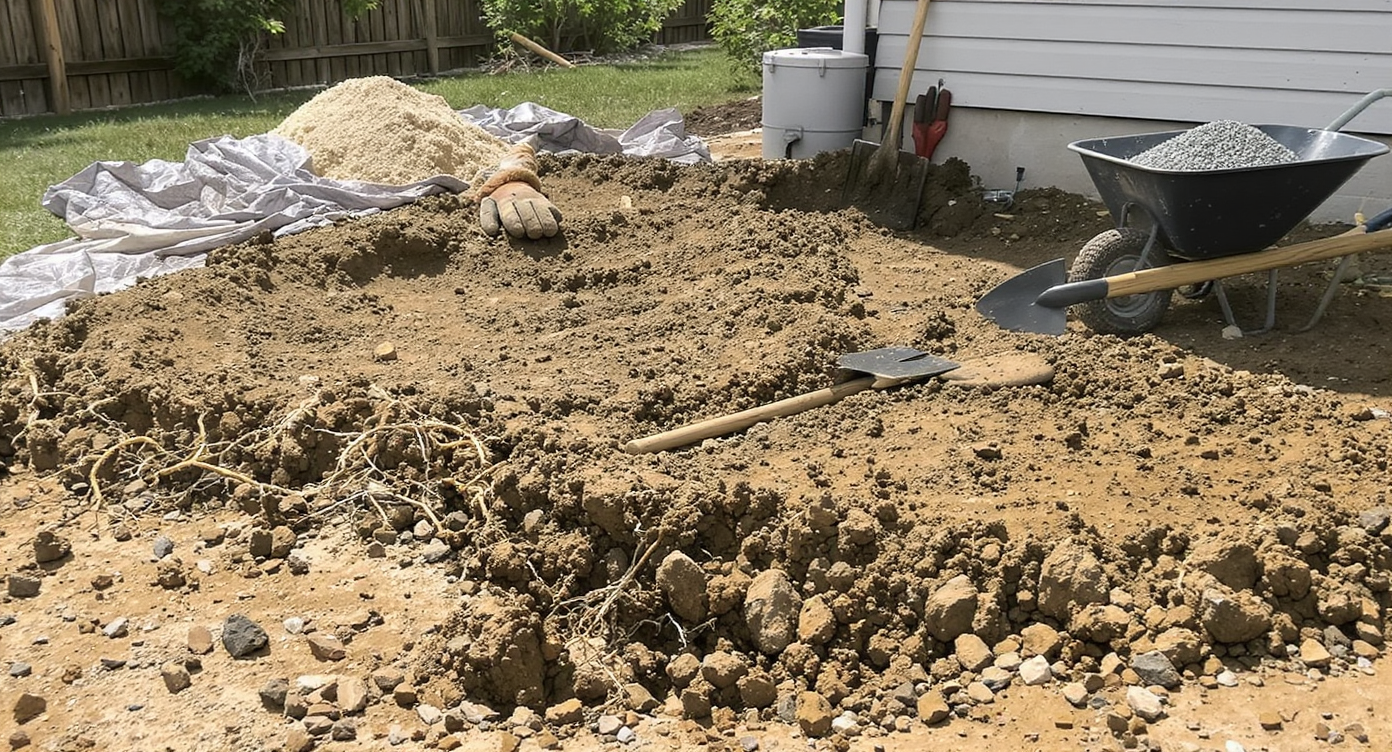
Tips or Expert Insights
A realistic DIY patio scene showing layered base compaction, string level for slope, mixed paver colors, and refreshed existing elements.
Experts frequently suggest beginning with a detailed plan, even if your design is modest. Mark the finish level on house foundations or use a string level to visualize slope. Compact the base in multiple increments rather than attempting a single thick layer. When buying pavers, mix from multiple pallets to blend color variations. If your patio abuts existing elements like concrete walls or planters, a fresh coat of paint or thorough cleaning can bring cohesion. Above all, embrace the possibility of adjusting the design as you uncover what lies beneath the surface.
-
How to Use This in Your Next Designs
Whether you’re planning a weekend transformation or a months-long overhaul, the principles of a successful DIY patio remain the same: invest time in groundwork, prioritize drainage and stability, and add details that reflect your personal style. Simple choices—like swapping grass for patio in low-use corners or pairing new surfaces with budget-friendly planters—can produce dramatic improvements in both function and curb appeal. Don’t underestimate small tweaks made after the fact. Adding low bushes along the edge softens boundaries and helps create a private oasis that matures over time.
-
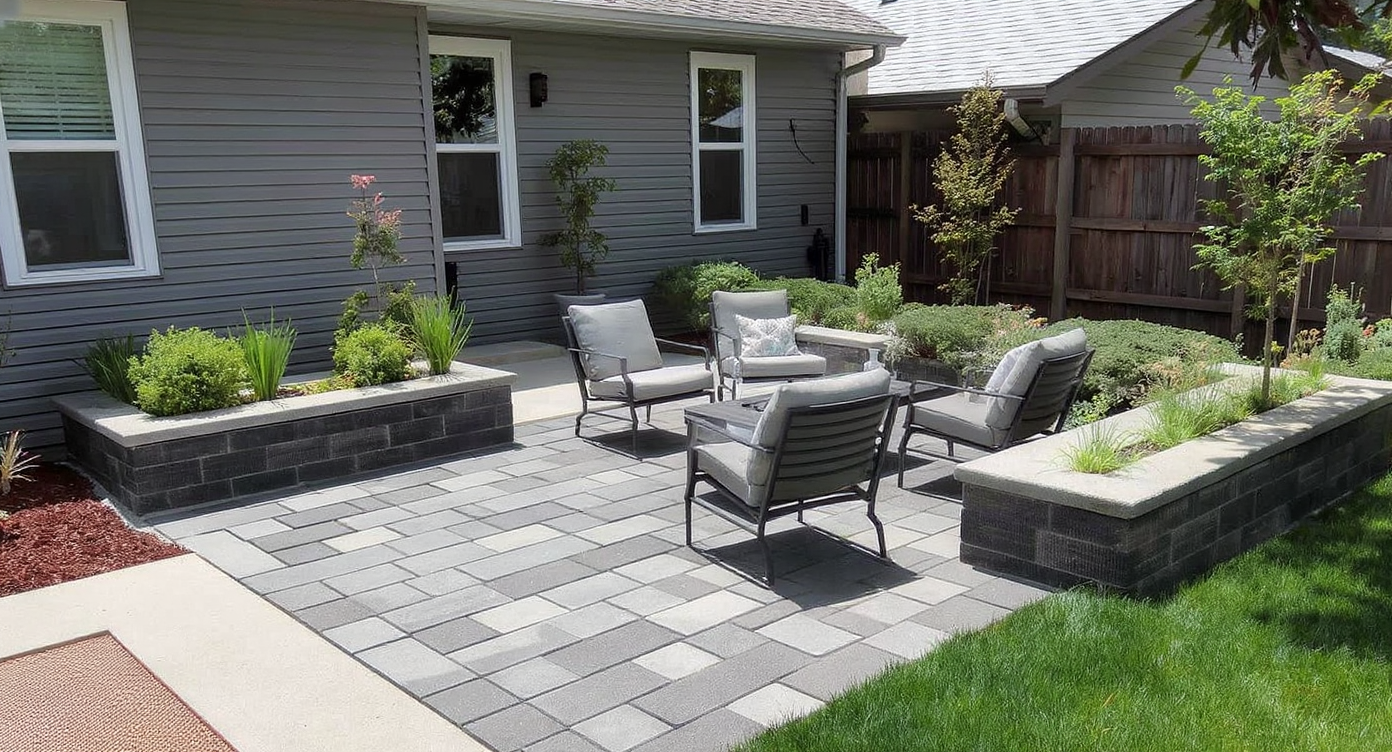
Visualization Scenario
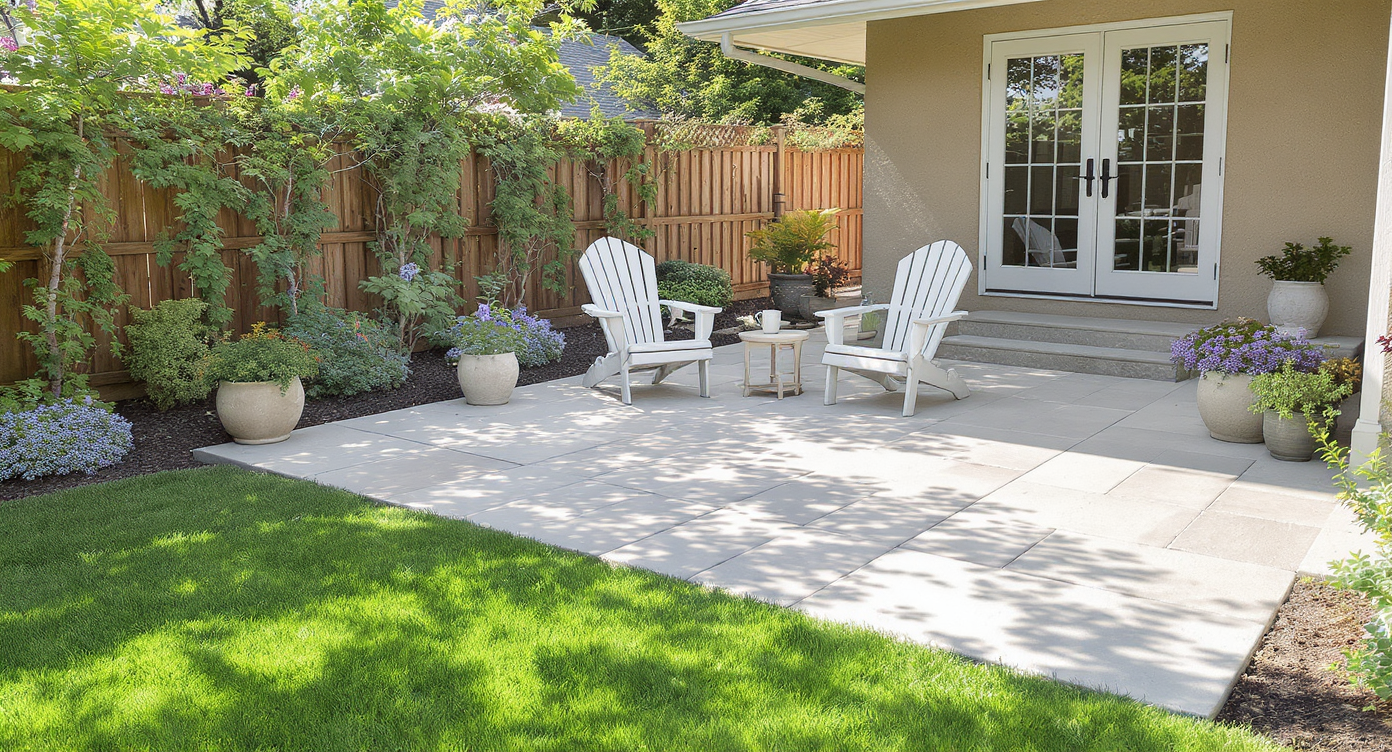
A tranquil backyard nook where smooth pavers, fresh plantings, and Adirondack chairs now stand where a shed and dirt once were.
Imagine standing where a shed once cast shadow on scruffy dirt, now replaced by an expanse of cool, smooth pavers. The sun dapples through just-planted shrubs, and the painted planters echo the tones of your home’s foundation. Freshly assembled Adirondack chairs invite you to linger with your morning coffee. Underfoot, ten inches of layered effort ensure no stone wobbles, no rainwater gathers. In this moment, all the sweat, soil, and course corrections have distilled into something lasting—a private nook that feels unmistakably like yours.
Visualization Scenario
Imagine standing where a shed once cast shadow on scruffy dirt, now replaced by an expanse of cool, smooth pavers. The sun dapples through just-planted shrubs, and the painted planters echo the tones of your home’s foundation. Freshly assembled Adirondack chairs invite you to linger with your morning coffee. Underfoot, ten inches of layered effort ensure no stone wobbles, no rainwater gathers. In this moment, all the sweat, soil, and course corrections have distilled into something lasting—a private nook that feels unmistakably like yours.
Frequently Asked Questions
Most experts recommend at least 6 to 8 inches of compacted rock base beneath the pavers, plus 1 to 2 inches of leveling sand.
Which materials are best for a first-time DIY patio?
Midrange concrete pavers are favored for their affordability and flexibility. If budget allows, natural stone can be used for the surface once a strong base is in place.
How do you prevent patio pavers from shifting or sinking?
Proper excavation, thorough compaction in layers, and installing edge restraints help maintain a level, stable patio.
What are common signs of poor patio installation?
Visible pooling after rain, uneven surfaces, or loose pavers often signal inadequate base or drainage.
Where can I get more help designing my backyard space?
Explore design tools and tailored advice at ReimagineHome.ai.
Lasting Value in Every Shovel’s Turn
DIY patios challenge us, sometimes more than anticipated, yet those who weather the sweat and surprises rarely regret the effort. The right preparation, honest budgeting, and a willingness to adapt are what elevate a patch of packed earth to an enduring outdoor haven. Each project is unique, defined as much by its backstory as by its stonework. If you’re considering your own backyard upgrade, let the practical lessons learned by others fuel your planning—and remember that the right resources make a difference. Inspiration and specific step-by-step help for any vision can be found at ReimagineHome.ai.