The Overlap Rule: How to Photograph a Room for Accurate 3D Design
TL;DR
The overlap rule is simple: keep recognizable architectural features from one photograph visible in the next, while revealing a different part of the room. For example, one photo might show a window and fireplace, while the next retains the fireplace and reveals the entrance. Chez by ReimagineHome recommends 4–8 overlapping photographs from different corners, with at least 2 required. Prioritize clear walls, corners, windows, and doorways instead of random angles. Good overlap helps document spatial relationships, but the resulting 3D model is still an estimate, not a source of construction-grade measurements.
-
1. Why Overlapping Photographs Matter for 3D Room Design
Explore a living room from multiple viewpoints to understand its layout, furniture placement, and spatial relationships in 3D.
Photographing a room from different angles doesn't always show how its features connect. The "overlap rule" solves this by keeping recognizable details, such as windows, fireplaces, or corners, visible across photos while revealing new areas. This helps establish spatial relationships for more accurate 3D reconstruction.
Chez by ReimagineHome recommends overlapping photos from different corners to better capture a room's architecture. These connected views provide a stronger foundation for exploring your space in 3D. Learn more in our guide to turning room photos into 3D.
-
2. How to Apply the Overlap Rule: A Step-by-Step Capture Routine
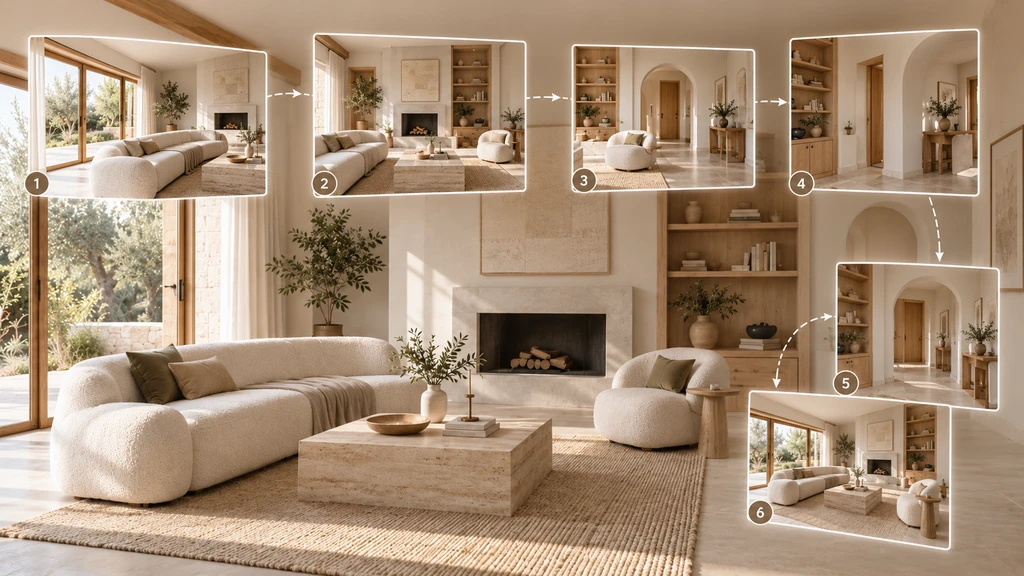
One Room, Six Perspectives: Explore how multiple camera angles capture the layout, architectural details, furniture placement, and spatial continuity of a beautifully designed living room.
Before taking photographs, identify the room's main architectural landmarks—such as windows, doors, fireplaces, built-in shelving, and wall junctions. Clear objects that unnecessarily hide these features and maintain consistent lighting and furniture positions throughout the photo session. You don't need a perfectly staged room; you need photographs that accurately represent its existing layout.
As you take photos, always include a feature from your previous image, such as a window frame, fireplace, or entrance corner, while shifting your viewpoint enough to reveal new details. For a living room, you might:
Camera Position What to Capture Shared Connection Near the entrance Window, adjoining corner, and fireplace Establishes the first view Along the adjacent wall Fireplace and entrance wall Fireplace from the previous view Another accessible corner Entrance and built-in shelving Entrance from the previous view Opposite side of the room Shelving and window-side wall Shelving from the previous view Position facing a hidden feature Alcove, doorway return, or recess Surrounding wall from an earlier view Position showing upper architecture Beam, arch, or ceiling slope Recognizable wall or corner from an earlier view This six-photo sequence is an illustrative example, not a fixed shooting requirement. Smaller rooms may need fewer photographs, while more complicated spaces may benefit from additional viewpoints. What matters most is that the selected views explain how the room connects.
-
3. Common Room Photography Mistakes That Affect 3D Reconstruction
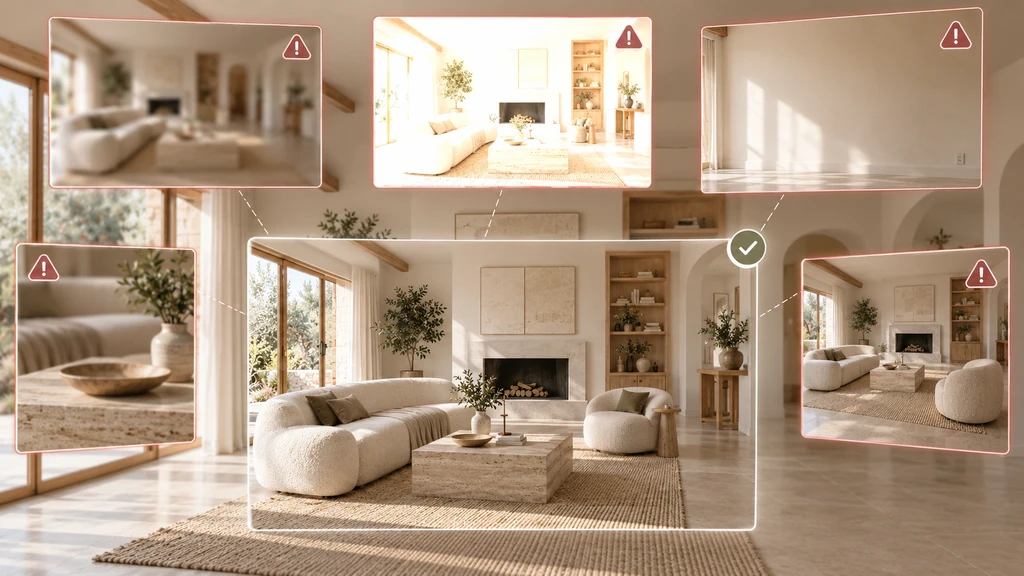
Choosing the Right Photos for Accurate 3D Room Creation: Clear, well-lit, wide-angle photos that capture walls, corners, and architectural details produce better 3D results. Avoid blurry, overexposed, overly cropped, or incomplete room views.
Common Mistake Why It Matters What to Do Instead Taking unrelated photographs of each wall Spatial connections may remain unclear. Include recognizable features across different views. Standing in one position for every photo Some corners and hidden surfaces remain unseen. Move between accessible camera positions. Using blurry or poorly exposed images Important architectural edges become difficult to distinguish. Retake unclear images in even lighting. Photographing only blank walls Plain surfaces provide limited visual landmarks. Include corners, windows, doors, and other distinctive features. Capturing isolated close-ups The feature's position within the room may be unclear. Include adjoining walls or architectural context. Moving furniture between photographs Scene changes can create inconsistent visual information. Keep the room reasonably unchanged throughout the session. Using panoramas or heavily edited photos Altered imagery may not accurately represent the original scene. Follow Chez's guidance to upload sharp, original still photographs. Hiding wall and ceiling junctions The surrounding geometry may be difficult to interpret. Include some floor, ceiling, and adjacent walls where possible. Before uploading, review your photo set together: Can you trace how each connected feature leads from image to image? If not, add a missing connecting view. This approach echoes best practices from both interior design and computer vision, a topic we explored in our reference photo capture guide and our list of the top reference photo types.
-
4. How Overlapping Photos Improve 3D Reconstruction, and Where They Fall Short
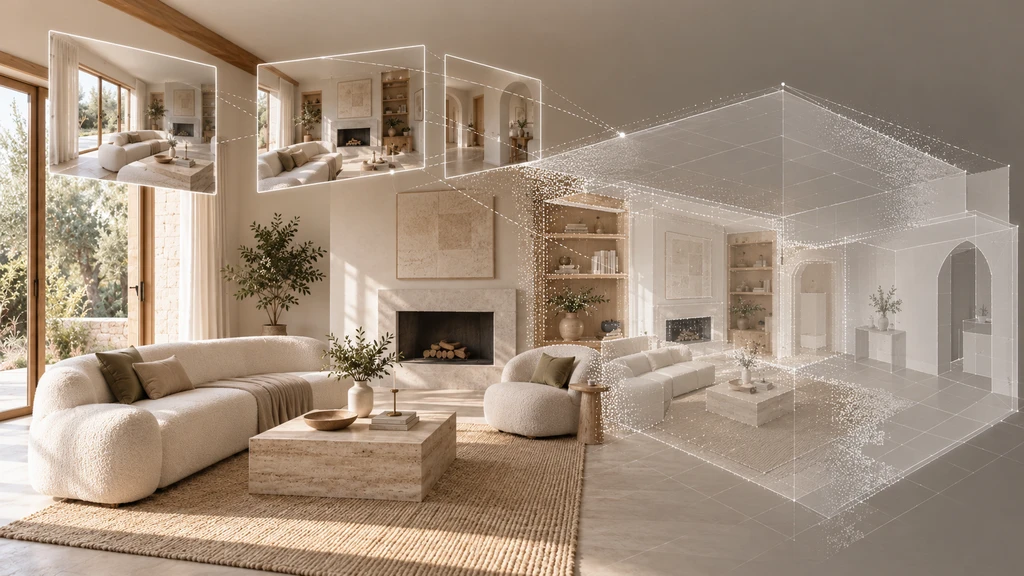
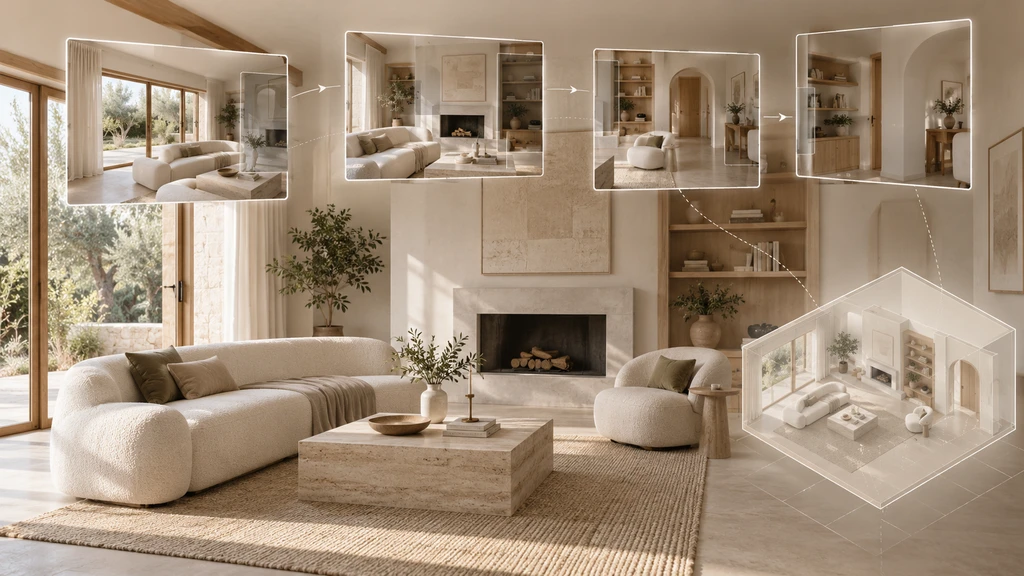
From Room Photos to 3D Reconstruction: See how multiple interior photographs are combined to generate a detailed 3D representation, transforming visual information into spatial geometry while preserving room layout, furniture placement, and architectural features.
Overlapping photographs provide shared visual references that can help establish relationships between different areas of a room. Chez by ReimagineHome uses uploaded room photographs to create a 3D representation for exploring layouts, furniture placement, and design possibilities. However, overlap alone cannot guarantee exact geometry, dimensions, or the accurate reconstruction of features hidden from the camera.
Here are some important limitations to remember:
- Not every detail is guaranteed to be reconstructed: Missing views, motion blur, reflective surfaces, and obscured architectural junctions can leave important spatial information uncertain. These limitations may affect the completeness or geometric accuracy of a reconstructed room.
- Model dimensions and feature placement are estimates: Always verify measurements in person before major purchases or renovations.
- The 3D tool is meant for exploration: It helps you visualize arrangements, compare alternatives, and collaborate, but does not replace on-site checks.
Using original, consistent photographs rather than digitally altered or retouched images helps preserve reliable visual information.
-
5. Key Takeaways Before Uploading Your Room Photos
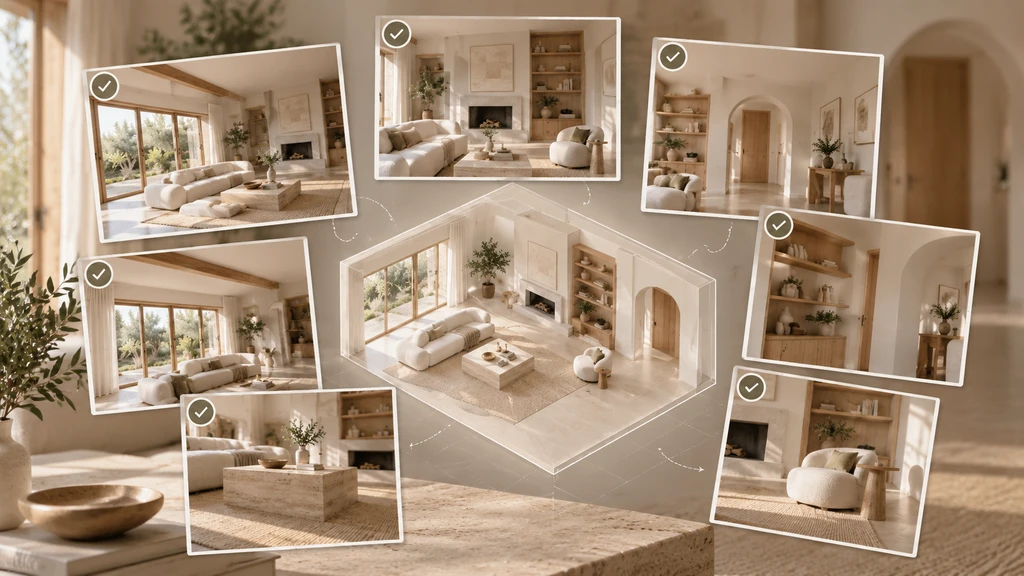
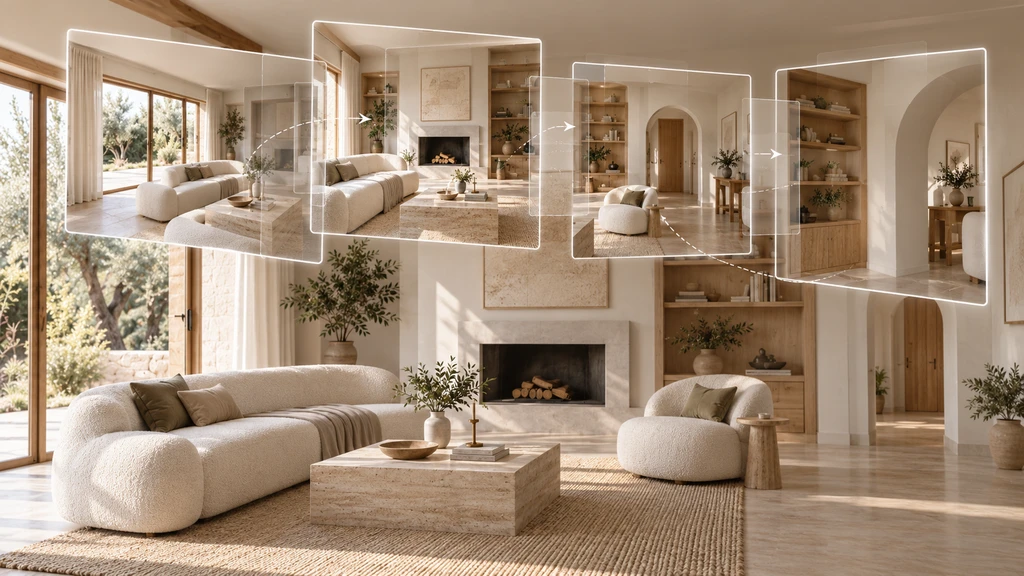
From Multiple Photos to One Accurate 3D Room: Discover how clear, overlapping room photos from different angles help recreate a consistent 3D space, preserving furniture placement, architectural features, room proportions, and spatial relationships.
Before uploading photographs to Chez by ReimagineHome, check whether your photo set meets these essential conditions:
☐ At least two clear photographs of the same room are available, with four to eight overlapping views recommended.
☐ Different viewpoints share recognizable windows, corners, doorways, or other fixed features.
☐ Major walls, openings, and architectural junctions are visible across the set.
☐ Photographs are sharp, reasonably level, and consistently lit.
☐ Some floor and ceiling are visible to provide architectural context.
☐ Previously hidden recesses or corners have been captured where practical.
☐ Original photographs have not been replaced with panoramas or AI-edited room images.
☐ The complete set makes it possible to understand how major parts of the room connect.
If one or more important architectural relationships remain unclear, consider adding a connecting photograph before uploading.
Frequently Asked Questions
How many photos should I upload to Chez by ReimagineHome?
Chez requires at least two clear photographs of the same room and recommends four to eight overlapping views from different corners. Include doors, windows, built-ins, and some floor and ceiling wherever possible.
Do all room photographs need to overlap with one another?
No. Every image does not need to overlap with every other image. Instead, aim for a connected sequence in which each area can be related to another through recognizable architectural features.
Why might my 3D room have an incorrect corner or doorway?
Potential causes include missing viewpoints, partially hidden wall junctions, ambiguous architectural features, or reconstruction limitations. Review the original photographs to check whether they clearly show the affected feature and its surrounding architecture.
Can I take room photographs with a regular smartphone?
Yes. You can use a regular smartphone to capture the original still photographs recommended by Chez. Prioritize clear images, reasonably level framing, consistent lighting, and views that connect the room's architectural features.
Photographing for Connection: The Overlap Rule in Action
Overlapping room photographs help capture how windows, doors, corners, and architectural features connect, providing a stronger foundation for 3D design. Before uploading to Chez by ReimagineHome, review your photos for clear visual connections to support better layout planning, furniture placement, and design exploration.